|
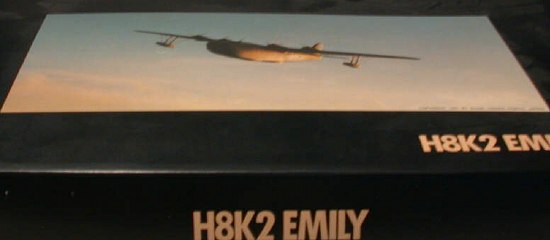
KIT: |
Hasegawa 1/72 H8K2 'Emily' |
|
KIT # |
QP 17 |
|
PRICE: |
@$28.00 |
|
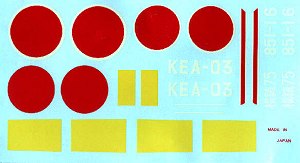
DECALS: |
Three aircraft |
|
REVIEWER: |
Dr. Frank Spahr |
|
NOTES: |
1991 boxing |
|
HISTORY |
I happened upon the Emily first in an aircraft dictionary, where she was represented by a very colorful profile of a very weathered plane, lacking roughly one third of its green paint. Cool, man. So I picked this Hasegawa kit up years ago, and now, being in severe dispute with myself on what to build next, I´ve at least removed the sprues from the plastic bags and taken pics.
Kawanishi´s Emily was the largest and most sophisticated japanese flying boat of WW II, well armed for defence and offence and having a tremendous range. It was developed as successor to the H6 „Mavis“ flying boat and marked a huge step in design. The inevitable teething problems occurred in landing: Caused by the weight and size and narrow beam of the plane, it suffered from uncontrollable porpoising, which doesn´t sound desirable at all. A complex redesign of the plane solved these problems, and production commenced in August, 1941. The operational debut was a raid on Oahu in May 1942 which had to be cancelled due to bad weather over the target. In all, a little under 200 Emilys were produced. Most belonged to the improved H8K2 type as presented in the kit, some late production aircraft had retractable stabilising floats, some were equipped with radar.
Emilys were used for armed maritime reconnaissance; their normal range was 3,000 miles, which could be boosted to neraly 4,500 miles for reconaissance only. In all, these flights might last nearly 24 hours. Emilys were armed with 5 20 mm cannon plus 3 7.7. mm machine guns; hence, US pilots used to nickname them „flying porcupine“. They could carry up to 4,400 lbs of bombs or torpedoes under their wings.
One Emily survives outside Tokyo´s maritime museum. This aircraft was brought to the US after the war and about 15-20 years ago donated back to the Japanese for refurbishing and display.
|
THE KIT |
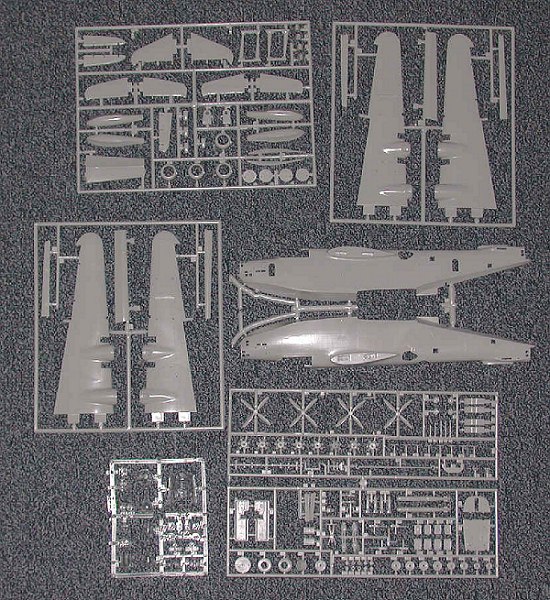
 You´ll get an
impressive model of about half a metre wingspan when you build this
beauty. I assume that this kit must have been engineered in the 1960´s,
as it´s well supplied with rivets (apart from where the Hinomarus will be
placed, ha ha) and „working“ features. Not only will the props rotate,
but also are the double flaps and ailerons designed movable and the doors
may be opened. Beaching gear is supplied; the instructions recommend to
leave them „uncemented, because it will be more fun to have them
removable.“ Moreover, you get a towing tractor with a towing bar plus a
driver and a guy signaling. The instructions are typical for the time, as
they concentrate on assembling. Painting guide and placement of decals
are, well, basic. I love those instructions nonetheless, as they are the
first ones I´ve ever read that use the word „fun“ at all.
You´ll get an
impressive model of about half a metre wingspan when you build this
beauty. I assume that this kit must have been engineered in the 1960´s,
as it´s well supplied with rivets (apart from where the Hinomarus will be
placed, ha ha) and „working“ features. Not only will the props rotate,
but also are the double flaps and ailerons designed movable and the doors
may be opened. Beaching gear is supplied; the instructions recommend to
leave them „uncemented, because it will be more fun to have them
removable.“ Moreover, you get a towing tractor with a towing bar plus a
driver and a guy signaling. The instructions are typical for the time, as
they concentrate on assembling. Painting guide and placement of decals
are, well, basic. I love those instructions nonetheless, as they are the
first ones I´ve ever read that use the word „fun“ at all.
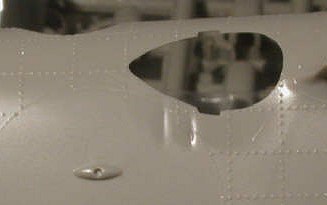 The kit is well made for the time,
shows a little flash and some sink marks, such as at the fuselage (see
pic) and on the wings. The torpedoes, though solid (!), don´t have any.
Ejector pin marks are present, too, yet mostly in inconspicuous places.
The many clear parts are rather thick, yet well made. I assume you won´t
see all that much through them, which is fine given that there´s no
interior at all apart from the basic cockpit. The decals are basic and
have yellowed and don´t look really trustworthy, but I´ll probably spray
the markings anyway.
The kit is well made for the time,
shows a little flash and some sink marks, such as at the fuselage (see
pic) and on the wings. The torpedoes, though solid (!), don´t have any.
Ejector pin marks are present, too, yet mostly in inconspicuous places.
The many clear parts are rather thick, yet well made. I assume you won´t
see all that much through them, which is fine given that there´s no
interior at all apart from the basic cockpit. The decals are basic and
have yellowed and don´t look really trustworthy, but I´ll probably spray
the markings anyway.
I took the literal one step beyond and clipped away the fuselage parts plus one wing from their sprues to test-fit them. Well, fit is adequate and you´ll need careful dryfitting, puttying and some consideration to retain the rivets – mostly as expected. Tom Cleaver onece stated in a review on the Hase Ar 234 that each Hase kit has at least one tricky point, and as far as I can see, this one is no exception. Part #28, an inset into the stepped bottom, has to be mounted per instructions rather late in the process, after the wings are attached and together with the underwing stores and floats. I tried to put this thing into its place, and had to admit it´s a real pièce de résistance. Fit is really bad, and the mounting tabs don´t really help at all. I´ll probably glue it firmly to one half before mating the halves. Whether that´s a good idea or not, only future will tell. I´ll keep you posted ...
|
CONCLUSIONS |
In all, the kit is well made for the time, in many aspects rather basic (see the guns), yet should build up (with some modeling involved) to a nice representation of a formidable flying boat. I´ll surely concentrate on the weathering ...
|
REFERENCES |
http://www.214th.com/ww2/japan/h8k/
http://www.j-aircraft.com/main/newkits/h8kmain.htm
http://www.vectorsite.net/avemily.html
http://www.combinedfleet.com/ijna/h8k.htm
http://www.warbirdsresourcegroup.org/IJARG/kawanishih8k.html
http://www.angelfire.com/fm/compass/H8K.htm
(The best book reference is probably Model Art #541 which though ostensibly is about all Japanese flying boats, is about 80% Emily info. Ed)
If you would like your product reviewed fairly and quickly by a site that has over 200,000 visitors a month, please contact me or see other details in the Note to Contributors.