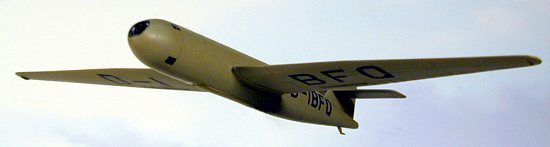
Huma 1/72 DFS-228v1
|
KIT: |
Huma 1/72 DFS-228v1 |
|
KIT # |
3503 |
|
PRICE: |
$16.98 MSRP |
|
DECALS: |
The prototype |
|
REVIEWER: |
|
|
NOTES: |
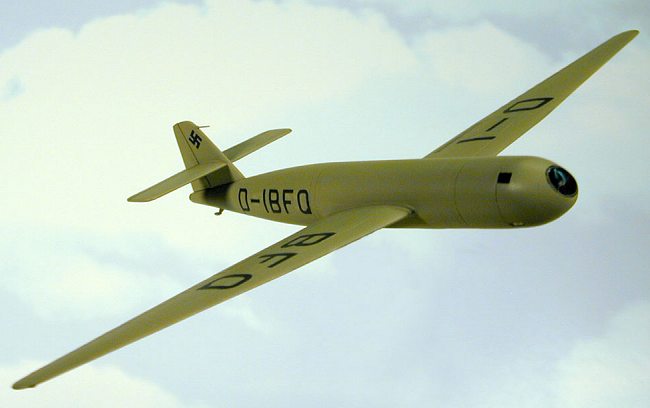
DEUTSCHE FORSCHUNGSANSTALT FÜR SEGELFLUG
DFS 228 V1
GERMANY, 1943
|
HISTORY |
 The German Institute for Sailplane Flight (Deutsche
Forschungsalstalt für Segelflug or DFS) promised to meet the RLM's need for an
uninterceptable reconnaissance aircraft with this remarkable rocket-powered
sailplane, which was a true ancestor of the Lockheed U-2. Shelved from 1940
through early 1943 due to pressure for other work, the 228 was resurrected and
two prototypes completed in 1943. The 228 was made almost entirely of wood, with
a pressurized metal nose compartment that could be jettisoned in an emergency
and recovered by parachute. The mid-fuselage housed rocket propellants (C-Stoff
and T-Stoff) and two Zeiss infrared camera. By the time Allied troops reached
Griesham, many glide test flights has been made after launches from a specially
prepared D0 217 K3, but none under power. Although designed for altitudes
approaching 80,000 feet, no glide flight went above the 33,000 feet launch
altitude.
The German Institute for Sailplane Flight (Deutsche
Forschungsalstalt für Segelflug or DFS) promised to meet the RLM's need for an
uninterceptable reconnaissance aircraft with this remarkable rocket-powered
sailplane, which was a true ancestor of the Lockheed U-2. Shelved from 1940
through early 1943 due to pressure for other work, the 228 was resurrected and
two prototypes completed in 1943. The 228 was made almost entirely of wood, with
a pressurized metal nose compartment that could be jettisoned in an emergency
and recovered by parachute. The mid-fuselage housed rocket propellants (C-Stoff
and T-Stoff) and two Zeiss infrared camera. By the time Allied troops reached
Griesham, many glide test flights has been made after launches from a specially
prepared D0 217 K3, but none under power. Although designed for altitudes
approaching 80,000 feet, no glide flight went above the 33,000 feet launch
altitude.
|
CONSTRUCTION |
 Cockpit:
Wow! What a cockpit HUMA gives you with this model. There are 17 parts in total excluding the pilot figure and most are molded in plastic almost as thin as photoetch. So a word to the wise, use styrene cement sparingly. The cockpit was painted RLM66 with various pressurized bottles and radio equipment paint yellow, blue, and black. The pilot was primed in Khaki and brush painted. Sadly, very, very little can be seen once the cockpit is assemble and closed up under that porthole nose glazing. But look close, you can see Fritz flying his sled :>). The landing skid bay should also be installed with the cockpit before close the fuselage halves, this was painted RLM02.
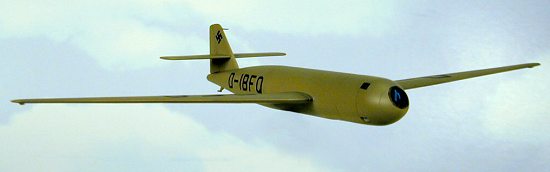
Exterior:
Once the cockpit is painted and installed, the exterior is a pretty simple affair consisting of 12 parts discounting the landing skid. The landing skids are nine parts including the main skid, skid bay, and small rear skid. I only used the skid bay, main skid, and the rear skid, so retractable struts and rods were not used for my in-flight model.
 There was much work in contouring the porthole front
window, the four small cockpit windows, and the round camera window. They were
attached with CNA glue, as I knew I would be doing a lot of sanding. I started
with a fairly course 400-grit and wet sanded all until all blended in well. I
next worked everything down in varying grits down to 3200-grit. After that, I
rescribed the sanded out detail and resanded with 3200-grit. After I cleaned the
resanded areas, I polished everything with Meguiar's Mirror Glaze #7, an auto
polishing compound. Once to my liking, I switched to Meguiar's Mirror Glaze #3,
an auto glazing compound, and further polished everything until the clear parts
had clean clear surfaces.
There was much work in contouring the porthole front
window, the four small cockpit windows, and the round camera window. They were
attached with CNA glue, as I knew I would be doing a lot of sanding. I started
with a fairly course 400-grit and wet sanded all until all blended in well. I
next worked everything down in varying grits down to 3200-grit. After that, I
rescribed the sanded out detail and resanded with 3200-grit. After I cleaned the
resanded areas, I polished everything with Meguiar's Mirror Glaze #7, an auto
polishing compound. Once to my liking, I switched to Meguiar's Mirror Glaze #3,
an auto glazing compound, and further polished everything until the clear parts
had clean clear surfaces.
Clear parts were masked with Bare-metal foil and the surfaces cleaned and prepped with 99% isopropyl alcohol (one can get the 99% isopropyl at the local pharmacy, just ask for it if they do not have it on the shelves).
|
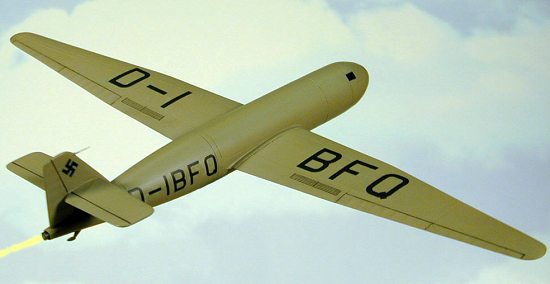
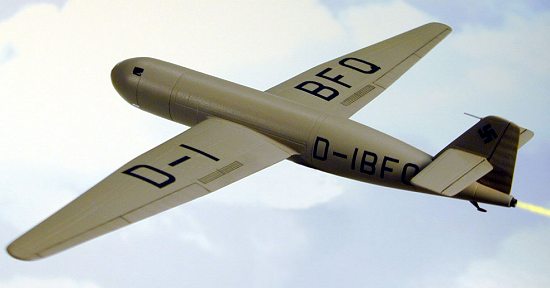
PAINT & DECALS |
 What's there to say, I used Polly Scale RLM02 overall. It's
jolly fun sometimes not to have to mess with masking for multiple colors. After
I rubbed the initial priming coats of RLM02 down, I gave it a couple more color
coats. When dry a decal prep coat of Model Masters Clear Gloss was applied. The
kits decals were used, with exception of the two swastikas, which were taken
from a spares sheet. The kit's decals were the pits and silvered badly, even
though I made every attempt to blot out air bubbles and such. One day I am going
to get a generic sheet for German letter codes and not have to resort to using
HUMA decals. Black inks washes were applied to the control surfaces and landing
brakes. The main skid was given a dry brushing of flat aluminum and earth. The
two wing tip skids were also treated to a little dry brushing of earth.
What's there to say, I used Polly Scale RLM02 overall. It's
jolly fun sometimes not to have to mess with masking for multiple colors. After
I rubbed the initial priming coats of RLM02 down, I gave it a couple more color
coats. When dry a decal prep coat of Model Masters Clear Gloss was applied. The
kits decals were used, with exception of the two swastikas, which were taken
from a spares sheet. The kit's decals were the pits and silvered badly, even
though I made every attempt to blot out air bubbles and such. One day I am going
to get a generic sheet for German letter codes and not have to resort to using
HUMA decals. Black inks washes were applied to the control surfaces and landing
brakes. The main skid was given a dry brushing of flat aluminum and earth. The
two wing tip skids were also treated to a little dry brushing of earth.
|
CONCLUSIONS |
 A really neat kit spoiled only by the decals. I picked this
kit up at the IPMS Nationals for a good price. I wish all HUMA kits were
available at this price. It was a welcome diversion from the standard
Tamiya-Hasegawa line of model offerings. (Editor's note: Huma kits have
dramatically decreased in cost over the last year, in many cases being 40% or
more lower than back in 2000. Not sure why, but what used to cost $29.98 [such
as this kit] is now $16.98 and that is retail. Most welcome.)
A really neat kit spoiled only by the decals. I picked this
kit up at the IPMS Nationals for a good price. I wish all HUMA kits were
available at this price. It was a welcome diversion from the standard
Tamiya-Hasegawa line of model offerings. (Editor's note: Huma kits have
dramatically decreased in cost over the last year, in many cases being 40% or
more lower than back in 2000. Not sure why, but what used to cost $29.98 [such
as this kit] is now $16.98 and that is retail. Most welcome.)
Article and Photos © Caz Dalton, October 2002
If you would like your product reviewed fairly and quickly by a site that has well over 150,000 visitors a month, please contact me or see other details in the Note to Contributors.
Back to the Reviews Index Page