| KIT # | ? |
| PRICE: | CK 699.00 |
| DECALS: | One option |
| REVIEWER: | Aldo Chetcuti |
| NOTES: |
Short run injection mould of optimum quality with resin pieces
|
| HISTORY |
A study of a four-engined long-range bomber began in 1940 by
Messerschmitt’s design team and the result was a high-wing cantilever monoplane
with tricycle landing gear, twin fins and rudders and four wing mo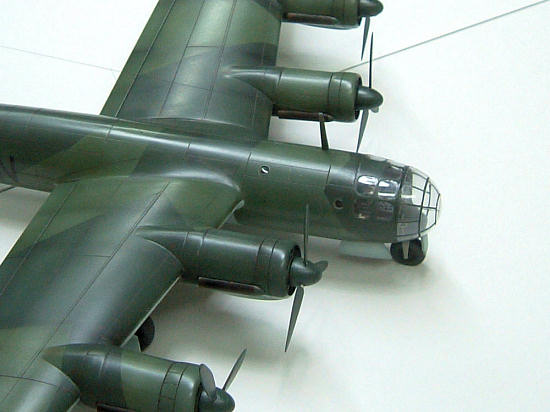 unted engines.
The prototype first flew in December 1942 after many
delays and by this time, the United States had entered the war and there was
interest in an ‘Amerika Bomber’ which could reach and attack US targets from
Europe.
unted engines.
The prototype first flew in December 1942 after many
delays and by this time, the United States had entered the war and there was
interest in an ‘Amerika Bomber’ which could reach and attack US targets from
Europe.
The range of the Me264 was not sufficient, and further development to increase power by adding two more engines did not meet with favour from the RLM. As the war situation continued to deteriorate, no other aircraft other than the first three prototypes were ordered and in fact only the V1 was completed and flown, the V2 being destroyed in an air raid and the V3 was not completed due to material shortages.
| THE KIT |
I bought my example from MPM’s model shop in Prague during a summer holiday some years ago. I bought a load of models over the week we were staying in the city since they were quite new at the time and the price was roughly half of what it was back home.
I am not particularly fond of Special Hobby models as they tend to promise more than they deliver but this was definitely not the case with the 264. The parts were crisp and clean and the dry fitting promised no unpleasant surprises. The transparencies may put off many modellers but these did not present any problems.
| CONSTRUCTION |
I started with the cockpit interior resin
pieces and built this impressively detailed section without mishap.
The fuselage requires planning
and a word of warning – a lot more weight is needed to get a tricycle sit.
I ended up putting in over
100g rather than the recommended 60g using the inboard engines for this
purpose besides the space behind the cockpit bulkhead.
 I painted the cockpit interior RLM 66 Dark Grey
and applied some subtle highlighting.
The finished unit will require
some negotiating to fit the front fuselage and accept the transparencies but
this was managed with some contour shaping.
Plastic card wedges may be needed
to obtain the correct angle of the nosewheel undercarriage well. It is important
that this part is installed correctly otherwise the nosewheel may appear
lop-sided.
Before closing the fuselage
halves, the ‘porthole’ windows are installed and lips are cut in the fuselage to
wing and tail attachment points.
These would otherwise have to be
stuck on to bare plastic with guaranteed structural problems when handling.
I painted the cockpit interior RLM 66 Dark Grey
and applied some subtle highlighting.
The finished unit will require
some negotiating to fit the front fuselage and accept the transparencies but
this was managed with some contour shaping.
Plastic card wedges may be needed
to obtain the correct angle of the nosewheel undercarriage well. It is important
that this part is installed correctly otherwise the nosewheel may appear
lop-sided.
Before closing the fuselage
halves, the ‘porthole’ windows are installed and lips are cut in the fuselage to
wing and tail attachment points.
These would otherwise have to be
stuck on to bare plastic with guaranteed structural problems when handling.
The wings, tailplane halves and fins are attached
together and attention turns to the engines.
The resin engine fronts are
separated from the moulding base and care is recommended here.
Be careful not to sand excessively
as they may sit loose in the engine cowls.
These are put together and the
inboard examples are filled with lead to ensure a correct sit. The cowls require
scribing around the gills and frankly, I cannot understand why Special Hobby
left this to the modeller.
The undercarriage resin wheel wells, a veritable
work of art, are installed in the undersurface of the main wings and are a
perfect fit.
Next, the engine rear cowls are
put together on the respective wing.
The inboard bottom rear cowls
(parts 34 and 37) lack a front cover and this can easily be made from thin
plastic card bent to follow the contour of the wheel well.
This solves the unsightly
‘opening’ which results from this omission.
This done, the main components come together and
fitting is made easier using the lips as a guide. In spite of this, I still made
jigs for the wings and tailplanes to get correct angles.
The fit is very good but this
notwithstanding, some amount of filler is always needed. The tail especially
required some amount of putty a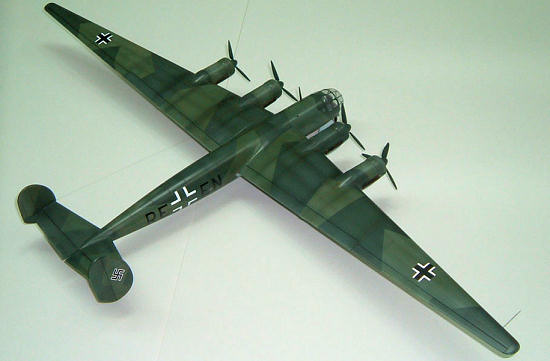 nd on my example, the starboard tail kept coming
off.
When the problems were all
resolved, attention turned to fitting the front cowl parts to the wing.
At this stage I added weight to
the inboard engines, and attached these in place without any problem.
nd on my example, the starboard tail kept coming
off.
When the problems were all
resolved, attention turned to fitting the front cowl parts to the wing.
At this stage I added weight to
the inboard engines, and attached these in place without any problem.
While waiting for the glue on different components
to cure, the tyre halves are cemented together. The propellors are put together
using a small jig consisting of a cardboard circle with 120 degree segments with
a hole in the middle for the spinner.
The fitting of these fiddly bits
went so smoothly, I was surprised !
Finally, the tedious task of masking the two
transparency pieces was undertaken, and took me quite a few hours.
When this was done, I planned
fixing the transparencies to the fuselage with a lot of trepidation.
This was
uncalled for as I managed to fit the items in place on the second attempt, using
transparent epoxy cement to spot fix the parts and later filled all empty joints
with
This model has very fine surface detail so I decided against a primer and instead, cleaned the model surface with isopropyl alcohol to remove any residual oils and dirt.
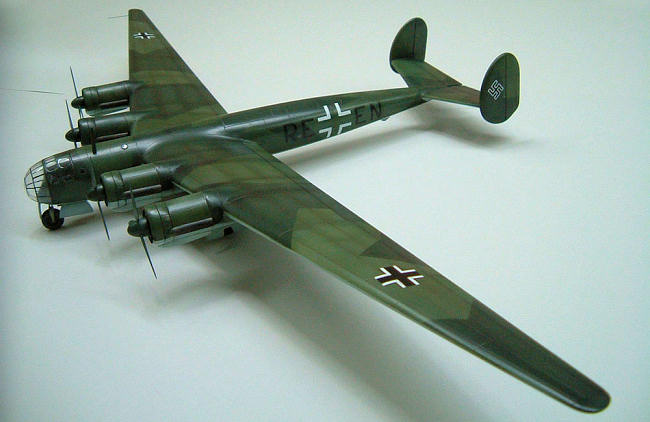
| COLORS & MARKINGS |
 There was only one prototype which features in
all publications, and Special Hobby give us very good markings for this
version.
The aircraft was a
straighforward 70 Black Green / 71 Dark Green
over 65 Light Blue.
I started with the 65 from
Model Master.
Next I masked as the
demarcation lines are all quite hard and proceeded with the 71 Dark Green
which I mix from Pactra Black and Dark Greens.
When this was done and left to
dry completely, the camouflage pattern was masked and the 70 Black Green
applied to complete the scheme.
I use good old Humbrol 91
which is a very good match.
There was only one prototype which features in
all publications, and Special Hobby give us very good markings for this
version.
The aircraft was a
straighforward 70 Black Green / 71 Dark Green
over 65 Light Blue.
I started with the 65 from
Model Master.
Next I masked as the
demarcation lines are all quite hard and proceeded with the 71 Dark Green
which I mix from Pactra Black and Dark Greens.
When this was done and left to
dry completely, the camouflage pattern was masked and the 70 Black Green
applied to complete the scheme.
I use good old Humbrol 91
which is a very good match.
The model is then given a few coats of auto gloss
lacquer rubbed down very wet with 1000 grade sandpaper.
The decals are now applied and
here it is important to refer to photographic reference as Special Hobby got the
wing placings wrong.
The upper wing crosses should be
applied further in and the underwing call signs and crosses should be more
spaced than as illustrated.
The fuselage code is shown
correctly.
Some subdued weathering over the final gloss coat concludes the job and a couple of matt varnish coats finish the model. This was a prototype which flew very little and it would not make much sense to go overboard with weathering. The canopy masking comes off and inspected for any defective areas. Very little touching up is required. The undercarriage and wheel well covers are attached as well as the mast on top of the fuselage and an aerial wire stretched from sprue.
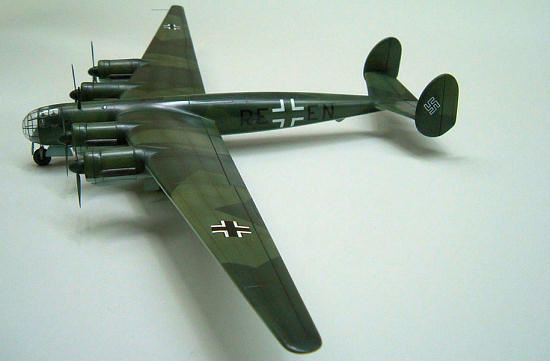
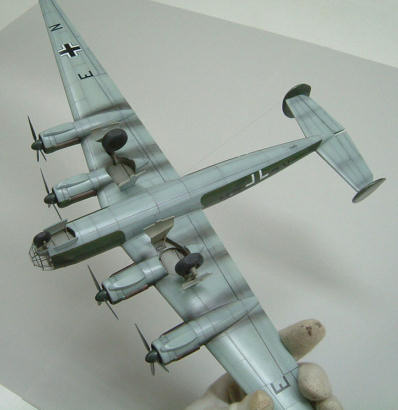
| CONCLUSIONS |
This is one nice sleek model and the extended wingtips add to the beauty of the aerodynamic design of the Me264. Although it is not excessively difficult to build, I would not recommend this one to budding modellers before they have built a few multi-engined models.
| REFERENCES |
Messerschmitt Me264: Amerikabomber
If you would like your product reviewed fairly and quickly, please contact the editor or see other details in the Note to Contributors.