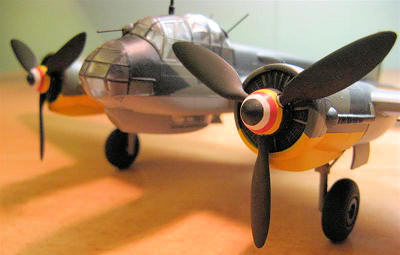
AMT 1/48 Ju-88A-4
| KIT #: | T 647 |
| PRICE: | $ Received in a trade |
| DECALS: | One option |
| REVIEWER: | Lee Fogel |
| NOTES: |
For kids and nostalgia
builders |
| HISTORY |
| THE KIT |
 The Ju88
family has been well represented in 1/48 scale by the DML/Dragon/Pro Modeler
releases and, before that, the Koster vacuform kit.
The Hobbycraft series of Ju88’s has been around since the late 1980s.
However the Hobbycraft kits were based off of the
The Ju88
family has been well represented in 1/48 scale by the DML/Dragon/Pro Modeler
releases and, before that, the Koster vacuform kit.
The Hobbycraft series of Ju88’s has been around since the late 1980s.
However the Hobbycraft kits were based off of the
Upon opening the box you will find the parts
molded in dark green plastic with fine raised panel lines.
The sprues are all in one bag.
The plastic is dark green in color and hard and smooth in texture.
The clear parts are somewhat thickly cast and the framing on the nose and
main canopy disappears on the sides.
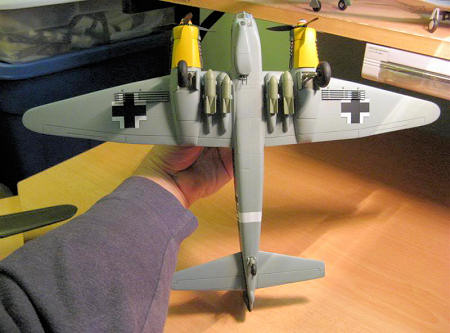
There is an option for raised landing gear and a full bomb load.
The prominent dive brakes are molded separate and one was mildly warped.
There are four figures and they are wildly inaccurate and look out of
proportion. Decals are for one
aircraft and appear to be all printed on the same carrier film so careful
cutting is needed should you use them.
The instructions are simple but concise.
| CONSTRUCTION |
I started off with assembling the upper and
lower wing halves. The fit here was
very good. Once the wings were dry
I added the gear bay/engine nacelles.
These will require a bit of filler around the front edge and where they
mate to the lower wing. The port
side needed a bit more filler than the starboard side, mainly at the trailing
area at the rear of the nacelle. I
added the cowlings but found that I could install the faces at a later date so I
left them off for now. Also of note
are the very shallow main gear wells.
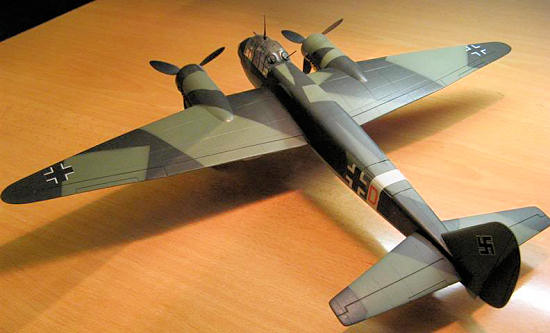
 Taking
a gander at scale drawings from William Green’s Famous Bombers of WWII. The
wings are inaccurate in shape especially around the wingtip area.
So, why build on? Well, it’s
a kit and I want to have it on my shelf to compare and contrast with my
Hobbycraft and Dragon kits.
Besides, it can’t be THAT bad, right?
Moving on to the fuselage I took one look and was reminded of how
inaccurate the cockpit really is.
The cockpit floor is about a scale foot from the upper edge of the canopy area!
So, I painted the area that should be open to the gondola flat black to
create the look of an open area.
Not correct but it would take reconstructing the entire cockpit to fix this.
So, I took the easy way out!
The sidewall detail is not too bad but the instrument panel and radio panels are
a bit lacking and appear to be somewhat inaccurate as well.
The main seats are wrong in shape and have bland detail.
I painted the interior MM RLM 66 and detailed it the best I could.
The figures really are terrible and cannot be used even to just fill in
the seats. They have Wehrmacht
uniforms and boots! Plus they are
very out of proportion especially the heads.
After this was done I mated the fuselage halves and set the assembly
aside to dry. A prominent feature
missing is the fan on top of the rear of the fuselage.
There is a panel there but no detail at all.
The overall fuselage fit is good but make sure to use a few clamps to
hold it all together.
Taking
a gander at scale drawings from William Green’s Famous Bombers of WWII. The
wings are inaccurate in shape especially around the wingtip area.
So, why build on? Well, it’s
a kit and I want to have it on my shelf to compare and contrast with my
Hobbycraft and Dragon kits.
Besides, it can’t be THAT bad, right?
Moving on to the fuselage I took one look and was reminded of how
inaccurate the cockpit really is.
The cockpit floor is about a scale foot from the upper edge of the canopy area!
So, I painted the area that should be open to the gondola flat black to
create the look of an open area.
Not correct but it would take reconstructing the entire cockpit to fix this.
So, I took the easy way out!
The sidewall detail is not too bad but the instrument panel and radio panels are
a bit lacking and appear to be somewhat inaccurate as well.
The main seats are wrong in shape and have bland detail.
I painted the interior MM RLM 66 and detailed it the best I could.
The figures really are terrible and cannot be used even to just fill in
the seats. They have Wehrmacht
uniforms and boots! Plus they are
very out of proportion especially the heads.
After this was done I mated the fuselage halves and set the assembly
aside to dry. A prominent feature
missing is the fan on top of the rear of the fuselage.
There is a panel there but no detail at all.
The overall fuselage fit is good but make sure to use a few clamps to
hold it all together.
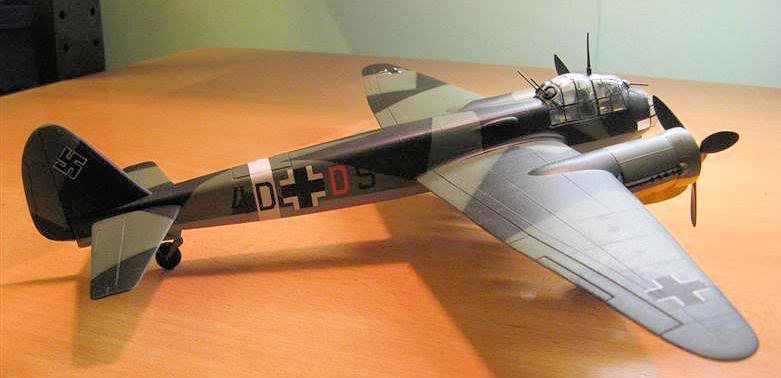
| COLORS & MARKINGS |
I masked the canopies off with Bare Metal Foil
and used 5 minute epoxy to glue the guns into place.
The canopies were then glued into place with 5-minute epoxy.
As mentioned before the frame detail disappears on the sides and lower
section of the nose canopy. I did
my best to guess here using photographs to achieve correct-looking framing in
these areas. Color call-outs
 for the
paint are nonexistent so make sure to use your references.
I used MM RLM 71 and Floquil paints for RLM 70 and 65 for the camouflage
splinter scheme. Post-Its and blue
masking tape were used to create the hard edges for this scheme.
The Floquil paints are terrific and had excellent coverage and opacity.
The MM 71 was a real nightmare to use though.
It was very thick and took a 50/50 mix with enamel thinner to get it to
shoot properly. This was a
brand-new bottle.
for the
paint are nonexistent so make sure to use your references.
I used MM RLM 71 and Floquil paints for RLM 70 and 65 for the camouflage
splinter scheme. Post-Its and blue
masking tape were used to create the hard edges for this scheme.
The Floquil paints are terrific and had excellent coverage and opacity.
The MM 71 was a real nightmare to use though.
It was very thick and took a 50/50 mix with enamel thinner to get it to
shoot properly. This was a
brand-new bottle.
| CONCLUSIONS |
 I’m sure
that two words come to mind…”why bother?”
Well, if anything, it gives you a terrific barometer for just how far
some particular airframe types have come in kit form.
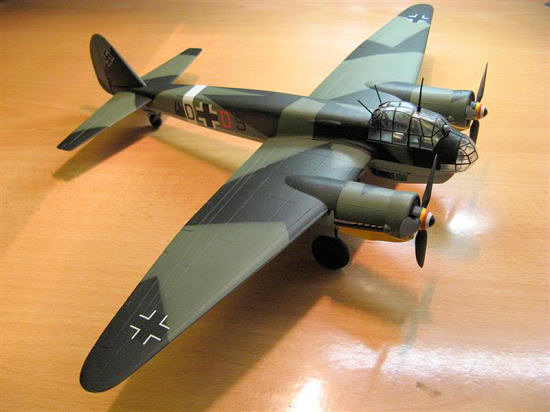
This kit goes together relatively
quickly and at first glance certainly looks like a Ju88.
However, upon closer inspection it really is lacking all around in
accuracy and finesse. It suffers
from mildly inaccurate wings, missing fuselage fan, inaccurate cockpit layout
and bland details, bad fit of gondola, poorly detailed bomb load, lack of any
depth to wheel wells…shall I go on?
Having said that I do recommend that you pass it along to a younger builder to
hone their skills on as the overall fit is actually pretty good (gondola
notwithstanding). For serious
enthusiasts just stick with the Dragon molds.
You’ll be happy that you did.
I’m sure
that two words come to mind…”why bother?”
Well, if anything, it gives you a terrific barometer for just how far
some particular airframe types have come in kit form.
This kit goes together relatively
quickly and at first glance certainly looks like a Ju88.
However, upon closer inspection it really is lacking all around in
accuracy and finesse. It suffers
from mildly inaccurate wings, missing fuselage fan, inaccurate cockpit layout
and bland details, bad fit of gondola, poorly detailed bomb load, lack of any
depth to wheel wells…shall I go on?
Having said that I do recommend that you pass it along to a younger builder to
hone their skills on as the overall fit is actually pretty good (gondola
notwithstanding). For serious
enthusiasts just stick with the Dragon molds.
You’ll be happy that you did.
| REFERENCES |
German Aircraft Cockpits 1911-1970, Cohausz, Peter W., Schiffer Publishing, 2003. ISBN: 0-7643-1873-X.
December 2010
If you would like your product reviewed fairly and quickly, please contact me or see other details in the Note to Contributors.