| KIT #: | 72292 |
| PRICE: | $45.00 SRP |
| DECALS: | Two options |
| REVIEWER: | Ryan Grosswiler |
| NOTES: | Long-run injection. Aftermarket masks are your friend! |
| HISTORY |
Aerial observation--the direct, naked-eye monitoring of your enemy's strength, composition, and movement--was the very first role assigned to military aircraft, going all the way back the manned army balloons of the French Revolutionary Wars and the American Civil War. Fast forwarding a century, the Focke-Wulf 189 modeled here was the last one designed from the start expressly for this purpose.
Created for a 1937 Luftwaffe tender requesting a successor to the
durable, slow, parasol-winged Henschel Hs-126 about to enter service, Kurt
Tank's design faced official competition in the fishbowl-bellied Arado 198, and
Dr. Richard Vogt crashing the party with his famously asymmetrical BV-141. The
Arado design turned out to be dangerously unstable at low speeds, and the German
High Command s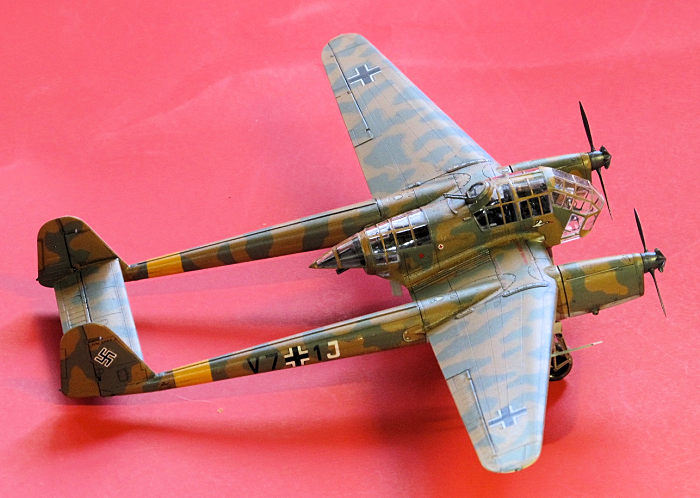 imply
couldn't get past the BV-141's bizarre looks (though by all accounts it was an
excellent aircraft), rejecting it on the excuse that it was marginally
underpowered. This left Focke-Wulf the winner by default.
imply
couldn't get past the BV-141's bizarre looks (though by all accounts it was an
excellent aircraft), rejecting it on the excuse that it was marginally
underpowered. This left Focke-Wulf the winner by default.
Dipl-Ing. Tank had ignored the contract's implied single-engine design intention. Instead laid out in a surprising pod-and boom format, good visibility outward was made possible by low-set wings and an extensively glazed crew gondola providing view for not one, not two, but three pairs of eyes, and ample wiggle room for the humans associated with those sets of eyes to crawl around, find the best vantage point, and point cameras and scribble notes. Entering test in 1938, the airplane turned out to be extremely maneuverable about the roll and pitch axes, and combined with the redundancies offered by the twin-boom/twin engine layout and two (and later four) bullet-sprayers pointing aft as well as a pair of cannons firing forward, turned out to be an extremely difficult target for enemy fighters tempted by the sight of a slow recon bird caught all alone. These qualities would serve the Fw-189's crews very well in its tough service life ahead. They started calling it "Uhu", onomatopoeic German for "Owl".
Despite its promise, the Luftwaffe horsed around with it for a year or two owing to the fact that the 189's predecessor--the Hs-126-- was actually still entering service! Interchangeable center pods for ground attack and crew training were tested during this time, but for various reasons not produced. It was only after the Hs-126's horrendous losses during the Battle of France that a production order for the Uhu was finally given. The initial batches coming off the Focke-Wulf line in Bremen were quickly supplanted by two more factories in occupied France and Czechoslovakia, owing to the company's pressing commitment to the new Fw-190 fighter also entering service .
About 860 were eventually built, all but about 170 in the foreign plants, and all went to serve on the Eastern Front except for half a dozen or so sent to aid Rommel in Afrika. The aircraft finally arrived at the front at the end of 1941 in its design role of general observation and reconnaissance plus artillery spotting.
The Soviets quickly connected the new airplane's presence
over the front lines to the accuracy of incoming German artillery fire. They
nicknamed it the Russian word for "the frame" and concentrated their triple-A
and fighter attacks on any spotted overhead. Unable to outrun, Uhu pilots used
their aircraft's exceptional low-speed handling to simply evade through tight
circles and turns at treetop-level, with two gunners prattling away at the
pursuing fighters. The slow aircraft often survived, maybe missing large p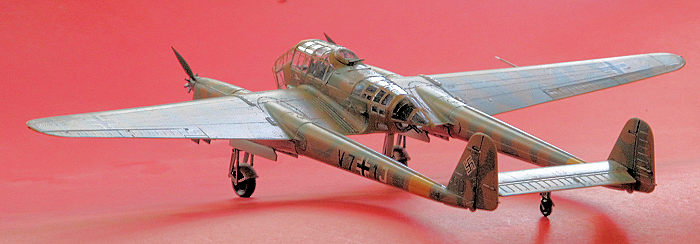 arts
of the airframe and/or an engine, very occasionally shooting down or even
causing its attackers to tip-stall into the ground. The combination of its
importance, rarity, and difficulty as a target made it an especially esteemed
"kill" among Soviet fighter pilots.
arts
of the airframe and/or an engine, very occasionally shooting down or even
causing its attackers to tip-stall into the ground. The combination of its
importance, rarity, and difficulty as a target made it an especially esteemed
"kill" among Soviet fighter pilots.
Of course, as the war progressed and only the highest-performance Luftwaffe aircraft could survive over the front with the loss of their air superiority, it was seen less and less. But it remained present, German records reporting a couple of dozen still on the rosters in combat at the end of April 1945. Increasingly it was used for duties such as night raids, bombing partisan hideouts, and (interestingly) as a specialized low-speed radar-equipped night fighter to combat continued and pesky nocturnal attacks by Soviet Po-2 biplanes.
After the war the Allies were unanimous in their praise of the design. Eric "Winkle" Brown, famous RAF test pilot and war-criminal interrogator, especially singled out the design's unusual combination of forgiving handling characteristics with extreme maneuverability, plus its reliability in weather extremes, and had one brought into service as a courier aircraft in the UK until it was destroyed in a storm. Having dealt with it so much, and capturing quite a few in various states of repair at Stalingrad (where fully 25% of the Fw-189s active at the time were lost), the Soviets were so impressed that they designed a bigger and more powerful derivative, the Sukhoi Su-12.
One Uhu still exists today, having been pulled from the Russian forest near the Finnish border where it had crashed in 1943. At first sent to the Czech Republic where rebuilding work at the jig level was started (by some of the original factory workers who built it!) it was last reported in the capable hands of Paul Allen's warbird restoration group in Washington state. Will we have a surprise visitor at Oshkosh one of these years?
| THE KIT |
The Fw-189 in 1/72: we've had four of them over the years, counting this one. Airfix and Aoshima were the only ones for decades; not bad kits from what I hear, but products of their time. Then the MPM group came out with an all-new one in 2001, released under the Condor, Revell Gmbh, and Italeri labels, possibly others.
When ICM released this kit my curiosity was piqued and I
felt the urge to buy and build it. The innovative packaging consists of a
full-color lid slipped over a sturdy pizza box, big enough to hold the model
fully assembled less landing gear. Very useful protection during assembly,
particularly in my home constantly under the ravages of children both two- and
four-legged. Spilling its contents reveals two grey spru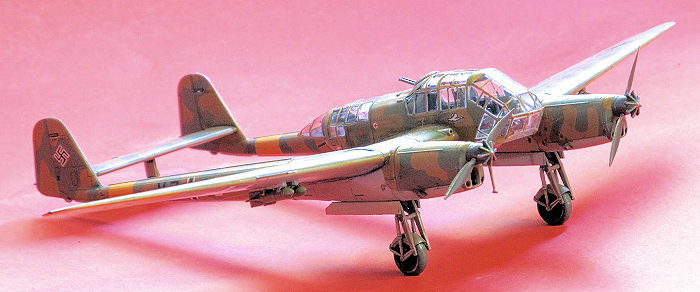 es
and one clear. In my sample, parts for both A-1 and A-2 versions are included,
which means a nice pair of MG-15s and ammo drums for the spares box. A sheet of
glossy decals provides everything sans swastikas, as this is a kit from a land
which suffered grievously under the Nazi jackboot. Instructions are very clear
Solidworks renderings, and painting diagrams are both in 1/72 and pleasing full
color--helpful for cutting camouflage masks later.
es
and one clear. In my sample, parts for both A-1 and A-2 versions are included,
which means a nice pair of MG-15s and ammo drums for the spares box. A sheet of
glossy decals provides everything sans swastikas, as this is a kit from a land
which suffered grievously under the Nazi jackboot. Instructions are very clear
Solidworks renderings, and painting diagrams are both in 1/72 and pleasing full
color--helpful for cutting camouflage masks later.
There will be natural comparisons between this and the MPM
kit, so I'll proceed with this review with that in mind. In the box, ICM's parts
are cleaner and crisper--as they should be, being almost two decades newer and a
long-run injection molded kit. Surface and interior detail is comparable in
both. ICM's cockpit transparencies are provided in no less than 15 parts but are
much clearer and more distortion-free than MPM's 4 comparatively chunky
One big problem not found in the MPM kit: for no
discernible reason ICM's engineers decided to mold each half of the tail booms
in two separate fore-aft parts, greatly multiplying the potential alignment
issues inherent with modelling a pod-and-boom aircraft. (Raising arms to the
heavens and crying out in Hestonesque fury-anguish) Why? Why? WHY?!? The modeler
is led to inevitable failure and humiliation when called upon to combine outer
wings, booms , stabilizer, and engines to the center section assembly at a
single point ICM has mockingly titled "Step 60"!
Instructions to avert this fate this follow. I don't normally like going into such excruciating detail when describing a kit's assembly but I want to lead you carefully through this particular minefield...
| CONSTRUCTION |
Predictably, it all starts with the center pod. First the (mis-numbered) inner
wing flaps were glued closed and allowed to cure. I then chose to assemble the
pod halves, the floor, and the wing center section parts all at once before the
glue set to make sure everybody was playing nice with each other. I also checked
the main clear parts for fit at this time. Assembly started with Testor's liquid
cement which strangely did not have much effect in fusing ICM's plastic, so I
switched to Tenax 7R from the last bit in my bottle and h ad
better luck; when that ran out switched to MEK which worked even better.
ad
better luck; when that ran out switched to MEK which worked even better.
Early on I noticed that the pilot's seat is way too small,
being about 1/144th, so I scratch built a new one from .015" styrene following
photos and drawing found online (Eduard's photoetch set provides a corrective
replacement). The rest of the interior is pretty good and provides all the major
elements; I just sprinkled in a few extras and some lead-foil seatbelts. There's
no vertical camera where there should be one but its absence isn't noticeable on
the finished model, even when you know to look. The few ejector pin marks within
become invisible through assembly and painting. In fact, the dark RLM 66 color
and all that canopy framing combine to make the interior largely obscured when
assembly's complete, so don't waste too much time on it now matter how much you
love cockpit detail. I left the ADF dome antennas and everything else underneath
off until after main assembly so the center section assembly would sit flat as I
worked on it.
 Boom(s)!:
per lessons learned with my RS Models P-38H Lightning a couple of years
back, I knew to avoid ICM's anxiety-rousing construction sequence. To begin,
I joined the fore-aft pieces of the outer boom halves (parts B15 to A11, B19
to A14) and let them cure taped over those wonderful 1/72nd painting
diagrams included in the instructions (this required some trimming so that
they would lie absolutely flat). Thus prepared, these joined-and-straight
outer boom halves were then removed and taped and glued their corresponding
inner halves. As this was going on, I assembled the horizontal stabilizer
parts.
Boom(s)!:
per lessons learned with my RS Models P-38H Lightning a couple of years
back, I knew to avoid ICM's anxiety-rousing construction sequence. To begin,
I joined the fore-aft pieces of the outer boom halves (parts B15 to A11, B19
to A14) and let them cure taped over those wonderful 1/72nd painting
diagrams included in the instructions (this required some trimming so that
they would lie absolutely flat). Thus prepared, these joined-and-straight
outer boom halves were then removed and taped and glued their corresponding
inner halves. As this was going on, I assembled the horizontal stabilizer
parts.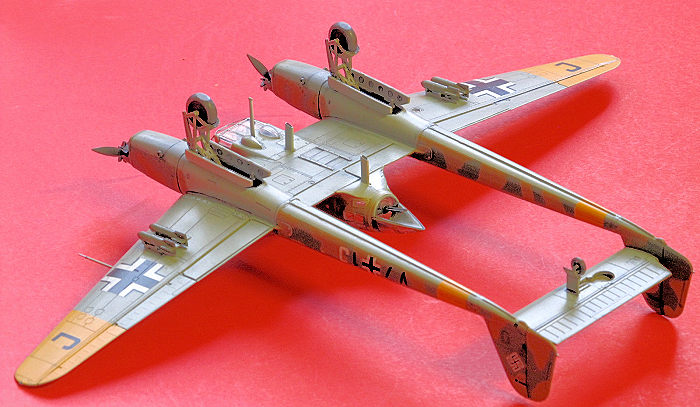 se
to add styrene sliding camera bay doors and their rails sticking proud from
the surface which ICM had only shown with recessed lines.
se
to add styrene sliding camera bay doors and their rails sticking proud from
the surface which ICM had only shown with recessed lines.| COLORS & MARKINGS |
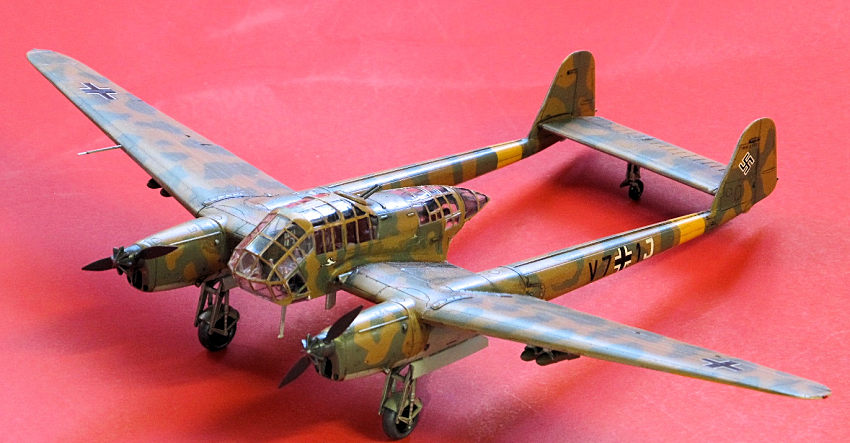
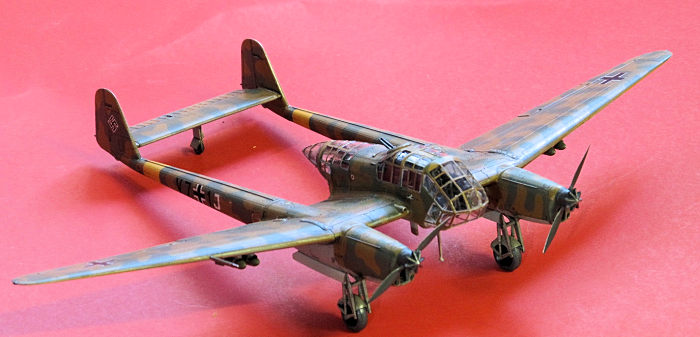
I selected the brown-green scheme of an Uhu operating
out of southern Finland in 1944. Following a white primer/preshaded undercoat,
the bottom surfaces were sprayed RLM 65, masked, and the top shot with RLM
79 Sandbraun. As I'm no whiz on the airbrush, I painstakingly masked the
complicated spot-scheme using photocopies of that wonderful painting guide for
the main surfaces and kabuki tape for the tight and/or compound-curve areas.
This took a couple of hours.
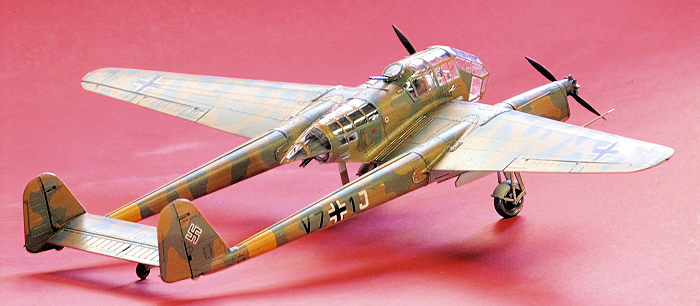 About halfway through this process, I thought to look up the subject aircraft
(V7+1J) for photo reference. The couple I found with a quick internet search
actually showed it in what looked like a badly weathered and scruffy winter
distemper, not the scheme depicted (at least not clearly). I felt I was too far
along to reverse myself and liked the scheme anyway, but be forewarned: even
though I've since seen it in illustrations elsewhere, it may be the product of
someone's imagination.
About halfway through this process, I thought to look up the subject aircraft
(V7+1J) for photo reference. The couple I found with a quick internet search
actually showed it in what looked like a badly weathered and scruffy winter
distemper, not the scheme depicted (at least not clearly). I felt I was too far
along to reverse myself and liked the scheme anyway, but be forewarned: even
though I've since seen it in illustrations elsewhere, it may be the product of
someone's imagination.
Decals were applied. ICM has clearly switched their source
for these since my last go with one of their kits and they performed
outstandingly. Swastikas came from the spares box. The only weathering I applied
was a thinned dark-gray enamel wash and a light silver dry-brushing to emphasize
prominent details, which was sealed under an enamel semi-gloss.
| CONCLUSIONS |
It's a close call. ICM's finished product delivers a cleaner, 'higher-resolution' Uhu than the MPM offering: nice, sharp trailing edges on all surfaces, correct open areas around the control surfaces and cowls, and the glories of that jewel-like glazing. It's the better finished model of the two...10% better. However, if assembling lots of tiny clear parts isn't your gig or you're not confident assembling a pod-and-boom aircraft you might find the older kit with its simpler engineering the better option.
Recommended for those very confident in their assembly skills!
In shooting these images I was frustrated by issues with glare. Baffling, as every picture I've ever taken for this site has been with the same equipment and backdrop. Then I realized I'd never taken pictures in the summertime--the light was streaming in more from the north-facing windows behind the model rather than the south-facing doorway behind the camera as it does the rest of the year!
| REFERENCES |
Complexities aside, this kit builds into such a good model out of the box that references really aren't needed, except for the pilot's seat and swastika selection/placement if you choose to make those improvements. The best single-source is probably the current "The Focke-Wulf Fw 189 Uhu: A Detailed Guide to the Luftwaffe's 'Flying Eye'" book by Richard A Franks.
7 August 2017
Copyright Modeling Madness.com
Thanks to for the review kit. You can get yours at your local hobby shop or on-line retailer.
If you would like your product reviewed fairly and fairly quickly, please contact the editor or see other details in the Note to Contributors.
Back to the Main Page Back to the Review Index Page Back to the Previews Index Page