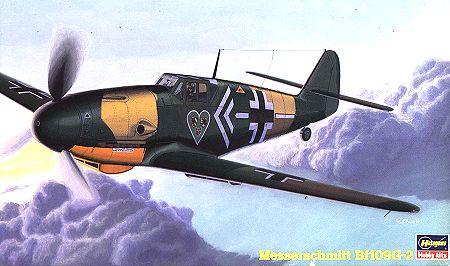
Hasegawa 1/48 Bf-109G-2
|
KIT # |
J 13 |
|
PRICE: |
$28.00 |
|
DECALS: |
6 Eastern Front aircraft |
|
REVIEW BY: |
|
|
NOTES: |
Is this the finest kit ever made? It certainly has to be a contender. |
|
HISTORY |
The G series of Bf 109s constituted the largest production run of this ubiquitous German World War II fighter aircraft. The G-2 was the most produced subtype of the G series. Calling for more of everything, more speed, more crew protection, more firepower, pilots flying the F series aircraft were given their wish. The downside, of course, was that the additions led to more weight and marked the decline of the airframe as a nimble fighting machine that could-out turn just about everything in the sky. Still, it was a formidable foe and served up until the end of the war.
|
THE KIT |
The Hasegawa series of Bf 109 kits, which now extend to the K models, are one of the most remarkable sets of kits every made in the industry. If ever a hallmark of the state of the art is mentioned, these models fit that standard perfectly. While not perfect (what is?), the quality is so high, the fit is so precise, and the accuracy is very well done, that the act of working on one of these kits is pure joy.
The kit comes in the standard Hasegawa gray styrene, with finely engraved panel lines. The cockpit is nicely done, needing only aftermarket seat harnesses to look very presentable. The clear parts are crystal clear and thin.
|
CONSTRUCTION |
I jazzed up my cockpit with a few pieces from the True Details photo-etch brass set 48-812. Mostly I used a few instruments and the above mentioned seat harnesses. The cockpit was painted with Polly Scale 66 Scale Black, and drybrushed with a lighter gray to pick out the highlights. A wash of black oil paint mixed with Turpenoid reinforced the detail, and a silver Berol pencil was used sparingly to simulate chipping and wear of the paint.
After attaching the radiators to the inner wing, I cut out the wheel wells as instructed by Hasegawa to make a more boxy opening instead of the circular openings of the F model, which shares this particular sprue of parts. I glued the wings together and sanded the seams. The fuselage went together in a similar manner, after I first installed a blanking plate made from plastic card underneath the forward machine guns. The fit between the wings and fuselage is very tight, but I managed to pop them in without too much difficulty. I used the only filler needed here, slopping CA glue in the hairline seams on the underside of the fuselage. The CA glue was dabbed with accelerator, then sanded and polished. The horizontal stabilizers didn’t need any attention other than glue. Used to making US Air Force radial-engined aircraft models, I was shocked at how quickly I had arrived at the painting stage. I now understand why these kits are so popular: you can squeeze one out in a weekend!

|
PAINT & DECALS |
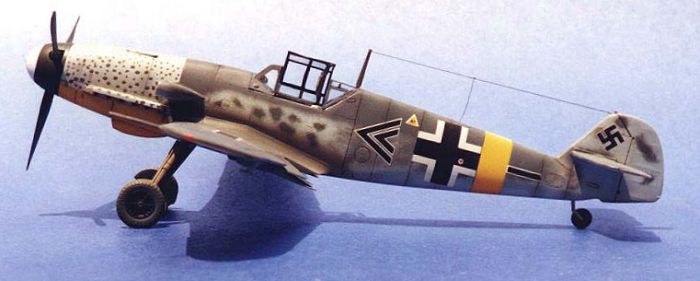
Having just come off two enormous projects that took a long time to do, I was determined to just build this model out of the box and relax. So I chose the most interesting kit decal selection, an aircraft flown by Hptm. Johannes Steinhoff in the Eastern Front in September 1942. This called for a standard 74/75/76 scheme with 04 accents. I first painted the areas to be yellow with flat white to establish an even application of the yellow color. Then Polly Scale 04 Yellow as sprayed. I masked the fuselage band, wingtips, and forward under-fuselage area with hardware store masking tape that had been cut with a sharp x-acto knife on a piece of plate glass. This insured sharp demarcation lines. The next color sprayed was Polly Scale 76 Light Gray. Then I sprayed the upper surfaces with Polly Scale 75 Gray Violet. I was surprised at how dark this shade was, compared to other manufacturer’s interpretations of the color. I figured that this would do the famous Floquil "chameleon" imitation and turn lighter as time went on, so I pressed ahead. Unfortunately, my assumption was wrong and the color never did lighten up.
AeroMaster’s 76 Gray Green was next. Since this paint is famous for being "toned down", it also accentuated the fact that the 75 was too dark. It is really difficult to tell the difference between the two colors on the model (see photographs). While I was pleased that the purpleness of the 75 was not overdone (too many manufacturers go overboard on this, in my opinion), I was disappointed at the monochrome effect. Oh, well, there’s always a next time!
The mottling was sprayed with 76, and I had a lot of trouble applying this consistently. I’ve been told by Luftwaffe aficionados that oil-based enamels are the only way to go here because of the fine pigments, slow drying times, and overall control in the airbrush. I’m beginning to believe them, as the acrylic paints tended to dry in the tip (a special acrylic one) of my Testor A470 airbrush and splatter on the model. Another lesson learned.
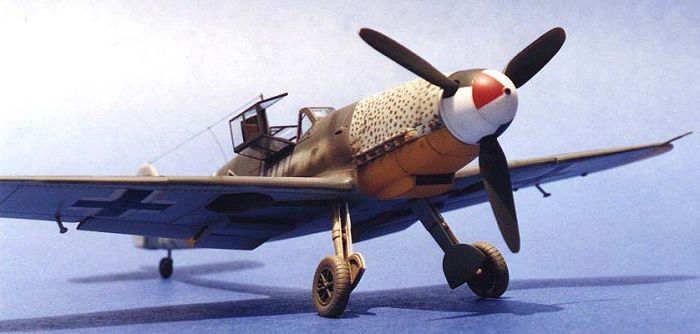
The nose of the airplane consisted of geometric patterns of red and black-green over white. I carefully masked the non-white areas with Parafilm M. It took a couple of complete do-overs, but in the end the spinner came out sharp. The propeller blades are 70 Black-Green.
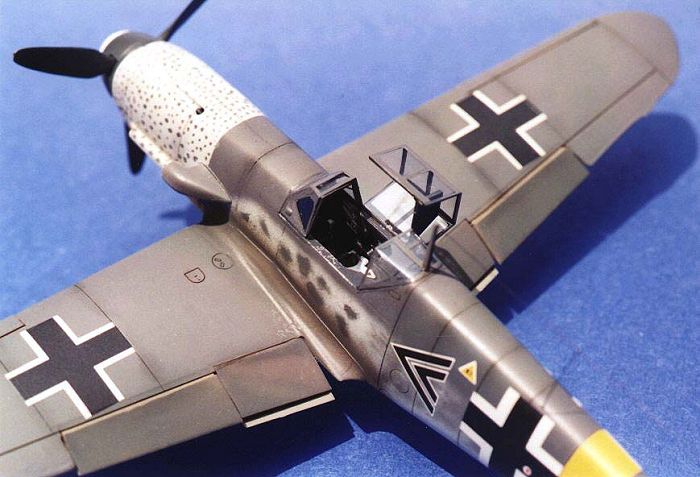
The forward upper cowling on this aircraft has an interesting effect. According to the Wantabe book, it looks like the polka dots of 75 were hand-painted with a brush on the real airplane. Hasegawa’s interpretation suggests a very close shot with a spray gun. What I did was twirl a corner of a paper towel, dipped it in the paint, and lightly dotted the cowling. This gave a slightly fuzzy edge to the dots, and looks a little better to my eye.
The model was sprayed with Future floor polish, and the decals applied. The kit decals went on very nicely and drew down into panel lines with Micro Sol. My only complaint with the markings is that the white has a yellowish tint to it. I’ve noticed this in other Hasegawa kits as well. It’s not so bad as to be obvious, but anal-retentive types like me notice things like that.
Weathering was limited to a wash of burnt-umber oil paint mixed with Turpenoid applied to the panel lanes. A light dusting of dark gray pastels was used to blend the lines a little further. A light spray of Polly Scale Oily Black was used for the exhaust stain, and some Polly Scale Dirt was used simulate the wear of operations from a grass and dirt airstrip. The exhaust stacks were drilled out and painted Polly Scale Rust, then drybrushed with aluminum paint. I know this is hard for modelers, but don’t sand out the mold seam – the real aircraft had a very prominent casting seam. The stacksfit so snugly into their well that I had to use quite a bit of force to get them properly seated.
The fiddly bits were next. I used fine copper wire, painted flat aluminum, to replicate the brake lines and attached the landing gear. The tires were sanded to flatten them a bit and glued on. The shoulder harnesses were painted off-white and attached to the area behind the seat. I used transparent "invisible" sewing thread for the aerial wires, then painted them with a black Sharpie marker. The windscreen and canopy were attached with white glue. The windscreen didn’t fit perfectly, and needed a little bit of filling with white glue to bridge the gap between it and the fuselage. If I were to do it again, I would have attached the windscreen during construction and filled the seam with CA glue and faired it in with the contours of the fuselage. The clear parts were masked with Parafilm M in the painting process. A final misting of Testors Dullcote Lacquer finished off the project.
|
CONCLUSIONS |
I thoroughly enjoyed the kit and can now understand the popularity of this subject (see the related Modeler’s Musing column). It went together like a dream, had an interesting paint scheme, and just looks good with virtually no modifications or aftermarket additions. Highly recommended!
|
REFERENCES |
Rikyu Wantanbe: The Great Book of World War II Airplanes