|
KIT # |
7625 |
|
PRICE: |
CDN$7.99 |
|
DECALS: |
Four aircraft |
|
REVIEWER: |
|
|
NOTES: |
An ancient Hawk kit that still works. |
|
HISTORY |
|
THE KIT |
In a HSO brown cardboard box, you
get the airframe parts in a soft, grey plastic and the clear (well,
cloudy) bits inside a small bag. The decals are inserted in the
instruction booklet. Options are limited to deploying the speed brakes,
as well as extending the landing skid (although you cannot extend the
tail wheel). The strong point of the kit is the ability to paint the
assembled product as four different aircrafts:
- 7./JG 400 at Schleswig-Holein in May 1945
- 1./JG 400 at Merseberg in May 1945
- 2./JG 400 at Brandis in January 1944
- Me 163B-0 V-41 at Bad Zwischenahn in 1944.
The last aircraft is the famous all red machine used on the first operational Komet mission, although it was hastily repainted before hand!
|
CONSTRUCTION |
 As this is an old kit with very
few parts, I had the aircraft assembled in 15 minutes, and I didn’t quite
follow the instructions to get there, since I omitted to fit the landing
ski on it mount at this time and painted the instruments on the panel
instead of using the provided decal. Also, I inserted the seat without
the pilot. Superdetailers will love building an interior for this kit,
as it’s bare to stay polite. The next step was to putty and sand all the
seams, the most troublesome being the joints around the part covering the
slots on the wings. All the seams were subsequently primed and
retouched. I hand painted the canopy frame Model Master RLM 66, then
masked it and glued it on. Masking was also done on the little side
windows and the kit was ready for the paint shop.
As this is an old kit with very
few parts, I had the aircraft assembled in 15 minutes, and I didn’t quite
follow the instructions to get there, since I omitted to fit the landing
ski on it mount at this time and painted the instruments on the panel
instead of using the provided decal. Also, I inserted the seat without
the pilot. Superdetailers will love building an interior for this kit,
as it’s bare to stay polite. The next step was to putty and sand all the
seams, the most troublesome being the joints around the part covering the
slots on the wings. All the seams were subsequently primed and
retouched. I hand painted the canopy frame Model Master RLM 66, then
masked it and glued it on. Masking was also done on the little side
windows and the kit was ready for the paint shop.
|
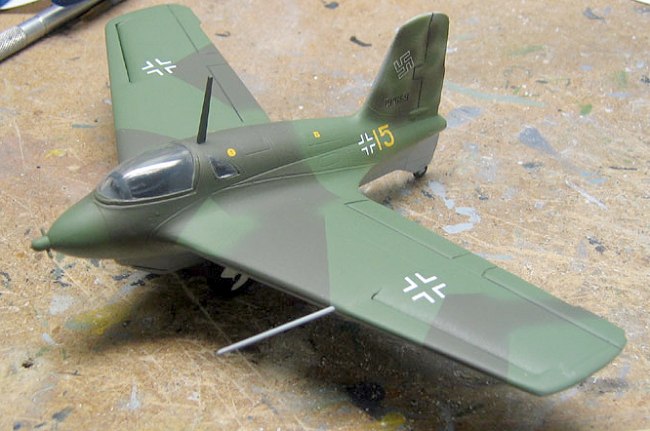
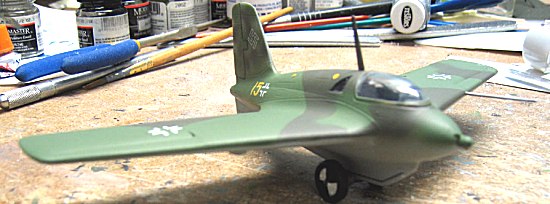
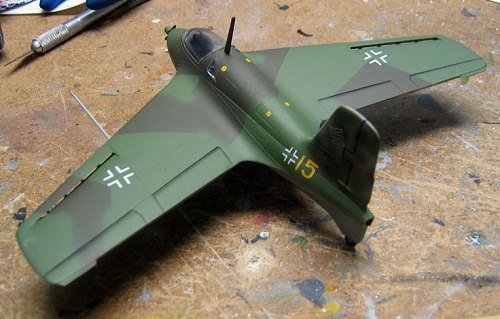
CAMOUFLAGE & MARKINGS |
The most difficult part was to choose which one to do. The red one was out of question, a friend having already done it. Then Tom Cleaver came along with his bird from 1./JG 400. That left two. My choice finally went to the Komet from 7./JG 400, because of the nice mottling on the tail. So, the aircraft was sprayed with Gunze RLM 76, then the wing’s underside were masked in preparation for the camouflage.
I started with RLM 82 Dunkelgrun
and only sprayed those areas that would have this colour, instead of the
whole upper surfaces, thinking that I would save some paint in the
process. Wrong I would be proved. I masked the green in preparation for
the brown, and then proceeded with a coat of RLM 81 Braunviolett. Upon
removal of the masks, I found out that I had masked the green areas too
far from the paint and had bleak spots all over the place. I re-m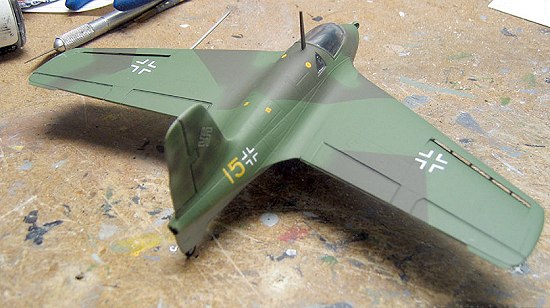 ixed
more RLM 81 and freehanded the repairs. On the plus side, it gives the
model a field-repaired look. I did some touch-ups with the RLM 76 and I
had already painted the mottling on the tail in the previous painting
sessions.
ixed
more RLM 81 and freehanded the repairs. On the plus side, it gives the
model a field-repaired look. I did some touch-ups with the RLM 76 and I
had already painted the mottling on the tail in the previous painting
sessions.
Although the instructions call for all-white wheels, I wanted them in the cool diamond pattern. Tamiya IJN Grey provided the primer for a coat of Tamiya Flat White, after which I masked the wheels with Tamiya masking tape and brush painted the black parts. I painted the dolly and the inside face of the wheels Model Master RLM 66.
I hand painted the Pitot tube and the radio antenna with their respective colour and glued them to the model before proceeding with the decals.
A coat of Future preceded the
decals, which went on beautifully. I had left out the dolly to be able
to place all the various stencils and followed the application with a
coat of
Poly Scale Flat Finish. Now, as Tom put it in his article, the Komets
were rather glossy, and I suggest you do the same with yours to achieve a
totally accurate look.
I added the trolley, making sure it was straight and highlighted the control hinges with a pencil.
|
CONCLUSIONS |
This kit is another case of price
versus quality. For a very small expense, you get a nice and easy to
build kit with lots or marking options. Of course, the interior
detailing is almost non-existent and the kit has raised panel lines. But
don’t let that deter you from buying it. It makes for a fun project, and
would be excellent to initiate someone to the world of modelling. For
the true accuracy maniacs out there, I suggest the Dragon kit but for all
the other people, grab it if you see it!
August 2003
If you would like your product reviewed fairly and fairly quickly, please contact the editor or see other details in the Note to Contributors.