| KIT #: | 002 |
| PRICE: | $65.00 MSRP |
| DECALS: | Two options |
| REVIEWER: | Olivier Lacombe |
| NOTES: | Resin kit |
| HISTORY |
We can consider ourselves lucky. Had the Germans hadn’t been so near-sighted, they would have produced a magnificent twin-engined aircraft that would have given a great many headaches to the allied pilots.
There never was any official requirement for the Fw 187, and as such it
was developed with the hopes of signing a contract for a working plane
instead of a sheet of paper. From the start, the 187 was meant to be
fast. Kurt Tank and his team made
 every attempt do minimize drag, and this
included the use of surface-evaporation cooling for the engine. Later
troubles with the system forced them to resort to normal radiators. The
fighter was supposed to be powered by DB 600 engines of 960 HP, but they
weren’t available, so the team opted for Jumo 210 of 610HP. At first, the
armament consisted of only two MG 17s, but it was to be augmented at a
later date.
every attempt do minimize drag, and this
included the use of surface-evaporation cooling for the engine. Later
troubles with the system forced them to resort to normal radiators. The
fighter was supposed to be powered by DB 600 engines of 960 HP, but they
weren’t available, so the team opted for Jumo 210 of 610HP. At first, the
armament consisted of only two MG 17s, but it was to be augmented at a
later date.
The first three prototypes were completed as single seaters, with a neat Fw 190-like canopy. Their main problem lay with the undercarriage which was week and prone to collapse. Comparing the V1’s specs with those of the Westland Whirlwind Mk I, it appears that the German fighter was a better performer, albeit slower. The first prototype crashed, claiming the life of Paul Bauer.
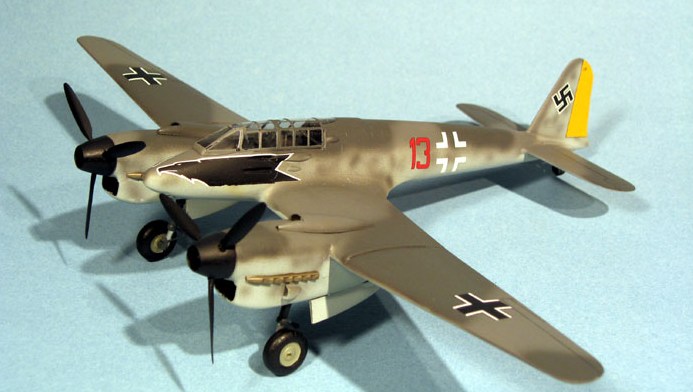
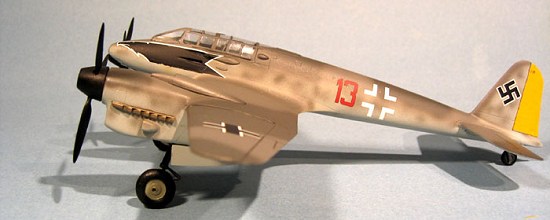
The design was modified to make it a Zerstörer, or heavy fighter. A second crew member was added to serve as a radio/navigator, but the sleek bubble canopy was replaced by a framed job. The new version was allocated the Fw 187A-0 designation and a small series was built. They were subsequently used as factory defence fighters. The A version was superior in every respect to the Bf 110, save for the armament. A few of them were also sent to Denmark where operational pilots flew them. On one occasion, a Spitfire was shot down.
The V7 prototype was fitted with DB 601 engines and further versions were planned, including the C version, which would have used DB 605s and would have packed a mighty wallop. Fortunately, it never went beyond the drawing board.
| THE KIT |
 HML is the expensive kit division of MPM. In a sturdy cardboard box, you
get a couple of heat-sealed bags with all the parts inside. The main resin
components feature prominent pouring stubs, but the small parts are all
integrated on a waffle. The main components are more or less straight,
save for the wings, which are warped. The metal parts look acceptable, but
more on that later. They consist of the landing gear struts and some
actuators. The decals are from Propagteam and thus look the part. Two set
of vac formed transparencies are provided.
HML is the expensive kit division of MPM. In a sturdy cardboard box, you
get a couple of heat-sealed bags with all the parts inside. The main resin
components feature prominent pouring stubs, but the small parts are all
integrated on a waffle. The main components are more or less straight,
save for the wings, which are warped. The metal parts look acceptable, but
more on that later. They consist of the landing gear struts and some
actuators. The decals are from Propagteam and thus look the part. Two set
of vac formed transparencies are provided.
The cockpit is adequate, although the super detailers will have a field day with this one!
| CONSTRUCTION |
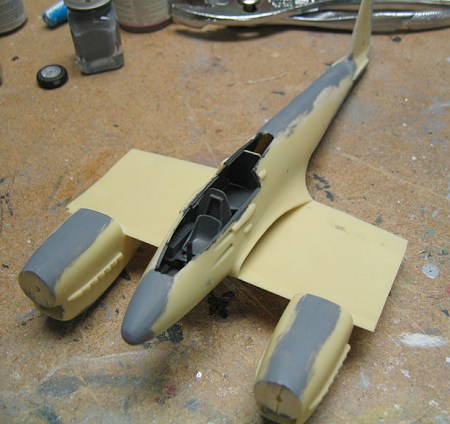
I started by cleaning all the parts in lukewarm soapy water and once everything was thorough fully dry, I removed the pouring stubs from all the parts. The worst bit are on the engine nacelles, when I was done, either through my uncarefulness or bad engineering, the top of the nacelles had nasty angles.
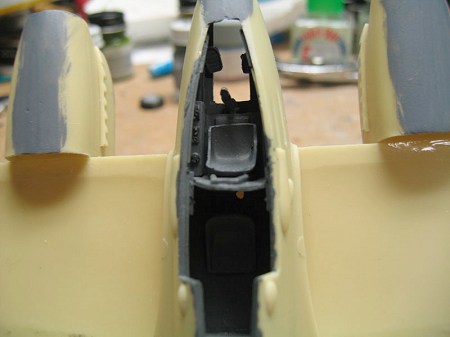 I glued what I could around for the interior: ammo boxes, radio shelf,
bulkheads and seats to the floor, rudder pedals and stick. I then painted
it Model Master RLM 66 with Flat Black for the details, and then attempted
a dry fit of the whole fuselage assembly. Hmmm, the Force is strong
with that one! I sanded the edges of the floor and the bulkheads and
it almost fit. I confidently poured super glue along side the
fuselage halves, rushed to get the cockpit in, closed the halves and
tightened them up with masking tape.
I glued what I could around for the interior: ammo boxes, radio shelf,
bulkheads and seats to the floor, rudder pedals and stick. I then painted
it Model Master RLM 66 with Flat Black for the details, and then attempted
a dry fit of the whole fuselage assembly. Hmmm, the Force is strong
with that one! I sanded the edges of the floor and the bulkheads and
it almost fit. I confidently poured super glue along side the
fuselage halves, rushed to get the cockpit in, closed the halves and
tightened them up with masking tape.
 It
was left to solidify while I went to work on the nacelles.
It
was left to solidify while I went to work on the nacelles.
The nacelles are very easy to build, and since they are the same on each side, there’s no danger of mixing anything up. As I gave the parts a nasty angle, I didn’t bothered with gluing the prop shaft retainer, but the wheel well bulkhead fits very well. I also test fitted the three wing parts, only to find that they didn’t had the same angle. Out came the pan and I boiled some water to straighten them up. In about 5 minutes, everything was straight.
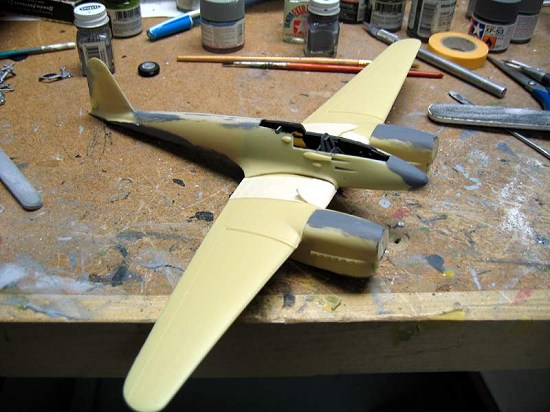 The outer wing panels were secured to the center section with super glue,
but not before I tested fitted the whole thing to the fuselage. The main
area of concern is the belly, more precisely at the center section’s
trailing edge. I sanded and scrapped a little bit of resin there until the
whole wing assembly popped into place. Remember the angles on the
nacelles? I dispatched them using Tamiya two-part putty. That thing dries
hard like concrete, so I had to use my Dremel to sand it away. In the end,
it filled the hole perfectly. All the various seams were dispatched with
the following ingredients: Tamiya Putty, various grits of sand paper and
lots of elbow grease!
The outer wing panels were secured to the center section with super glue,
but not before I tested fitted the whole thing to the fuselage. The main
area of concern is the belly, more precisely at the center section’s
trailing edge. I sanded and scrapped a little bit of resin there until the
whole wing assembly popped into place. Remember the angles on the
nacelles? I dispatched them using Tamiya two-part putty. That thing dries
hard like concrete, so I had to use my Dremel to sand it away. In the end,
it filled the hole perfectly. All the various seams were dispatched with
the following ingredients: Tamiya Putty, various grits of sand paper and
lots of elbow grease!
 Once the airframe was complete, I glued the instrument panel coaming and
reshaped the nose into something more aerodynamic. I inspected the
propellers and the spinner and found one of the low points of the kit. One
of the spinner had holes in it (super glue was used to build it back up)
and the blades were more like those on a Bf 109F than on a Bf 109E. A
close look at my Schiffer book on the Fw 187 proved my suspicions: the Fw
187 had propellers very much like the one on an Emil. So I ordered two Bf
109E propellers from Ultracast to correct the inaccuracy. I kept the kit’s
spinners, and simply glued the new blades to them.
Once the airframe was complete, I glued the instrument panel coaming and
reshaped the nose into something more aerodynamic. I inspected the
propellers and the spinner and found one of the low points of the kit. One
of the spinner had holes in it (super glue was used to build it back up)
and the blades were more like those on a Bf 109F than on a Bf 109E. A
close look at my Schiffer book on the Fw 187 proved my suspicions: the Fw
187 had propellers very much like the one on an Emil. So I ordered two Bf
109E propellers from Ultracast to correct the inaccuracy. I kept the kit’s
spinners, and simply glued the new blades to them.
The stabs were a bit of a problem to install. They were a butt-joint, so I had the idea of using two-part epoxy glue to fix them. The glue refused to cooperate, so I fell back on cyano to do the job. I didn’t want to use that for fear of breaking them at a later date, but in the end, everything held out pretty good. I also cut the vac transparencies, masked and fixed them on the airframe using cyano glue, praying for no fogging! The gentle kind of super glue is hard to come by around here. I installed the various ducts and intakes around the engines and dispatched the seams with Tamiya Putty and nail polish remover. You apply the putty and before it’s dry, you have to wipe it with a cotton swab wet with the remover. It works fairly well and it sure beats having to sand all those nooks and crannies!
| COLORS & MARKINGS |
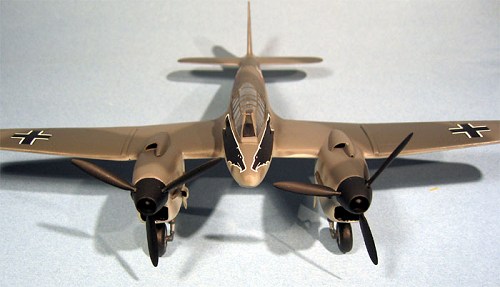
Painting
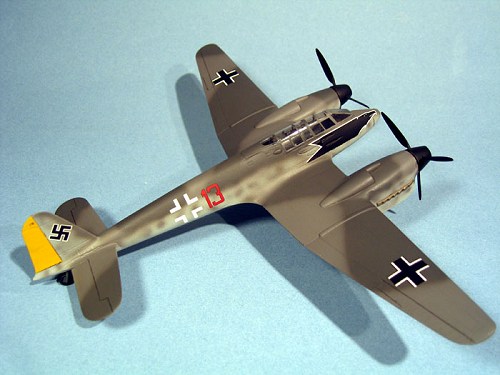
As this was my first resin kit, I didn’t want to ruin the paintjob, so I primed the whole kit with automotive etching primer, the sandable grey kind. Before hitting it with paint, I sanded the surface with 600-grit sandpaper. First colour on was Gunze RLM 76 followed by some masking and the under cowls and rudder were painted RLM 04. The underside was masked and the top was first painted with RLM 75 after which RLM 74 was free handed over it in the same pattern as seen on Fw 190s. Squiggles of those two colours were made at the same time. The propellers were painted Flat Black.
No touch ups were necessary, so I brushed painted the wheel wells RLM 02 along with the inside of the gear doors.
| CONSTRUCTION CONTINUES |
 I tried to fit the kit’s metal landing gear legs on the resin wheels, but
all I could do was to bend the metal. I got pissed at the kit and threw
the metal thingies away, replacing them with 1/32 Corsair legs from an old
Revell kit. I did a few tests and the new legs were the same length as the
old ones, so the stance of the plane was unchanged, yet its look was
bettered. In my Schiffer book, they said that the Fw 187 always suffered
from weak landing gears, so my home-grown solution is not that far out! I
had to make new axles, but it was simply a matter of cutting a length of
styrene rod and fixing it to the leg with Ambroid glue. The legs were
installed using cyano glue, as were the gear doors.
I tried to fit the kit’s metal landing gear legs on the resin wheels, but
all I could do was to bend the metal. I got pissed at the kit and threw
the metal thingies away, replacing them with 1/32 Corsair legs from an old
Revell kit. I did a few tests and the new legs were the same length as the
old ones, so the stance of the plane was unchanged, yet its look was
bettered. In my Schiffer book, they said that the Fw 187 always suffered
from weak landing gears, so my home-grown solution is not that far out! I
had to make new axles, but it was simply a matter of cutting a length of
styrene rod and fixing it to the leg with Ambroid glue. The legs were
installed using cyano glue, as were the gear doors.
Following this, the plane was given a coat of Future floor polish in preparation for the decals.
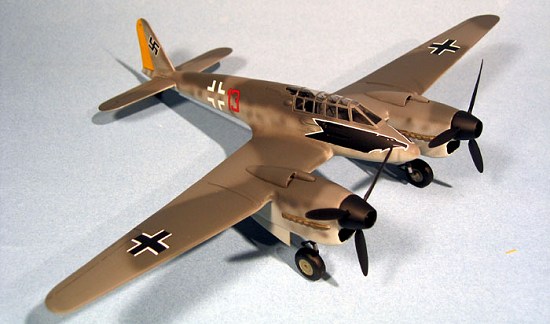
Decals
I used a SuperScale sheet (48-748) for those, and they went on beautifully. The only thing I regret is using the red 13 instead of black numerals. I sealed the job with Poly Scale Flat.
| CONCLUSIONS |
This was my first resin kit, and it really wasn’t as bad as I thought it would be. It’s not much different from a plastic short-run, granted that you take your time. I’m looking forward to my next resin job, and hey, where else can you get a 1/48 Fw 187?
January 2005
If you would like your product reviewed fairly and fairly quickly, please contact the editor or see other details in the Note to Contributors.