|
KIT # |
4002 |
|
PRICE: |
$12.75 |
|
DECALS: |
Two schemes |
|
REVIEW : |
|
|
NOTES: |
Used 3rd Group Decals for 1/72 Me109 |
|
HISTORY |
I don't normally build aircraft smaller than 1:48 --- I get frustrated at the tinyness of everything. However, I found the ERTL B35A for a steal, and wanted to do a diorama with it. The idea I had in mind required an opposing fighter, and since I was playing with a pretty hypothetical aircraft in the first place, I started looking for a hypothetical Nazi or Soviet bomber interceptor.
I didn't have to look far - the local shop had several copies of the Revell Me P1099 B/I and Me P1099 kits for about $13 US.
I won't bore you with a potted history of this Kurt Tanke loo-doodle .... not that there's a ton of history involved. This thing never flew off the paper it was sketched on.
|
THE KIT |
Seventy some-odd parts are jammed into the flimsy box. Most are typical Revell grey (besides the canopy, there are some sighting devices/periscopes on the clear sprue), with typical Revell precision and typical Revell molding. That means you get plenty of delicate parts which are a bitch to remove from the sprue without damaging (and if you manage that, you still have to clean up the attachment points and a few mold seams). If your fingers are as fat as mine, you'll need more patience than I have .... or an
ERTL Star Wars kit.
Revell's instructions have changed very little in the twenty years since I bought my first of their kits. You get a thick booklet, printed on ultra-cheap newsprint, with well illustrated pictorial step-by-step assembly diagrams. In keeping with our times, fully half the sheets are taken up with safety warnings, printed in 100 languages with typical Teutonic thoroughness. "Mind you don't hurt yourself, and don't inhale" just doesn't cut it anymore, I guess. A paint guide is also included, but I ignored it (read on to see why).
Decals are provided for two hypothetical schemes. No swastika fouls the sheet with its evil presence (no matter, that's what the spares box is for).
|
CONSTRUCTION |
The B/I kit is pretty much identical to the stock P.1099 kit, with a different canopy, cockpit and nose gun. I quickly found the "stock" parts fit well enough; the add-ons, less so.
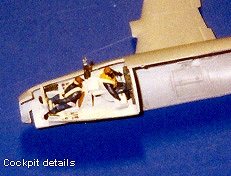 Taking a cue from both the editor of this splendid site and the instructions, I built the cockpit first. It pretty much went together easily, except the pilot's instrument panel. After threatening to feed it to my three ravenous, snarling Husky dogs, the part suddenly shaped right up and hopped into place. You just gotta know how to talk to these things .... The instructions call for the front office to be painted "Dust Gray, Matt", whatever the heck that is. I used Testors Model Master RLM 66 Swartzgrau, on the theory that every other German aircraft after 1942 (or so) was painted this almost-black in areas where the crew did their thing. Once the base colors were dry, I picked out details by drybrushing silver and flat white over the raised bits.
Because I wanted to do a vignette with this kit and the B-35, I wanted to have a crew in the cockpit. Revell thoughtfully neglects to include pilot figures in their later kits; fortunately, Hasegawa and a razor saw can overcome that. I grabbed a couple of likely looking figures from the Hasegawa 1/72 scale WW2 pilot set, cut them up and repositioned them to fit the seats. OK, so the pilot is actually British, and the gunner Japanese ... but with the tinyness of the figures, and the fact they're covered by a 2mm thick canopy, I defy anyone to determine that just by looking.
I painted the figures something close to Luftwaffe blue, with yellow life jackets, then plopped them in their 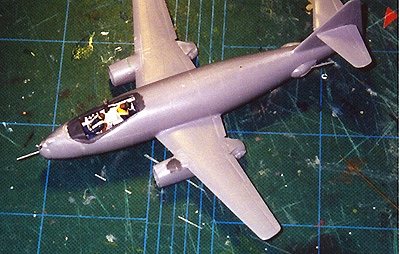 seats. I made overly wide seatbelts from masking tape. Once all that was done and dry, I glued it to the starboard fuselage half and turned to on the rest of the plane.
Revell is not Accurate Miniatures, or Tamiya .... or Hasegawa, for that matter. They could do a better job engineering their models (have you ever build one of their ships? >shudder<) but this one doesn't totally
stink. In fact, just about everything went together without a fuss ..... but then again, I carefully dry fit, sand, then dry fit again before committing to glue. I learned the hard way on sci-fi models, you see. The only place where I had problems with fit were the fronts of the engine nacelles. I guess I wasn't patient enough - I ended up with a noticeable step on both that putty didn't quite fix. I glued the tail guns on at this point - in retrospect, I should have left t both barbettes off until the end, because painting the gun in each turned out to be a major chore.
The parts that make this a B/I gave me the most trouble - but only because they are noticeably bigger than the areas they are supposed to fit around. The nose turret and canopy are just too big for where they are supposed to fit. After much putty, rescribing ... and white glue used as a filler, I managed to get something I was satisfied (but not happy) with. Ah, well. The biggest disappointment was yet to come.
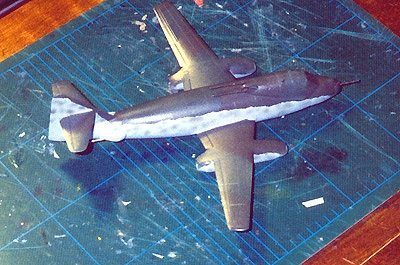
With all but the pitot tube and DF loop installed, I was ready to paint. Before I did that, I drilled a hole in the bottom for the stand the model would sit on later.
|
PAINT & DECALS |
NIGHTMARE IN THREE ACTS
 I'd picked up some Aeromaster enamels on a trip back to Michigan to see the folks (first place I'd seen them, at Old Guard, on 15 Mile and Van Dyke across from the Chrysler plant - decent enough shop, though small, and their sci-fi selection is rather meager).. I'd heard so many good things about the line, and was raring to try them out for myself.
They kicked my butt.
No, really. After priming the model with a delicate light grey enamel from the Testors line (utilitarian, but with a hint of naughtiness and a _fine_ bouquet; I'm a connoisseur, dontchaknow) I sprayed the underside with Aeromaster RLM 75. Then I scrubbed it all off with Strip-A-Kit [http://people.montana.com/~arl3845/hangar1.html] (wonderful product, that, and talk about a bouquet!)
because the paint ran like my dogs after the mailman. Chastened, I tried again. Whoops, clogged the airbrush and spattered everywhere - and I was saving that Strip-A-kit for the gold-plated Star Wars B-Wing. Ah, well ....
Third time's the charm .... not. It Looked like everything went on OK .... but in daylight, the next day, I 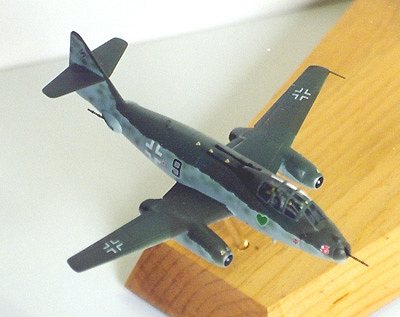 saw the paint had pebbled. Everywhere. I tried sanding it the gravelly parts smooth .... and the paint went from light blue to puke green (RLM 84, or so I've been told). ARGGGGHHHHH!!! With the dregs of the Strip-A-Kit (handy stuff, did I mention that?) I took the model down to bare plastic and tried again. This time, I got the thinning and the spraying mostly right, though the paint pebbled on me in a few key areas -- which I didn't notice until decal time.
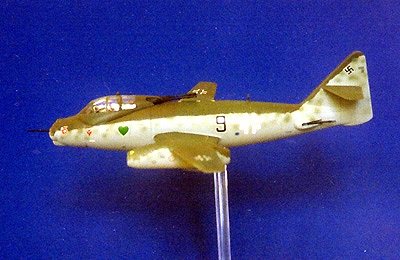
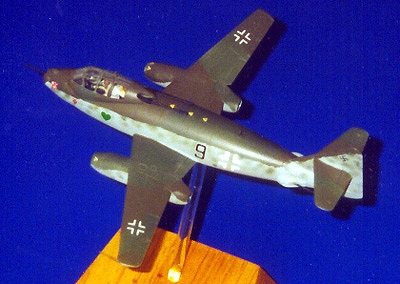
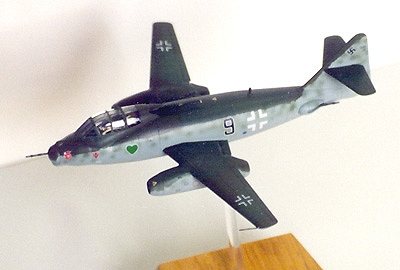
I learned my lesson on the base coat, and switched back to Testors Model Master paints for the uppers. RLM 81 and 82 went on in a splinter pattern on the fuselage spine and wings, with a mottle of RLM 82 along the fuselage sides. In contrast to everything else I did, I think that looks good. I then sprayed three light coats of Future to get a surface
acceptable for decals.
Decals were a combination of kit and an aftermarket set for the Me 109 from Third Group, chosen solely because it looked cool. The 3rd Group decals went on like a dream, conforming to every sandpapery surface with only a Q-Tip moistened with MicroSol wafted in their general vicinity. It took the threat of a hammer to get the Revel decals to lay down, but based on previous experience, that's my own fault for giving them such a rough bed to lie on. Any silvering I turned to my advantage later, when I drybrushed silver here and there to simulate wear ( not too much, as I wanted this plane to look relatively fresh)
Last of all, I gave the whole model a clear flat coat, and a wash of dirty brown/black to bring out the panels and control surfaces a bit. Then, I impaled it on a clear acrylic rod set in a wooden base and declared victory.
|
CONCLUSIONS |
Ok, in all seriousness, it's not a bad kit. If I was less of a klutz, it would have turned out better .... of course. Look out for the engine nacelle/ wing joint, and the canopy and nose cap fit. There's not much you can do about the latter, except to attempt to fair it in with putty or white glue.
Despite the problems I encountered (mostly my own fault, to be fair), I want a rematch. And the local shop has the BV P194 calling my name so seductively .....
Copyright ModelingMadness.com. All rights reserved. No reproduction in part or in whole without express permission from the editor.
Back to Reviews Page 2023