Heller 1/72 Arado Ar-196
| KIT #: | 241 |
| PRICE: | AUD 8.00 |
| DECALS: | Two options |
| REVIEWER: | George Oh |
| NOTES: | Did it this way for fun and for the difference |
| HISTORY |
Conceived in 1936 as a ship-based
utility & spotter aircraft, the two-seater Arado Ar.196 became the standard
floatplane to equip Major Fleet Units of the Kreigsmarine during WWII. Allied
reports advised that it was fast and well-armed. With two wing-mounted 20mm
cannons and a 7.9mm machinegun beside its single engine, the Ar.196 was
better-armed than any other small floatplane. Additional armament included one
or two machineguns for the backseater, and two 50KG/110lb bombs. Even after the
demise of the Kreigsmarine’s large ships and the appearance of better RAF
Coastal Command aircraft (l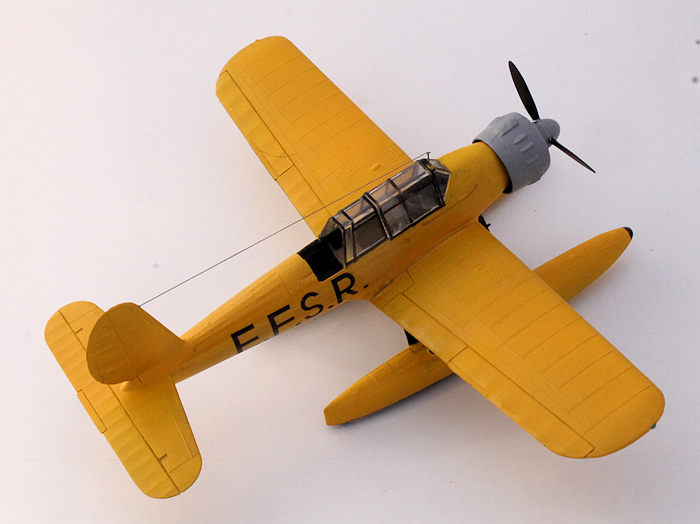 ike
the Mosquito and the Beaufighter), the Ar.196 continued to serve as a coastal
patrol aircraft in the Baltic and Mediterranean Sea.
ike
the Mosquito and the Beaufighter), the Ar.196 continued to serve as a coastal
patrol aircraft in the Baltic and Mediterranean Sea.
Tintin is a comic strip character created by Belgian cartoonist Georges Remi (under the nom d’ plume of Herge). He is a young Belgian reporter who (with his friends & associates) gets involved in many adventures involving spys, organised criminals, explorers &/or revolutionaries in Belgium or foreign countries (or seas). Several different aircraft are depicted in his adventures. Some are generic or fanciful, but many are clearly recognisable, because Remi was big on research and a great artist. In his adventure to the Southern Ocean to find a gigantic meteorite ([Tintin and] The Shooting Star), Tintin beats a rival group to claim possession of the meteorite by parachuting onto it from his ship’s aircraft. Due to Herge’s faithful drawings, it was easy for me to identify that the ship’s aircraft was clearly an Ar.196.
As I enjoy the books, cartoons and movie/s of Tintin, and as I am a model builder, it was no great leap for me to decide to build Tintin’s Ar.196. The fact that we have a local modelling competition approaching (Sep 16), with a theme category of ‘Yellow’, served as additional incentive. Any modelling competition within reach should be supported by we modellers.
| THE KIT |
In 72-scale, Ar.196 kits are produced by Airfix (which I’ve
built), Pavla and Revell. But this is the Heller/Encore kit. It’s raised, but
petit, detail reveals its age. And there are many small parts (especially under
the wings). The cockpit is basic with accurate-looking instrument panels. There
are bomb racks moulded under the wings, but unfortunately, no bombs are
provided. The parts show two omissions. Ther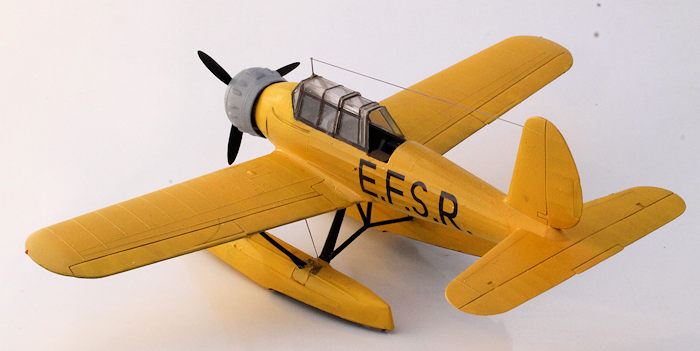 e
is no floor for the gunner, and there is a square hole in the pilot’s floor. The
kit’s strength is the use of large(ish) plates on the tips of the struts to
attach them to the wings, fuselage, and the upper sides of the floats.
e
is no floor for the gunner, and there is a square hole in the pilot’s floor. The
kit’s strength is the use of large(ish) plates on the tips of the struts to
attach them to the wings, fuselage, and the upper sides of the floats.
As this is an old kit, I musta bought it a long time ago, or when I saw it cheap. The kit’s age is also revealed by the inclusion of swastikas on the decal sheet (for how long now have models been politically correct?) The Rumanian crosses are slightly out of register but that’s OK, because the decal-placement instructions show them positioned correctly, but equally out of register. The modeller must paint-on the Rumanian rudder stripes because they aren’t supplied as decals.
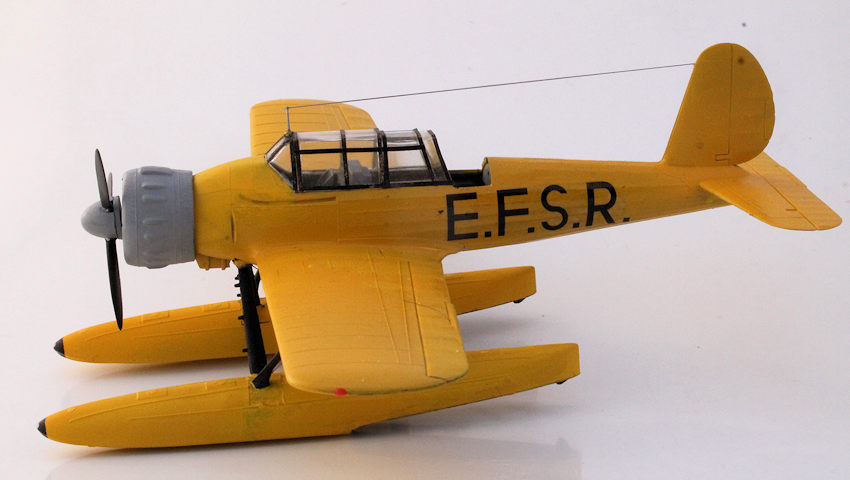
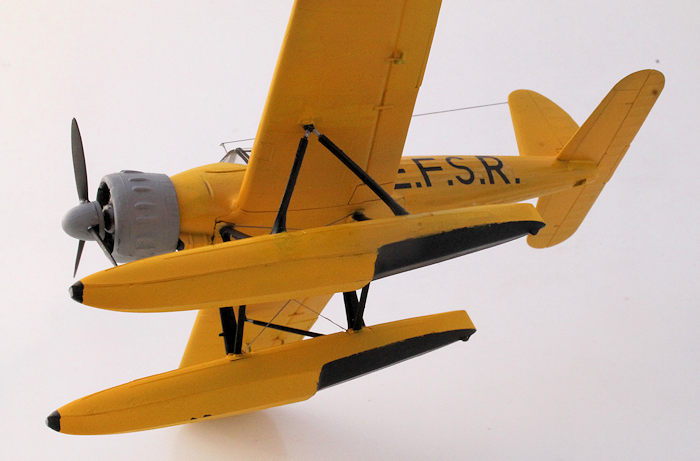
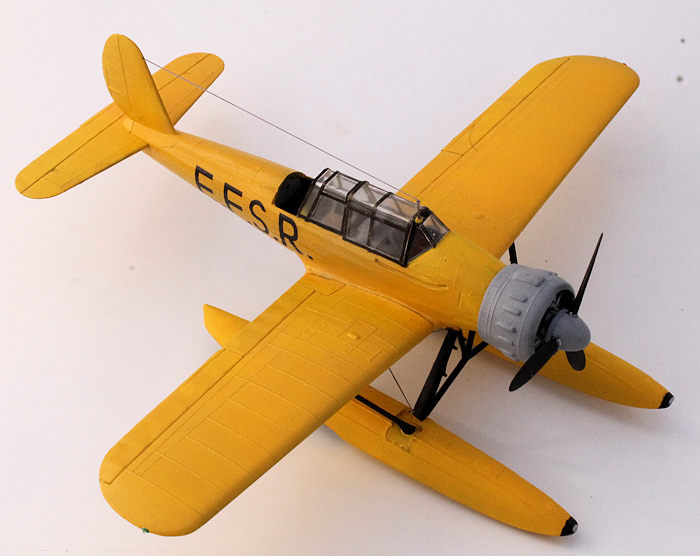
About six-months before the target competition, I excavated this kit from my stash (I knew it was there because my database said so) because I didn’t have a suitable model to suit the ‘Yellow’ theme. Naturally, I first refreshed my recollection of the plane’s details by reacquainting myself with the comic. It has an all-over yellow coat, with a light grey cowling and black underwing struts. It sports the letters FERS along the side of the rear fuselage in black (though in other frames of the comic, the letters are EFSR).
| CONSTRUCTION |
My plan was to paint the fuselage black, mask-off the letters (identical on both sides), then (under advice from another modeller) to undercoat the model with an experimental sable, and finally, a bright yellow top coat. Midway through the build, I would attached the struts to the floats (then rig them) and then to the plane. The clear bits and the cowling would be added last.
The build commenced when I painted
the inside of the fuselage (and its bits) with Citadel Miniatures (CM) dawnstone
(a medium grey) and all needed bits (including the IPs and the fuselage sides)
with CM chaos black. One of the most fiddley and time-consuming aspects of the
build was removing the mould-seams f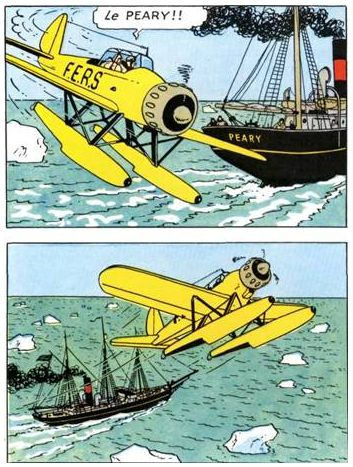 rom
the struts (before I could paint them black). As the paint dried, I hastily
entombed two tubular fishing sinkers into the front half of each float, with
lengths of sprue to keep them there (only moderately successful). I also worked
at cutting/sanding-off the bomb racks, and filling the nose gun trough. The only
detail I added while assembling the cockpit, were seatbelts replicated by strips
of tape. You may question why I left-on the nose gun blister & the wing cannon
blisters. The answer is that there is no logical reason to remove them as
someone (who is intelligent & handsome, like me) would probably realise that
they could store (survival? contraband?) stuff in there, and that the existing
blisters would give them(/me) a bit more room.
rom
the struts (before I could paint them black). As the paint dried, I hastily
entombed two tubular fishing sinkers into the front half of each float, with
lengths of sprue to keep them there (only moderately successful). I also worked
at cutting/sanding-off the bomb racks, and filling the nose gun trough. The only
detail I added while assembling the cockpit, were seatbelts replicated by strips
of tape. You may question why I left-on the nose gun blister & the wing cannon
blisters. The answer is that there is no logical reason to remove them as
someone (who is intelligent & handsome, like me) would probably realise that
they could store (survival? contraband?) stuff in there, and that the existing
blisters would give them(/me) a bit more room.
The only real problem I encountered was the poor fit of the wings. The two upper halves fit great onto the single-piece lower wing, but that assembly wouldn’t fit well against both sides of the fuselage. Or, the two would fit beautifully against the fuselage, but were then askew from the lower piece. Rats! My method was to attach the lower piece under the fuselage, then the upper halves to the fuselage sides at the wing roots, and then to glue them together as best I could. Despite my best efforts, the wing edges still some trimming. If I had more motivation, I would have removed the solid chin-mounted radiator, and replaced it with a more realistic-looking one. (I did on the Airfix kit because it was poorly mounded).
While showing-off my in-progress Arado, another modeller commented that the decals for this aircraft were available in the Comic Designs series from Blue Rider (in England). Obviously, there are other modellers who are as nutty as I am. Being lazy (as well), I ordered two ‘Aircraft of Tintin’ sheets, and continued the build as I waited for them to arrive.
| COLORS & MARKINGS |
The cockpit well was stuffed with a bit of packing sponge before I squirted her with Tamiya XF.4 yellow-green, then XF.3 yellow. The airframe was complete, but the struts and floats were all separate items. With the yellow dry, I re-painted the struts CM chaos black. In truth, I had to redo the struts because I’d forgotten to spray all of the contact pads (and the horn balances) – Double Rats!! The engine bits & cowling were all brush-painted with CM colours.
 The whole
fuselage was brush-painted with Future before applying the decals. It is prudent
to say a few words about the decals and the decal art. “The Shooting Star” comic
book was published first in a Belgian version, then an English version. In the
Belgian version, the expedition was conducted by the FERS (the
Fonds Européen de Recherches Scientifiques)
and the aircraft was painted in three shades of light grey. In the English
version, (ya know that we Australians speak proper English, ‘ay. And the Brits
and the Americans each have a heavily-accented form of it) the expedition was
mounted by the EFSR (the European Foundation for Scientific Research) and the
plane was depicted as I’ve built her. This explains why, in one of the comic’s
panels, the letters are in the wrong order. These initials are emblazoned on the
sides of the rear fuselage, and they are the aircraft’s only markings. The Blue
Rider decal sheets (there are two identical sheets) allows the modeller can
build either version (or both).
The whole
fuselage was brush-painted with Future before applying the decals. It is prudent
to say a few words about the decals and the decal art. “The Shooting Star” comic
book was published first in a Belgian version, then an English version. In the
Belgian version, the expedition was conducted by the FERS (the
Fonds Européen de Recherches Scientifiques)
and the aircraft was painted in three shades of light grey. In the English
version, (ya know that we Australians speak proper English, ‘ay. And the Brits
and the Americans each have a heavily-accented form of it) the expedition was
mounted by the EFSR (the European Foundation for Scientific Research) and the
plane was depicted as I’ve built her. This explains why, in one of the comic’s
panels, the letters are in the wrong order. These initials are emblazoned on the
sides of the rear fuselage, and they are the aircraft’s only markings. The Blue
Rider decal sheets (there are two identical sheets) allows the modeller can
build either version (or both).
The comic shows that the rear half of the undersides of the floats are black, as are their front caps. Additionally, there is a small white (or silver?) highlight on the very-front tip of each float. These are not shown on the Blue Rider decal placement artwork, so it is a good thing that my children have the (English) comic book. I took the book reference as THE definitive reference.
The only kit decals I might have used were the first-aid kit indicators on the outside of the fuselage (on the Luftwaffe aircraft), but they would have had to go over the top of a bit of the lettering – so I didn’t.
| FINAL CONSTRUCTION |
 The three
clear bits were attached, and the framing done with strips of black tape. How
come the Arado didn’t have one more clear piece to close-off the rear canopy?
The engine was attached to the front firewall and the cowling was clamped around
it. Unfortunately, Heller moulded the engine upside-down, so now the cowling is
also upside-down – Triple Rats!!! For a touch of colour, I added dots of tinted
Krystal Kleer to the wingtips to produce the formation lights. I dunno where
they were really located on the real aircraft. There were only little bits to
add now – the horn balances, antenna mast, pitot tube and 3-piece propeller. Add
the antenna wire from a bit of black EZ-Line, and she was done. Nope – under the
fuselage was a post that the ship’s catapult pushed-on to launch the aircraft.
The comic and decal drawings don’t show it, so I lopped it off. Then the mast
snapped in half, so I lopped off the rest and replaced it with a piece of steel
that won’t hold paint – Rats, Rats and Double Rats!!!!
The three
clear bits were attached, and the framing done with strips of black tape. How
come the Arado didn’t have one more clear piece to close-off the rear canopy?
The engine was attached to the front firewall and the cowling was clamped around
it. Unfortunately, Heller moulded the engine upside-down, so now the cowling is
also upside-down – Triple Rats!!! For a touch of colour, I added dots of tinted
Krystal Kleer to the wingtips to produce the formation lights. I dunno where
they were really located on the real aircraft. There were only little bits to
add now – the horn balances, antenna mast, pitot tube and 3-piece propeller. Add
the antenna wire from a bit of black EZ-Line, and she was done. Nope – under the
fuselage was a post that the ship’s catapult pushed-on to launch the aircraft.
The comic and decal drawings don’t show it, so I lopped it off. Then the mast
snapped in half, so I lopped off the rest and replaced it with a piece of steel
that won’t hold paint – Rats, Rats and Double Rats!!!!
| CONCLUSIONS |
This is another build that I can cross-off my bucket list. I dunno how it’ll go in the competition, because that’s still a ways off. The kit itself is successful because it looks like an Ar.196. The Heller offering has both strength and weaknesses when compared to other kits, but I would still recommend it to other modellers (of all ages).
| REFERENCES |
Just the kit instructions, the decal-placement artwork and the comic-book.
13 September 2016
Copyright ModelingMadness.com
If you would like your product reviewed fairly and fairly quickly, please contact the editor or see other details in the Note to Contributors.