
Special Hobby 1/72 FW-58 'Weihe'
| KIT #: | SH 72090 |
| PRICE: | $30.00 |
| DECALS: | Three options |
| REVIEWER: | Torben Plesberg |
| NOTES: |
Short run kit |
| HISTORY |
The German Harrier of the thirties has little to do with the famous cold war fighter carrying the same name. The Fw-58 was designed by the famous German aircraft designer Kurt Tank, who is best known for his Fw-190 Würger fighter plane. One could say that the Weihe was for the Germans, what the Anson was for the British. A light twin engine training and transport aircraft for six passengers.
 Kurt
Tank’s aircraft was a tubular steel construction covered with fabric and steel,
was a low wing monoplane with the wings braced and the tail plane well ahead of
the fin and braced, too. It was powered by two Argus inverted V-8 engines of 240
HP – the same engine used by the famous Fieseler Fi-156 Storch. It was the first
German training aircraft with a retractable landing gear and it was a very
sturdy plane capable of taking off and landing almost anywhere.
Kurt
Tank’s aircraft was a tubular steel construction covered with fabric and steel,
was a low wing monoplane with the wings braced and the tail plane well ahead of
the fin and braced, too. It was powered by two Argus inverted V-8 engines of 240
HP – the same engine used by the famous Fieseler Fi-156 Storch. It was the first
German training aircraft with a retractable landing gear and it was a very
sturdy plane capable of taking off and landing almost anywhere.
Kurt Tank used a Weihe as his personal transport plane throughout the war, the D-ALEX. Once upon a time his plane was attacked by a couple of Spitfires, but Tank managed to out manoeuvre the Spitfires and succeeded in a safe landing in spite of 57 bullet holes. However, the plane was easily repaired with some sort of sticking plasters, and in Luftwaffe service the plane earned its nick-name: the “Leukoplastbomber”.
The Weihe was a very reliable plane and was used almost in every theatre of the war. It was used as a trainer, a weather plane and passenger aircraft. It was built in substantial numbers, actually close to 4500 aircraft. This figure makes the Weihe the second most built Focke Wulf aircraft, surpassed only by the Fw-190 series fighter planes. Out of the 4500 aircraft built only one survives to this day. A Brazilian licence-built Weihe can be seen in the Brazilian AF Museum. In Norway they found a Weihe in a fjord, but this plane needs a complete restoration, before it can be exhibited.
After the war almost 1100 Luftwaffe aircraft were left on Danish airfields. Almost all of these aircraft were destroyed by British troops – a hand grenade in the cockpit, and the wrecks were sold for scrapping. I have a couple of photos from 1945 taken at Fliegerhorst Vaerloese near Copenhagen showing one of the destroyed German aircraft, an armed version of the Focke Wulf Weihe and with my mother standing on the wing leaning against the wing strut. I guess these pictures are the reason for my interest in building a model of the old German Harrier! However, I wanted to model a Swedish civil edition from “Kartverket”, the Swedish Cartographical Department. The Weihe served until 1957, when the type was faced out and the new mapping aircraft chosen was the NC 701 Martinet.
Rikets Almänna Kartverk (RAK =
National Public Map Office) bought two Weihe aircraft in 1938 (SE-KAA) and 1940
(SE-KAB) from Germany. The Weihe had the optimal size for mapping photography
and a s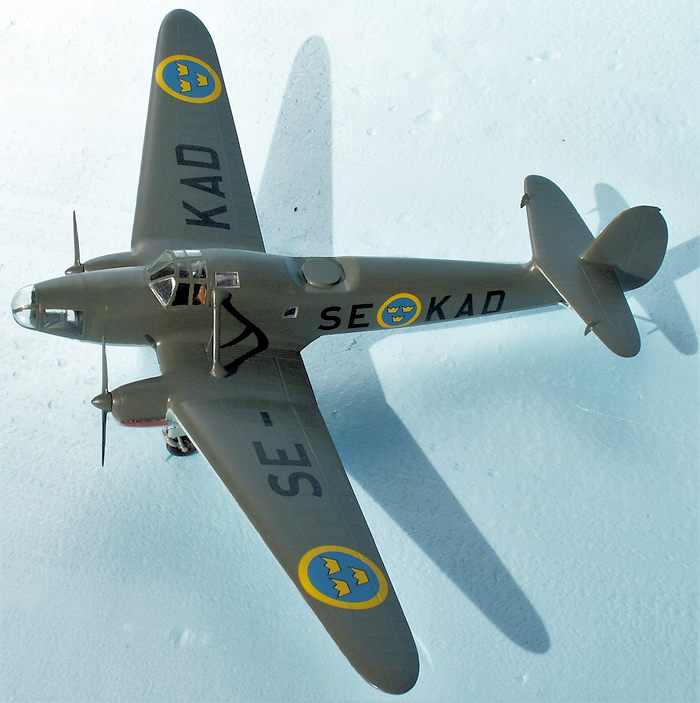 uitable
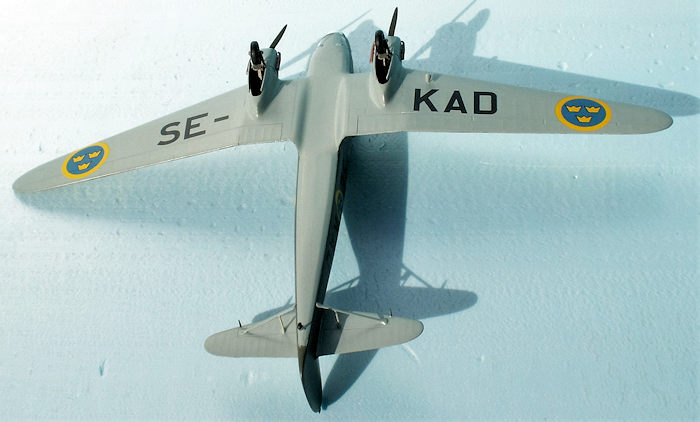
slow speed to secure sharp images. The Swedish designation was P 6. In spite of
the civil registration, the aircraft also had the three crowns roundels of the
Swedish AF, because the aircraft were operated by Swedish AF personnel. The
camera equipment was a Zeiss Rb 20/30. The crew was normally a pilot and a
photographer, but sometimes a mechanic joined the flight.
uitable
slow speed to secure sharp images. The Swedish designation was P 6. In spite of
the civil registration, the aircraft also had the three crowns roundels of the
Swedish AF, because the aircraft were operated by Swedish AF personnel. The
camera equipment was a Zeiss Rb 20/30. The crew was normally a pilot and a
photographer, but sometimes a mechanic joined the flight.
The SE-KAA crashed unfortunately in mid-1943, but without casualties. However, the aircraft was written off. There was now an urgent need for two new aircraft, since the mapping activities increased because of the war. The new aircraft were approved by the authorities, and the payment were more ball bearings needed by the German industry. The Swedish SKF factory in Schweinfurt had suffered severely after an American bombing attack. Sweden got two brand new Fw 58 C in exchange, and the aircraft were registered SE-KAC and SE-KAD. The SE-KAD was in service until 1957 and is the subject of my model.
For some obvious reason the aircraft was not preserved for a museum. The Swedes are normally very keen on preserving old aircraft, and the Air Force museum has a remarkable collection of aircraft having served with the Flygvapnet. The reason might very well have been that this aircraft was an evidence of the Swedish help to keep the German war machine going by supplying the vital ball bearings. Another evidence was the supply of iron-ore from Kiruna. It is a well-known fact that the Swedes preferred Hitler to Stalin. Communism was feared by the Swedish king, because of the cruel murder of the czar and his family, and he had a strong influence on Swedish foreign policy. Sweden was officially a neutral state during WWII.
| THE KIT |
The kit comes in a nice box with a
fine picture of the SE-KAD on the top. There are three sprues in medium grey
styrene, a fret of photo-etched parts and a small bag with resin parts. The
decal sheet is first class quality and with three options: A Luftwaffe machine,
a machine of the Dutch AF and SE-KAD of the RAK. The instructions is a booklet
of 10 A5 pages. The construction of the model is illustrated in eleven steps, a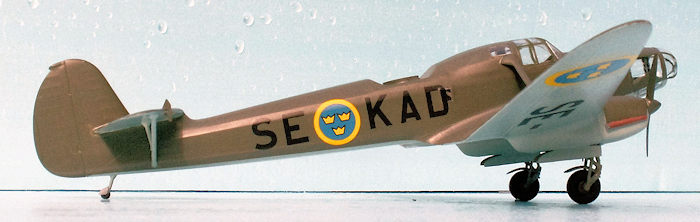 nd
the color reference is Gunze. There are three four-view drawings of the aircraft
options, showing the color schemes and the position of the decals. A short story
of the aircraft and data in Czech and English is on the front page. According to
the data, the span is correct to 1/72 scale, however, the length is 7 mm too
long.
nd
the color reference is Gunze. There are three four-view drawings of the aircraft
options, showing the color schemes and the position of the decals. A short story
of the aircraft and data in Czech and English is on the front page. According to
the data, the span is correct to 1/72 scale, however, the length is 7 mm too
long.
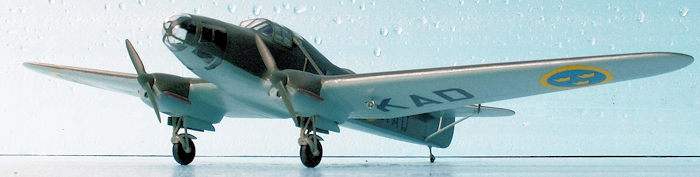
It is a short run kit, but the quality is OK and the fit is acceptable. I did only use a few of the photo-etched parts, but it is possible to make a detailed interior of the cockpit, if your interests are for it. The wheel doors are closed for gear up. If you want gear down, you must cut the doors from each other. The fuselage is without the recess for the gunner’s position. There is a special part for the recessed fuselage and you must cut or mill away for an opening if you want this option. The undercarriage is rather intricate and seems too weak – a metal undercarriage might be a good choice.
The front canopy has a bad fit to the fuselage and requires some effort. The pins of the exhaust pipes fit badly or not at all to the small holes in the nacelles. Some precision drilling is required. The “shelf” protruding into the front canopy has to be sanded smaller, or the canopy cannot be put in place.
| CONSTRUCTION |
If you follow the instructions, it is mostly rather simple to put the model together, with an important exception: The undercarriage legs. Some of the parts are very thin –especially the resin “V”. However, if you look carefully the two ends of the “V” slope in a certain angle, and this is essential for the construction. However, it is a bad thing that a crucial part has to be assembled with super glue, because plastic cement does not glue a resin part! The assembly of the undercarriage legs is rather difficult and the instructions are not good enough for this procedure!
 I
always put a small brass tube as bearing for the propeller shaft into the front
of the nacelles to secure a free turning of the propellers. The inner gauge of
the tube should be one tenth of one mm larger than the propeller shaft. The
shafts were 1.8 mm and hence the tube hole should be 1.9 mm. The bearing should
be as long as possible but with room for the stop ring. The bearings should
protrude between one tenth and one fifth of one mm from the nacelle fronts, just
to secure a free running of the propeller.
I
always put a small brass tube as bearing for the propeller shaft into the front
of the nacelles to secure a free turning of the propellers. The inner gauge of
the tube should be one tenth of one mm larger than the propeller shaft. The
shafts were 1.8 mm and hence the tube hole should be 1.9 mm. The bearing should
be as long as possible but with room for the stop ring. The bearings should
protrude between one tenth and one fifth of one mm from the nacelle fronts, just
to secure a free running of the propeller.
I milled the fuselage piece away to make place for the part for the gunner’s position. The important thing when milling is that the work-piece is securely locked in a vice. It may take some time to do this. However, the result will be much better and exactly perpendicular, which is not the case if you use a knife. But of course a knife will do + some filing and sanding to get the opening correct and perpendicular. After being glued in place the part needed some filling and sanding to fit exactly to the fuselage. A circular resin part closed the opening, which was not relevant for the SE-KAD.
I am not a fan of photo-etched parts. They are suitable for instrument panels and seat belts, but the smaller parts may be almost impossible to handle – in the least for me! That is why I do not use them. They are also only two-dimensional and not able to simulate three-dimensional items. If details get too small, it is better to omit them – or choose a larger scale, i.e. 1/32 or bigger.
Most of the resin parts were not relevant for the SE-KAD. Some of them were very thin, for example the two small parts for the front of the tail plane. They were impossible for me to glue in place with super glue. Therefore, I replaced them by new ones made of 0.3 mm plastic card. The greatest problem is to handle such very small items. A flat nose plier did the job, and a circular needle file made the opening for the front of the tail plane. They were in fact the very last items to be glued on the model.
To make the transparent parts –
the two canopies – fit properly was a major job. The front fuselage was not
symmetrical, the BB side was too high, and too wide. It is an option to make the
parts fit before they are glued in place. However, I have a lot of experience
telling me, that if you are gluing transparent parts in place with clear
varnish, they do not always harden up exactly where you placed it. I prefer to
glue the transparencies in place first. Then you know exactly where they are,
and you can make the necessary
 filing,
filling and sanding to make the fit, if not perfect, then in the least
acceptable. During this procedure it is a good thing not to touch the panes with
the file or the sanding paper. Otherwise you get an extra job removing the
scratches and polishing the pane clear again with tooth paste.
filing,
filling and sanding to make the fit, if not perfect, then in the least
acceptable. During this procedure it is a good thing not to touch the panes with
the file or the sanding paper. Otherwise you get an extra job removing the
scratches and polishing the pane clear again with tooth paste.
There were no antennas or other small details to make, with the exception of the landing light. This was a tiny resin part of the kit. However, it was impossible to glue it in place with super glue. The area of the holder was too small: 0.3 mm x 1 mm. I made a new landing light from a piece of sprue –turned in the lathe. This looked more correct compared to the photos in Karlström’s Flygplansritningar vol. 6. I faced the front with a 2.5 mm gauge disc punched from vapor aluminum-tape. The holder was a small piece of 0.5 mm gauge brass wire, and I drilled a 0.5 mm hole in the wing. No glue was necessary to put the landing light in place. My scratch-built landing light looked right, the resin part of the kit did not!
One of the wing struts did not fit properly to the wing and it had to be sanded a lot before it could be glued in place. The struts for the tail plane had a much better fit. The very small struts for the struts all had to be sanded in the ends to get the right slope. They were not easy to glue correct in place.
| COLORS & MARKINGS |
The color scheme is very simple: the upper sides, including propeller blades and spinners, are dark green, Model Master RLM 71. The interior, the wheel wells, the inner side of the doors and undercarriage legs are grey, Model Master RLM 02. The under sides are light grey-blue, Model Master RLM 65. All colors are water- based acryl. This was the first time I used acryl colors for a model, and I was very pleased with the result. This meant that I might do the painting in the house – no toxic fumes to annoy the Mrs.! The finish seemed smooth enough for decaling, no clear gloss varnish necessary first. The tires are flat black, Model Master flat black FS37038, and the exhaust pipes are brick-red, HB no 70.
The decals were first class and easy to apply. The decals got a protective layer of HB Satin Cote. The finish of the Satin Cote is the same as that of the acryl colors. No need for an all over layer of Satin Cote.
| CONCLUSIONS |
Modelling a Harrier does not necessarily mean a VTOL jet fighter. Focke Wulf used names of birds for all of their aircraft. Besides the Würger, the Stieglitz is also a well-known aircraft built as standard trainer for the Luftwaffe. I found it refreshing to model this very special aircraft, which also appeared on the Danish civil register before the war. The kit is not an easy one and certainly not for beginners. However, if you have some experience, it is possible to make a decent model of an outstanding aircraft designed by Kurt Tank himself. The kit is recommended warmly.
| REFERENCES |
Wikipedia : Focke Wulf Fw-58 Weihe
Björn Karlström : Flygplansritningar vol.6 (Swedish military helicopters, gliders and test aircraft, and army aircraft covering 1926-1991, drawings to scale 1/72 and 1/50 including photos and data). Allt om Hobby AB, Box 90133, S-120 21 Stockholm, Sweden. ISBN 91-85496-39-1
Heinz J. Nowarra: The Focke wulf 190. A famous German fighter. Harleyford Publications Ltd. Letchworth, Herts, -England 1965. Library of Congress Card No. 65-15546
If you would like your product reviewed fairly and fairly quickly, please contact the editor or see other details in the Note to Contributors.