Revell AG 1/72 FW-200C-4 'Condor'
|
KIT # |
4312 |
|
PRICE: |
@$13.00 |
|
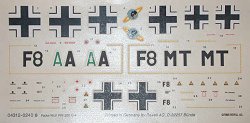
DECALS: |
Two KG 40 aircraft |
|
REVIEWER: |
|
|
NOTES: |
|
HISTORY |
Now this is an OLD kit. It was in the first Revell catalogue I had when a very little child, and my dad built it for me when I was about eight or nine, the kit being a bit too expensive to be wasted on my then, er, skills. I just loved this particular plane as the kit had lots of working features and I frequently flew successful bombing and strafing runs with it. In all, it looked like a really big and capable and formidably-armed bomber to me.
 Now I´m a little
older and better informed, and I know that Germany never had a really capable
4-engined bomber, and that the Fw 200, albeit looking formidable, was little
more than an airliner pressed into military service. The structural problems
were so severe at least in the earlier part of the series that quite a many a/c
broke their backs on landing.
Now I´m a little
older and better informed, and I know that Germany never had a really capable
4-engined bomber, and that the Fw 200, albeit looking formidable, was little
more than an airliner pressed into military service. The structural problems
were so severe at least in the earlier part of the series that quite a many a/c
broke their backs on landing.
The Fw 200, constructed by Focke-Wulfs head designer Kurt Tank (who also developed the Fw 190) started its life as a record-breaking transatlantic airliner in the late 1930ies, and soon was used by the military in both the freighter and personnel transport role (Hitler had a personal Fw 200 for his travels), but mostly as a long-range reconnaissance and anti – shipping plane. Fw 200´s did long range patrols from occupied France to Norway and vice versa, reporting convoys to the Kriegsmarine U-boats and attacking ships with their own armament. This was fairly successful until the allies equipped their convoys with ships that carried fighter planes.
At some point the model was trashed, as all my then stuff, and I was delighted when the kit was re-issued in the 90ies, now with „Super decals“; I bought one and let it mature for another 6 years until I finally tackled it in one of those spur-of-the-moment decisions.
|
THE KIT |
 The kit is rated skill level 3
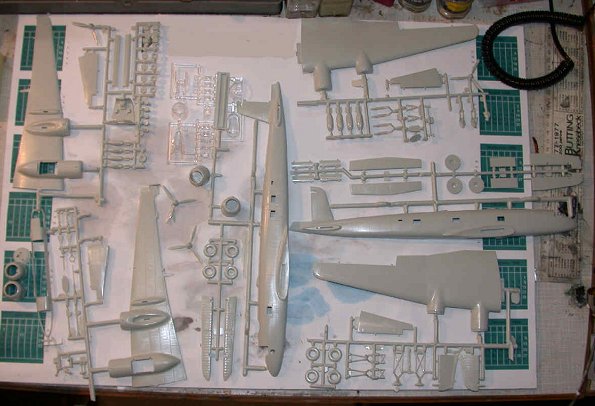
out of 5 by Revell and comprises of 120 individual parts, with quite a number of
rather brittle transparent parts for the various windows, the turret and
observing cupolas. T
The kit is rated skill level 3
out of 5 by Revell and comprises of 120 individual parts, with quite a number of
rather brittle transparent parts for the various windows, the turret and
observing cupolas. T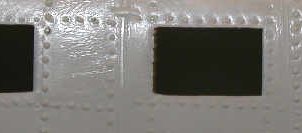 he molds
must have suffered quite a bit over the decades, and so there´s a lot of flash
and hence some weird-looking areas, e.g. the wing tips. Being a typical child of
its period, the kit has working control surfaces, movable tyres, a movable
turret and you can pose the bomb bay open. None of it is, of course, molded in
the current quality anyway. Moreover, the whole plane is pocked with rivets of a
size you´d expect in a tank or an early battleship. But that´s how it used to be
...
he molds
must have suffered quite a bit over the decades, and so there´s a lot of flash
and hence some weird-looking areas, e.g. the wing tips. Being a typical child of
its period, the kit has working control surfaces, movable tyres, a movable
turret and you can pose the bomb bay open. None of it is, of course, molded in
the current quality anyway. Moreover, the whole plane is pocked with rivets of a
size you´d expect in a tank or an early battleship. But that´s how it used to be
...
|
CONSTRUCTION |
 I decided not to sand down the
rivets and rescribe the whole thing, as I definitely wanted and needed a quick
build. So I progressed rather straightforward and on numerous fronts and kept
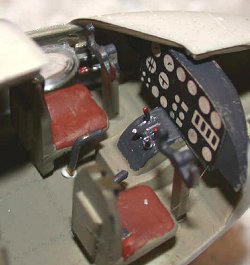
looking for references to a minimum, even for my standards. I assembled the
cockpit, and it being a rather basic affair, I decided to bring some life into
the sidewalls with some bits of evergreen, made kinds of seat belts of aluminum
foil – you don´t see it afterwards anyway, the cockpit windows being small and
the plastic thick. The interior was sprayed in RLM 02, as was also the landing
gear, the wheel wells and the insides of the flaps. I also tackled the engines
(Testor´s steel metalizer plus some drybrushing), the wheels (Testor´s rubber),
the landing gears, the wings and the stabilizers as subassemblies. I decided to
glue most of the control surfaces into place and did so. The gun barrels were
hollowed out a bit at the tip with a hot instrument. I glued the various windows
in and masked them with Humbrol Maskol. In that way, I had a complete fuselage
pretty soon. The seam along the fuselage center line already indicated some
work.
I decided not to sand down the
rivets and rescribe the whole thing, as I definitely wanted and needed a quick
build. So I progressed rather straightforward and on numerous fronts and kept
looking for references to a minimum, even for my standards. I assembled the
cockpit, and it being a rather basic affair, I decided to bring some life into
the sidewalls with some bits of evergreen, made kinds of seat belts of aluminum
foil – you don´t see it afterwards anyway, the cockpit windows being small and
the plastic thick. The interior was sprayed in RLM 02, as was also the landing
gear, the wheel wells and the insides of the flaps. I also tackled the engines
(Testor´s steel metalizer plus some drybrushing), the wheels (Testor´s rubber),
the landing gears, the wings and the stabilizers as subassemblies. I decided to
glue most of the control surfaces into place and did so. The gun barrels were
hollowed out a bit at the tip with a hot instrument. I glued the various windows
in and masked them with Humbrol Maskol. In that way, I had a complete fuselage
pretty soon. The seam along the fuselage center line already indicated some
work.
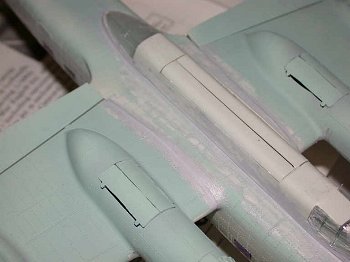
Upon mounting
the wings, I realized the full extent of the necessary filling and sanding.
 There were remarkable gaps
around the wingroots (I couldn´t reduce them by dryfitting and sanding), around
the nacelles and around the bomb bay. So I used liberal amounts of Tamiya putty
which I immediately smoothened with nail polish remover, a method that worked
very nice and reduced the amount of sanding to be done. I of course masked all
the clear parts before puttying in order not to blind them. A little note: When
I went to the store to get nail polish remover, I found out they had two sorts.
The cheaper one boasted: „Without acetone“, the more
There were remarkable gaps
around the wingroots (I couldn´t reduce them by dryfitting and sanding), around
the nacelles and around the bomb bay. So I used liberal amounts of Tamiya putty
which I immediately smoothened with nail polish remover, a method that worked
very nice and reduced the amount of sanding to be done. I of course masked all
the clear parts before puttying in order not to blind them. A little note: When
I went to the store to get nail polish remover, I found out they had two sorts.
The cheaper one boasted: „Without acetone“, the more
 expensive one had it. First I
thought: Wow, that´s just so ecological, but how on earth will they get
the nail polish off without a proper solvent? I then found out that the acetone
had been replaced in the cheaper product not by something environmentally
friendly, but by ethyl acetate, which is much more aggressive and would melt
your plastic right away. So I used the more expensive brand – and it´s even
„almond fragrance“ ;-)
expensive one had it. First I
thought: Wow, that´s just so ecological, but how on earth will they get
the nail polish off without a proper solvent? I then found out that the acetone
had been replaced in the cheaper product not by something environmentally
friendly, but by ethyl acetate, which is much more aggressive and would melt
your plastic right away. So I used the more expensive brand – and it´s even
„almond fragrance“ ;-)
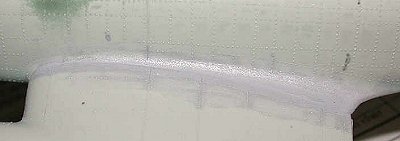
Fit of the clear parts was so.so, and I had to chop away quite a lot around the windscreen, with subsequent sanding and polishing and futuring.
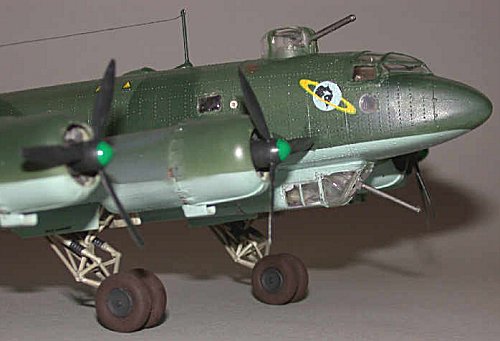
Well, then it was sanding and filling and so on, until I was sufficiently satisfied. Meanwhile, the landing gears were ready, the props were cleared up and sprayed Revell 9 (anthracite) with green spinners (I used an office punch and post-it´s for the mask).
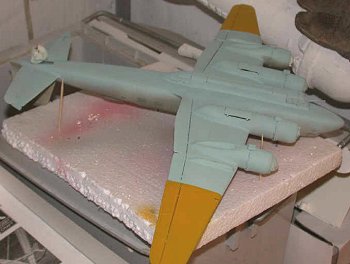
Finally, I mounted the engines to the wings, stuffed their fronts with wet kleenex and started painting. I first sprayed the entire plane RLM 02 as a primer, detected flaws and cleaned them up for several times. When that was done, I sprayed the lower half RLM 65 with yellow wing tips, waited to dry and masked the undersides using tape, Parafilm, Maskol and wet kleenex to achieve a hard demarcation I could trust. The model was placed on three toothpicks that went into the inner bomb mounts and the tail gear well; the toothpicks sat in a piece of styrofoam. So I could move the plane without touching it.
|
CAMOUFLAGE & MARKINGS |
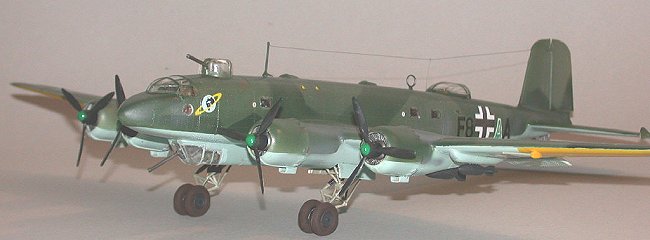
The camo was
sprayed like this: I first sprayed the entire upper portion of the plane RLM,
er, Revell 39 , well, the lighter of the two greens. BTW: Although I might face
stiff measures by RLM buffs, I must confess I´ve set my mind „do it as it looks
right“. Some months ago, I chanced to inspect and photograph two plane models a
German bomber pilot had made during
 the war and painted RLM
70/71/65 from squadron stocks. The pics plus a writeup have been published by
Martin Waligorski in his IPMS Stockholm webzine (http://ipmsstockholm.org/magazine/2002/11/stuff_eng_profile_luftwaffe_bomber_camo.htm
) We found out that there was hardly any difference between the two tones of the
camo, and I for my part am now convinced that this results from an aging process
of the paint. All pics you see from the war show that there was a marked
difference between the two tones, and hey folks, being a german myself, I just
can´t believe german engineers or soldiers would figure out complicated camo
schemes with meticulous technical drawings on how to paint the planes and then
use nearly the same color. So ein Unsinn, meine Herren!
the war and painted RLM
70/71/65 from squadron stocks. The pics plus a writeup have been published by
Martin Waligorski in his IPMS Stockholm webzine (http://ipmsstockholm.org/magazine/2002/11/stuff_eng_profile_luftwaffe_bomber_camo.htm
) We found out that there was hardly any difference between the two tones of the
camo, and I for my part am now convinced that this results from an aging process
of the paint. All pics you see from the war show that there was a marked
difference between the two tones, and hey folks, being a german myself, I just
can´t believe german engineers or soldiers would figure out complicated camo
schemes with meticulous technical drawings on how to paint the planes and then
use nearly the same color. So ein Unsinn, meine Herren!
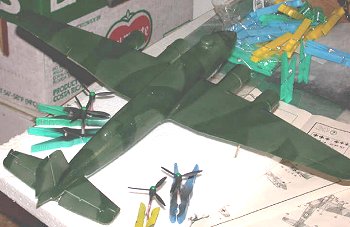
Well,
rant ended. I waited for a while for the first green to dry, and then brought
out the painting instructions and a pile of post-it notes. I had a very happy
hour (not more) of cutting them to size and shape, and then spraying the camo
Revell 40. It was just a breeze, the most satisfying part of the whole project.
I then toyed a little with different hues of green and tried to make the paint
job a little more lively, yet not too theatrical, maintaining the demarcations
between the two greens but
 adding
shading to both. Then I was able to remove the mask from the underside and
sprayed the whole thing as glossy as possible in preparation for the decals.
adding
shading to both. Then I was able to remove the mask from the underside and
sprayed the whole thing as glossy as possible in preparation for the decals.
Next came the decals; well, on the box is a yellow triangle stating „with super decals“. Perhaps they meant with silver decals. Anyway, they´re those typical annoying RoG decals, matte, not quite thin and more than eager to give you trouble. I finally found out the correct approach: 1. Achieve a high gloss before doing anything else 2. Use Micro Set (It worked surprisingly stronger with them than Micro Sol) liberally 3. Watch out for the little devils and give them a thorough knock on the head using q-tips or the like, or they´ll curl up like snakes, just longing to leave the surface. 4. Repeat this treatment some times until you´re satisfied. Slice open any bubbles with a fresh X-acto knife and add Micro Set. It won´t be a surprise to you that the yellow dotted lines on the wings were particularly, er interesting to work with. But on the whole, the decals help the kit up a lot.
|
FINAL CONSTRUCTION |
When that was
done, I shot another couple of gloss coats plus a number of matte coats plus a
number of mistings with different matte greens in order to achieve the satin
glossy yet somehow lively surface I had had in mind. After looking at what few
pics I found, weathering was kept to a minimum; I just added some exhaust
staining, a little subtle postshading and
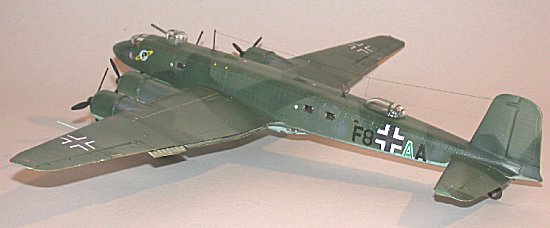 some wear marks using silver. Then
came the unmasking, plus some retouching work, adding the fiddly bits, putting
the plane finally on its feet, and in the end adding the aerials from thin
stretched black sprue.
some wear marks using silver. Then
came the unmasking, plus some retouching work, adding the fiddly bits, putting
the plane finally on its feet, and in the end adding the aerials from thin
stretched black sprue.
All this took about two weeks, a record for me, and it was satisfying when I completed work on this model right after Xmas. Well, this is a kit of many possibilities, especially by all you guys out there that have and spend much more time and brains and skills on the kit than I did. If you do some of the following, you can make a real show-.stopper of it: 1. Get rid of those /&%)/& rivets and rescribe. 2. Rebuild the turret, detail the guns. 3. Open access door and build at least a part interior. 4. Replace D/F loop and pitot tube. Of course, there´s no end to what can be done, those are just the things that came to my mind.
|
CONCLUSIONS |
For me, it has become what it should be: A quick build of a cool-looking plane, and a good opportunity for playing with the „splinter“ camo scheme. I had fun doing it, and that´s all that counts for me. And my dad liked it, too. Although it sure is nothing near the magic carpet he built for me back then...
|
REFERENCES |
http://www.214th.com/ww2/germany/fw200/
http://www.warbirdsresourcegroup.org/LRG/condor.html
http://www.kafejo.com/aviado/fw200.htm
Copyright ModelingMadness.com. All rights reserved. No reproduction in part or in whole without express permission.
If you would like your product reviewed fairly and quickly, please contact the editor or see other details in the Note to Contributors.