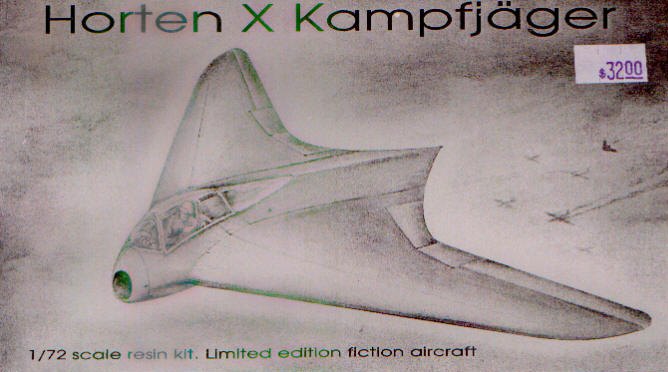
Sharkit 1/72 Horten Ho-X
|
KIT # |
|
|
PRICE: |
$32.50 |
|
DECALS: |
none |
|
REVIEW : |
|
|
NOTES: |
Basic Resin Kit |
|
HISTORY |
In the waning hours of the mighty Third Reich, two brothers designed all wing aircraft that, despite the outcome of the war, would serve into the 21st Century. The Horten IX or 2-229 aircraft had proven the idea that an all wing aircraft was a superior design to the conventional aircraft then being used. An American designer also realized this idea of an all wing aircraft by the name of Jack Northrop. The fruition of his dream was the B-2 Stealth bomber, the Horten's dream was not to be, although numerous designs and some actual aircraft were built in Argentina after the war.
|
THE KIT |
 To be honest with you all, this kit is more a fanciful idea
than an actual paper project brought to life. Based on the Ho-229 with some
tweaking by Sharkit, we have what could have been the single engine version of
the actual Ho-229. Owing to that fact, we go into a more detailed look at this
neat little resin kit. The wings and main body of the kit are very well cast in
the usual tan resin, some small surface pitting was noticed, but nothing a
little 400 grit paper would solve. Two clear thin vac canopies are included
along with some small resin bits that make up the wheels, wheel covers and
cockpit seat. The interior as well as the main gear legs must be scratch built
by the builder. I simply used the gear from the PM/Revell Ta-153 kit, it's a
good bet to use the nose wheel from this kit as the one supplied in the Sharkit
kit is a bit pitted and would require much rework to get into shape. Also, an
engine cover for the underside was supplied in a white vacuform plastic, this
once fitted covers the resin engine. No decals are included but finding them was
not a problem in the spares parts file.
To be honest with you all, this kit is more a fanciful idea
than an actual paper project brought to life. Based on the Ho-229 with some
tweaking by Sharkit, we have what could have been the single engine version of
the actual Ho-229. Owing to that fact, we go into a more detailed look at this
neat little resin kit. The wings and main body of the kit are very well cast in
the usual tan resin, some small surface pitting was noticed, but nothing a
little 400 grit paper would solve. Two clear thin vac canopies are included
along with some small resin bits that make up the wheels, wheel covers and
cockpit seat. The interior as well as the main gear legs must be scratch built
by the builder. I simply used the gear from the PM/Revell Ta-153 kit, it's a
good bet to use the nose wheel from this kit as the one supplied in the Sharkit
kit is a bit pitted and would require much rework to get into shape. Also, an
engine cover for the underside was supplied in a white vacuform plastic, this
once fitted covers the resin engine. No decals are included but finding them was
not a problem in the spares parts file.
|
CONSTRUCTION |
First order of business, clean up the resin wings, a simple procedure, sand off the minor molding blocks and fill in some leading and trailing edge pits and cracks. I feel Mr. Wagner at Sharkit does a very fine job of casting his parts and has a different approach to the engineering aspect of his kits. Attach the wings to the main body, and attach the separate nose/intake piece, which makes up the cockpit tub. The cockpit really needs some help, and I based mine on the Ho-229 with tubular braces, sidewall controls and a reworked Fw-190 control panel. It looks busy enough to pass inspection by the Mag-light group at my local hobby shows.
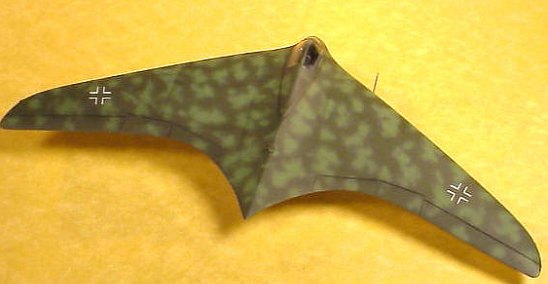
 With the landing gear dilemma taken care of, I could
concentrate on the smoothing all the resin pieces into looking like the one
piece structure that is typical of a Horten wing. The best putty for this and
any job is a two part polyester filler, available at any local auto enthusiasts
store, I believe Bondo falls into that category, hey, it works! The wing will
fly.
With the landing gear dilemma taken care of, I could
concentrate on the smoothing all the resin pieces into looking like the one
piece structure that is typical of a Horten wing. The best putty for this and
any job is a two part polyester filler, available at any local auto enthusiasts
store, I believe Bondo falls into that category, hey, it works! The wing will
fly.
The canopy attachment could be approached in two ways, one is to trim it and attach it with white glue or similar glue. The other would be to keep a fair amount of plastic around the actual canopy and smooth in onto the wing, this was the way I did it and it looks a lot better than the first choice. The advantages of this out weight the usual method in that the smooth lines are not interrupted and the interior is airtight, keeping the dust and dirt out. The canopy was masked using Bare Metal foil and the fun begins.
|
PAINT & DECALS |
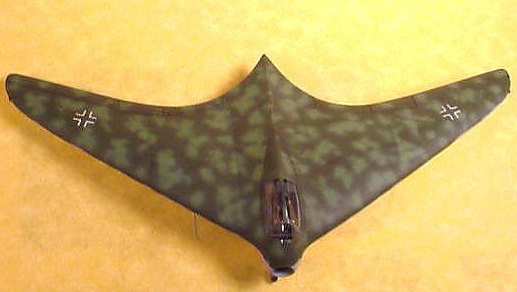
With Xtra-color RLM 83 and 82 in hand, the upper surface was
hand mottled; the underside was given a coat of RLM 76. The engraved surface
details are picked out using various pencils and inks seeing that these are the
only areas engraved. For the first time I used the new Eduard Paint masks for
national insignia, and I must say it sure beats the tar out of preparing for and
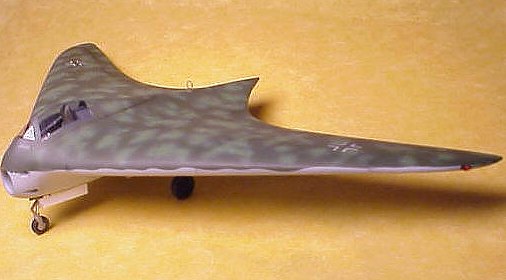
using the slide on decal system. They look, well, painted on! The fiddley details such as landing gear and gear doors are
processed, poised in the ready to take off position. That's about all that's
needed to get this kit onto the display shelve. It may seem about as daunting a
task as say doing a vacuform, but resin kits are not that difficult. 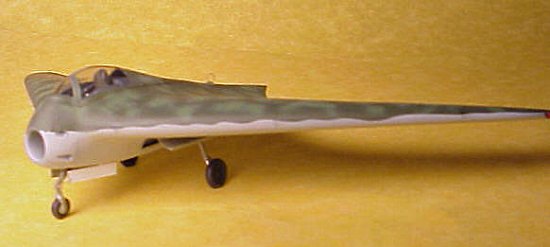
|
CONCLUSIONS |
I would rate this kit a 7 for ease of assembly and molding quality. The fact some small details must be scratch built would probably put this kit into the advanced modeler arena. It looks great next to my Ho-229 and Ho-XVIII and after all, the wing is the future and it will fly!
Copyright ModelingMadness.com. All rights reserved. No reproduction in part or in whole without express permission from the editor.
If you would like your product reviewed fairly and fairly quickly, pleasecontact the editor or see other details in the Note to Contributors.