| KIT #: | FG 2 |
| PRICE: | $60.00 SRP |
| DECALS: | 2 Options |
| REVIEWER: | Mark Hiott |
| NOTES: | Kit out of production |
| HISTORY |
| KIT #: | FG 2 |
| PRICE: | $60.00 SRP |
| DECALS: | 2 Options |
| REVIEWER: | Mark Hiott |
| NOTES: | Kit out of production |
| HISTORY |
The development of the 312T began in 1974, as it became apparent that problems with the handling of the then current 312B3 chassis could not be solved, and a radical re-think was required. As with all Ferrari F1 cars of this era, the design of the new model was led by Mauro Forghieri.
The car was powered by the ultra reliable flat-12 engine
which gave around 510 bhp. The car also featured a large number of new design
features, the most interesting of which was the transverse-mounted gearbox – the
T in the car's name stood for Trasversale.
The gearbox design allowed it to be
 positioned
ahead of the rear axle, in order to give a low polar moment of inertia. The
suspension was also significantly different from that of the 312B3, and the
front of the chassis was much narrower. The handling of the car was found to be
inherently neutral, not suffering from the persistent understeer which blighted
the 312B3. Niki Lauda tested the car extensively during the off season, ready
for a full-on championship challenge.
positioned
ahead of the rear axle, in order to give a low polar moment of inertia. The
suspension was also significantly different from that of the 312B3, and the
front of the chassis was much narrower. The handling of the car was found to be
inherently neutral, not suffering from the persistent understeer which blighted
the 312B3. Niki Lauda tested the car extensively during the off season, ready
for a full-on championship challenge.
The first 312T was completed in the autumn of 1974, and unveiled to the press in Modena after the end of the 1974 season. However, the team used the old 312B3 at the first two races of the 1975 season, and it was not until the South African Grand Prix the 312T received its race debut. The car's performance at its debut race was disappointing, a subsequent test of Lauda's engine proved that there was a technical problem.
The 312T was tested alongside the 312B3 at Fiorano, proving conclusively that
the newer car was faster, and indeed it went on to win its next race, the
non-championship International Trophy race, with Lauda at the wheel. In the
world championship, after the slow start to the season, Lauda won 4 out of 5
races mid season before snatching the title at Monza by finishing third, whilst
Clay Regazzoni's win in that race
 secured
Ferrari its first Constructors' Championship since 1964..
secured
Ferrari its first Constructors' Championship since 1964..
The Formula 1 technical regulations were changed for the 1976 season – from the Spanish Grand Prix in May, the tall air boxes which had become popular would be banned. The rules therefore allowed Ferrari to continue to use the 312T for the opening 3 races of the 1976 season (Lauda won the first two and Regazzoni the third), before the introduction of its successor, a revised version called the 312T2.
The 312T series won 27 races, four Constructors' and three Drivers' Championships, and was replaced for the 1981 season by the 126 C, Ferrari's first turbocharged F1 car.
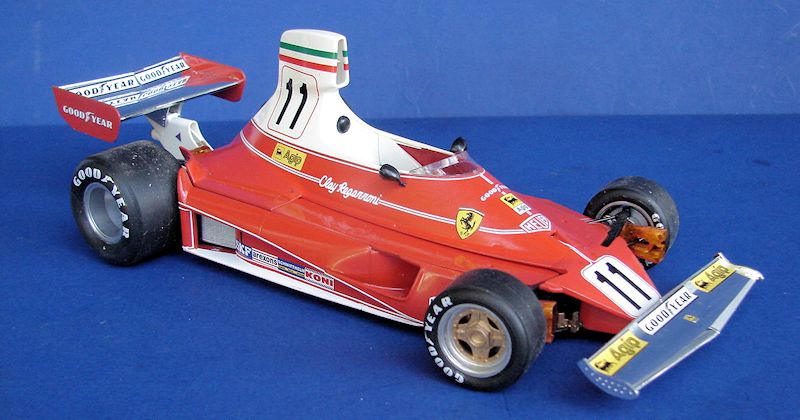
| THE KIT |
 Hasegawa
makes Formula 1 kits almost as nice as Tamiya. The level of detail is quite nice
and they usually are easy to build. The kit is molded in red, white and gray.
The front and rear wings are molded in chrome. Also included are 4 rubber tires
and a small sprue of clear parts.
Hasegawa
makes Formula 1 kits almost as nice as Tamiya. The level of detail is quite nice
and they usually are easy to build. The kit is molded in red, white and gray.
The front and rear wings are molded in chrome. Also included are 4 rubber tires
and a small sprue of clear parts.
The instructions are 21 steps and include a parts layout as well. The color callouts only give you Aqueous Hobby numbers, but they give you the color as well.
The rather large decal sheet is very complete. Hasegawa also gives you tire logos as well.
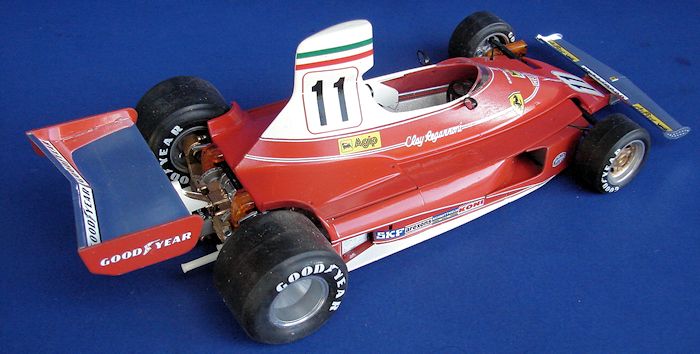
| CONSTRUCTION |
I normally begin with seeing what I need to do to the chassis as far as prep goes. I like to get as much put together as I can before painting. The front suspension lower arms are trapped between the upper and lower chassis parts and painting it will be a problem. I solved this by removing most of the rear mount for the arms. I left just enough so that I could spread them and attach them after painting.
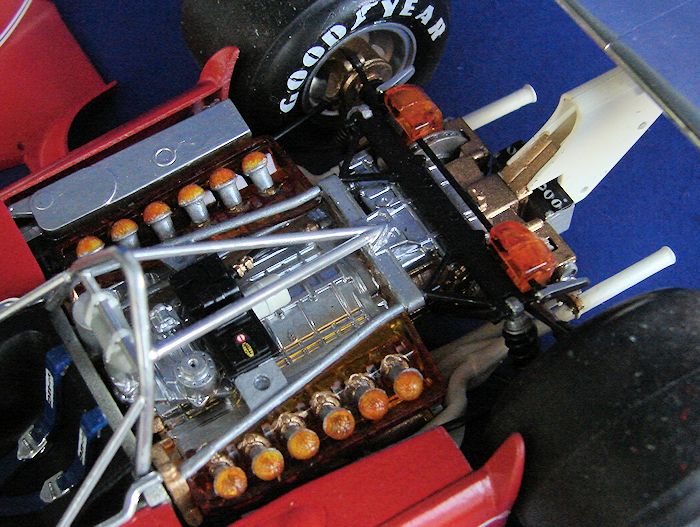
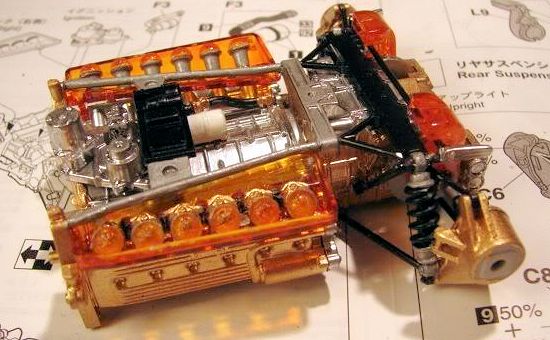 When
building the engine you will need to decide if you're going to use the clear
intake parts. When attaching the transaxle to the engine you will need to trap
part D14 between them. If you installed the clear intake parts, D14 should lay
just alongside them.
When
building the engine you will need to decide if you're going to use the clear
intake parts. When attaching the transaxle to the engine you will need to trap
part D14 between them. If you installed the clear intake parts, D14 should lay
just alongside them.
When attaching the exhaust pipes, Hasegawa tells you to install the front pipes first then the rear pipes. No matter how I tried, I could not get them to fit this way, I installed the rear pipes first as they lay under the front pipes.
The rest of the model was assembled as per the instructions and I had very little trouble. The fit of the airbox leaves a bit to be desired though. I also chose to glue the side covers and sidepods to the chassis. I left the front and rear wings in chrome as I just think they look very cool.
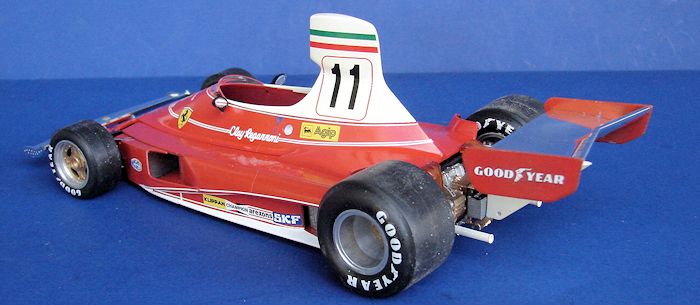
| COLORS & MARKINGS |
Hasegawa makes it easy to paint this car. The airbox and upper
cowl are separated just as the real car would be. No masking is needed, you
simply paint one part red and the other white. Now there have been d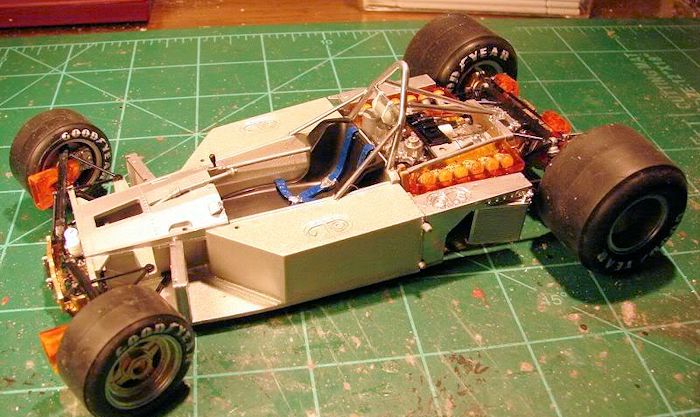 ebates
galore about just what color red Ferrari cars are. I don't really care about all
that and I just painted it gloss red. The good thing about the 312T is that it
doesn't have the white inner sidepods of the 312T2. Makes painting much easier.
ebates
galore about just what color red Ferrari cars are. I don't really care about all
that and I just painted it gloss red. The good thing about the 312T is that it
doesn't have the white inner sidepods of the 312T2. Makes painting much easier.
The decals went on with little trouble, the only trouble I had was on the chrome wings. The decal film is quite noticeable on these and is another case for painting these.
'The tire logos are of the transfer type and require water to make them stick. Simply cut out the logo and remove the cover to expose the logo. Position it on the tire and brush water on with a Q-tip. The backing will then come free. When dry, you might want to apply a dull coat to blend it in.
| CONCLUSIONS |
A very nice kit. While some of the steps are a bit tricky, it's nothing a modeler with a few cars under his belt can't handle. The decals are daunting but go on with no trouble and it makes for a beautiful model. This one will look great next to the rest of your F1 cars!
| REFERENCES |
Wikipedia for the history
Internet for photos
November 2015
Copyright ModelingMadness.com
If you would like your product reviewed fairly and fairly quickly, please
contact
the editor or see other details in the
Note to
Contributors.