Moebius1/25 Lone Star
| KIT #: | 1300 |
| PRICE: | $79,99 SRP |
| DECALS: | One option |
| REVIEWER: | Robert Myers |
| NOTES: | Shop for the best price as some retailers over-price the kit. |
| HISTORY |
| THE KIT |
This
1/25th scale kit is huge! There are over 300 parts and none of them are
individual track links! With the addition or deletion of the sleeper
roof extension (1 part), you can build two versions. The sprues are all
wrapped in plastic, very detailed and are very well molded without
visible injector pin marks or flash. The engineering of parts and parts
placement on the sprues really shows a modeler was involved with the
design on this one. Most of the sprue attachment points are hidden or
very small. Even the chrome is well thought out so that you don’t have
major seams or attachment point cuts showing. The exceptions are the
fuel tanks
 and air cleaners. They have a long seam where the halves
join. The upside is that the seam on the fuel tanks is hidden when you
add the aero skirts. The tires are soft vinyl and appear very realistic.
The parts also include a thin metal, flexible metal mesh grill insert.
This is a very nice touch.
and air cleaners. They have a long seam where the halves
join. The upside is that the seam on the fuel tanks is hidden when you
add the aero skirts. The tires are soft vinyl and appear very realistic.
The parts also include a thin metal, flexible metal mesh grill insert.
This is a very nice touch.
The
decals are bright and in register. They will be used to add woodgrain to
the interior, a nice dashboard, various exterior markings and a trucking
company name. Your choice
for company names are Erb, a real Canadian company, and Moebius
Transport.
There is
a downside to this kit; the instructions for building the engine are very
poor. They show a couple of color shots of the engine (great for reference)
and use text to tell you to add the parts. If you are not familiar with the
Maxxforce 15 engine it is a real trial. I would suggest you use the
instructions from a Revell Lonestar or a Moebius Prostar to build the
same engine, these instructions were great with exploded drawings. The rest
of the instruction sheet is just ok, with color call-outs for the parts on a
separate page. I copied the color callout page, so I didn’t have to flip
back and forth in the instructions. (I would suggest going to the Revell web
site and downloading a set of their instructions. The kit is the same except
for decals.)
| CONSTRUCTION |
To
begin the assembly I broke it down into several steps, engine, chassis,
interior and cab/sleeper. Everything was washed in dish soap, and given
a good rinse. Don’t skip the wash! There is a lot of mold release agent
on this kit and it will mess up your paint and leave visible finger
prints on the chrome.
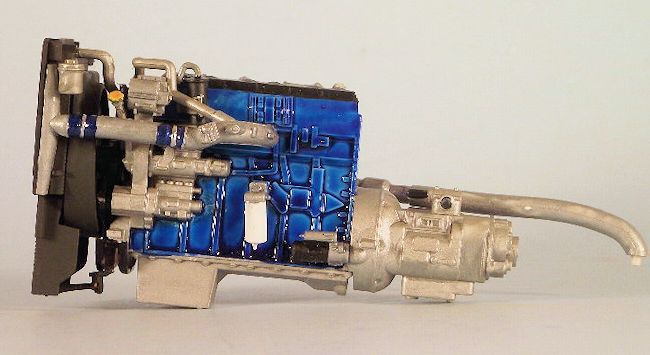 The
engine is a modern International Maxxforce 15 with EGR. International
discontinued this engine and replaced it with a Cummins, rather than
certify it for newer emission standards.
I would have like to see a Cummins engine in the kit, but I
understand the licensing problems. The engine was sprayed an appropriate
blue and assembled per instructions. The Moebius instructions are
confusing, but with a lot of test fitting everything is an excellent
fit. I went back with brush paint and did the detail painting. Chrome
foil was used to make the hose clamps. The finished assembly was given a
black wash and set aside to dry.
The
engine is a modern International Maxxforce 15 with EGR. International
discontinued this engine and replaced it with a Cummins, rather than
certify it for newer emission standards.
I would have like to see a Cummins engine in the kit, but I
understand the licensing problems. The engine was sprayed an appropriate
blue and assembled per instructions. The Moebius instructions are
confusing, but with a lot of test fitting everything is an excellent
fit. I went back with brush paint and did the detail painting. Chrome
foil was used to make the hose clamps. The finished assembly was given a
black wash and set aside to dry.
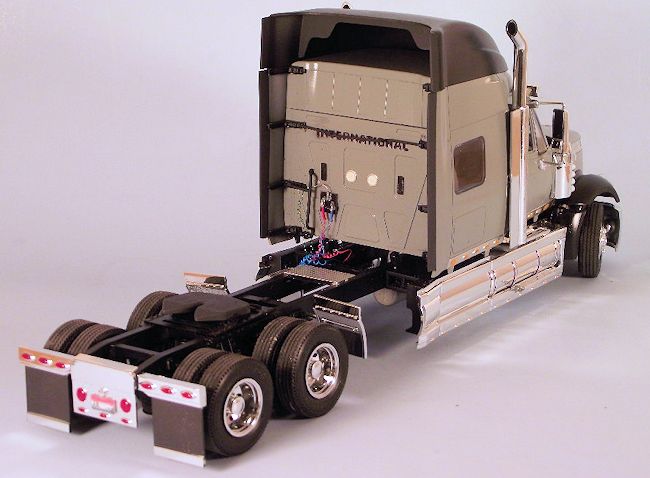
The
chassis was next. Before you start; figure out a way to insure you
assemble the frame rails and cross pieces so that everything is square!
I use a small carpenter’s square taped to the glass on top of my work
bench. I check the fit often and when the basic assembly of frame and
cross pieces is complete, I stop and work on something else until the
glue is dry. Next, I added the rear suspension and differentials. There
are no surprises here, everything has an almost snap kit tightness to
fitting the parts. I followed the instructions and part numbers very
closely, for a change. There are parts that must go in a front/back or
left/right position for everything to line up. I assembled the front
springs and axle per the instructions, but I didn’t glue one side of
 the
axle to the spring. When you insert the engine you will be very happy
you did this, it saves a lot of fitting, bad language and possible
broken parts. No chrome parts were added to the chassis and it was set
aside to dry and wait for painting.
the
axle to the spring. When you insert the engine you will be very happy
you did this, it saves a lot of fitting, bad language and possible
broken parts. No chrome parts were added to the chassis and it was set
aside to dry and wait for painting.
This
interior is exceptional! Everything was prayed with Krylon grey primer
before assembly. The dashboard was detailed with paint. I thought it
looked pretty good, then in the spirit of doing a build review, I added
the decals. They feel a little thick, but I applied them over a drop of
Microset then brushed a little Microsol on top. The decals settled down
very well on the uneven dash board. It looks so much better than my hand
detailing. A little scraping on the join areas and the whole thing was
glued together. Again the assembly was almost a snap fit. The dashboard
was masked off and a final coat of grey primer was sprayed on. Some
small details were picked out with a brush and the rest of the wood
grained interior decals
were added directly to the primer coat. I trimmed them very close and
used Microset. They didn’t silver and settled down nicely.
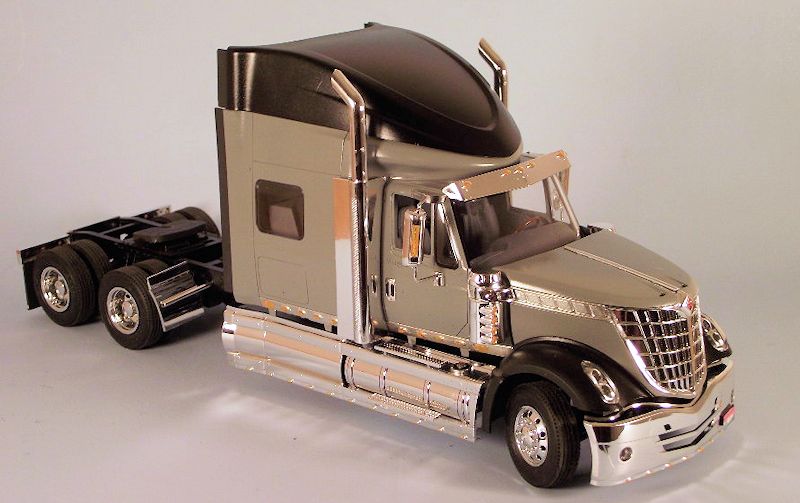
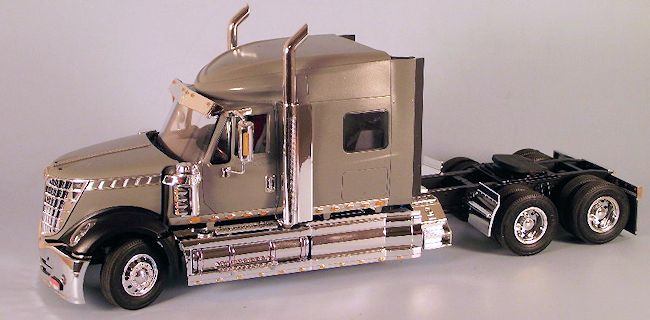
The
cab/sleeper is huge and intimidating and very well molded. The cab roof is a
separate part that has the glue joins along the same seams as seams on the real
truck. I glued the roof on and sprayed the cab, hood and fenders in black Krylon
primer. The fenders were sprayed gloss black and after drying the headlights
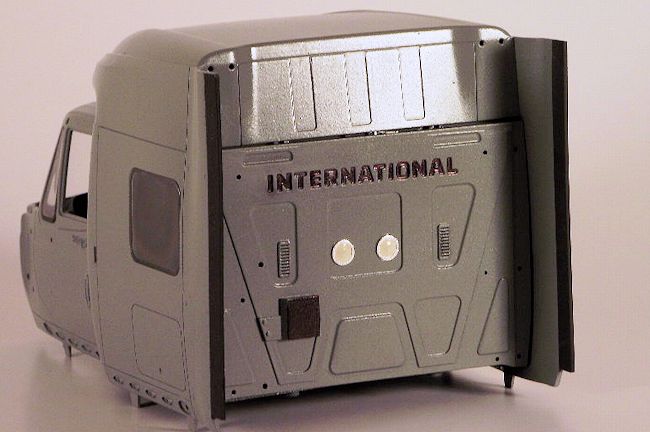 were installed. Beautiful fit. The intimidating part is all of the lights on the
lower cab. After spraying the cab Krylon grey, chrome foil was applied to the
lower cab/sleeper before installing the lights. Each depression for each light
was given a prep drop of turn signal amber paint. When that was dry, I inserted
a clear lense into each depression. Each lense was given a coat of turn signal
amber to glue it into place. Extra lenses are included, but I didn’t loose any.
My installation technique was to wet the tip of my finger, touch the outside of
the lense and just press it into place.
were installed. Beautiful fit. The intimidating part is all of the lights on the
lower cab. After spraying the cab Krylon grey, chrome foil was applied to the
lower cab/sleeper before installing the lights. Each depression for each light
was given a prep drop of turn signal amber paint. When that was dry, I inserted
a clear lense into each depression. Each lense was given a coat of turn signal
amber to glue it into place. Extra lenses are included, but I didn’t loose any.
My installation technique was to wet the tip of my finger, touch the outside of
the lense and just press it into place.
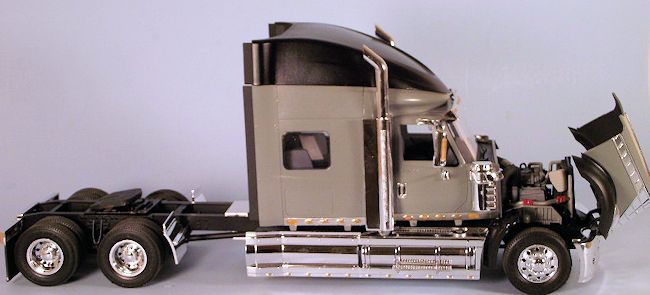
The final
assembly was easy. All of the chrome and bright parts were glued to the chassis
and cab. The engine was fitted to the frame and the front axle was glued to the
spring. I used epoxy to glue the floor of the interior to the chassis. This is a
heavy model and someone will pick it up by the sleeper. I can see the chassis
dropping off at the worst possible moment. Hence the epoxy. The assembly for the
interior and cab is unique. The instructions have you glue the floor to the
chassis, then slip the cab in place over the interior. It worked, but if I
hadn’t used epoxy on the floor/chassis mounts, I know I would have broken the
floor loose from the chassis. On my next build, I will glue the interior into
the cab first, then mount the whole thing on the chassis.
The hood was
fitted. It fits close, but not quite what I would like. After looking at the
Moebius test builds on line and talking to one of the builders, I saw they had
the same problem on multiple builds. So I decided if all of those very good
builders couldn’t get it straight, it was close enough for me.
| COLORS & MARKINGS |
 I sprayed all of the major parts with Krylon primer and paint. I used Model
Master brush paints for all of the detailing. There were no reactions
between the two. I didn’t use the decals for the outside of the truck, as I
am having my own decals made for a series of these trucks, in my own company
name. I can tell you the decals on the inside worked well and reacted very
well to Microsol and Microset. If I may nag a bit; don’t forget to wash all
of the parts, prior to priming/painting.
I sprayed all of the major parts with Krylon primer and paint. I used Model
Master brush paints for all of the detailing. There were no reactions
between the two. I didn’t use the decals for the outside of the truck, as I
am having my own decals made for a series of these trucks, in my own company
name. I can tell you the decals on the inside worked well and reacted very
well to Microsol and Microset. If I may nag a bit; don’t forget to wash all
of the parts, prior to priming/painting.| CONCLUSIONS |
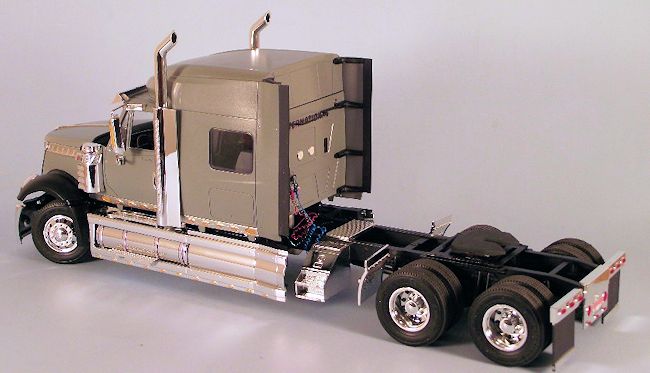 This was a
long (3 month), but enjoyable build of a modern truck! Moebius is honest and
rates this kit as a skill level 3. Bottom line this is not a kit for a beginner
because of the instructions, but it
is a very detailed and easy build of a new subject for the average to
experienced builder (if you use Revell instructions). I have now bought six of
these kits because the kit itself will build into two different sleeper versions
and I am doing a daycab, a wrecker and of course I need a spare for who knows
what. So, yes, I highly endorse this as a well done kit!
This was a
long (3 month), but enjoyable build of a modern truck! Moebius is honest and
rates this kit as a skill level 3. Bottom line this is not a kit for a beginner
because of the instructions, but it
is a very detailed and easy build of a new subject for the average to
experienced builder (if you use Revell instructions). I have now bought six of
these kits because the kit itself will build into two different sleeper versions
and I am doing a daycab, a wrecker and of course I need a spare for who knows
what. So, yes, I highly endorse this as a well done kit!