Frog 1/96 DeHavilland Comet 4
|
KIT #: |
F-356 |
|
PRICE: |
$10.00 |
|
DECALS: |
Three options |
|
REVIEWER: |
Peter Burstow |
|
NOTES: |
Long OOP but can be found |
Reborn from the ashes of the earlier Comet
disasters, the Comet 4 first flew in April 1958, received it's C of A on 24th
September 1958 and was delivered to BOAC the next day. The first jet powered
regular transatlantic s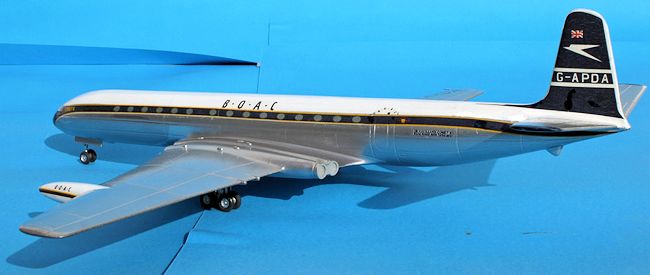 ervice was flown on 4th
October of that year. Unfortunately for de Havilland and BOAC, Pan-Am started
regular Boeing 707 services later that month, the technological lead of the
earlier Comet 1, being reduced from four years to a few weeks.
ervice was flown on 4th
October of that year. Unfortunately for de Havilland and BOAC, Pan-Am started
regular Boeing 707 services later that month, the technological lead of the
earlier Comet 1, being reduced from four years to a few weeks.
The Comet 4 was a much stretched and up-engined
version of the earlier Comets. Powered by Rolls-Royce Avon engines, the go-to
British engine of the 50's and 60's, it had a capacity of 60-81 passengers.
Later it was stretched further as the 4A, 4B and 4C.
First released in 1958, a busy year for Comets, the Frog kit represents some
early Comet 4s as delivered to BOAC.
The review kit was a Novo boxing, moulded in the USSR. In a tan, brittle
plastic, the kit barely fits in the large top opening box. There are 10 parts
for the airframe, with another 20 odd parts for the undercarriage and engine
exhausts. Two cockpit windscreens were supplied. There are no cabin windows
moulded.
The parts are very cleanly moulded with a little
flash here and there. A couple of small sink marks are visible on the fuse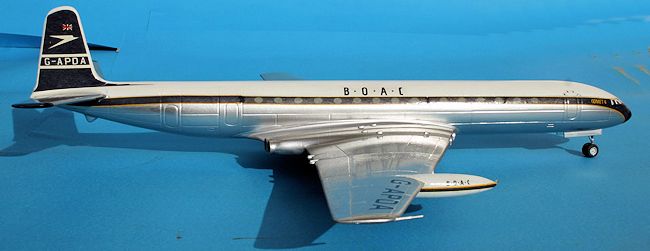 lage.
A lot of thought went into the kit engineering, with the sprue attachment points
hidden inside joints and on the under fuselage. The sprue had been torn away
from the fuselage, leaving a couple of holes that need repair. Detailing is fine
recessed lines, a little heavy for this scale, but a few coats of paint will
lighten it enough. The mouldings showed signs of polishing and clean up.
lage.
A lot of thought went into the kit engineering, with the sprue attachment points
hidden inside joints and on the under fuselage. The sprue had been torn away
from the fuselage, leaving a couple of holes that need repair. Detailing is fine
recessed lines, a little heavy for this scale, but a few coats of paint will
lighten it enough. The mouldings showed signs of polishing and clean up.
As expected from a kit of this vintage there is
not much detail. The cabin is empty, with just a bulkhead, the site of the sink
marks. The engine intakes are open holes into the wing, the exhausts blanked
off. The undercarriage is simplified with very shallow wells, and thick doors.
There is moulded hub detail on the wheels, not sure how accurate, but it looks
OK. There is a large stand slot, but no stand provided.
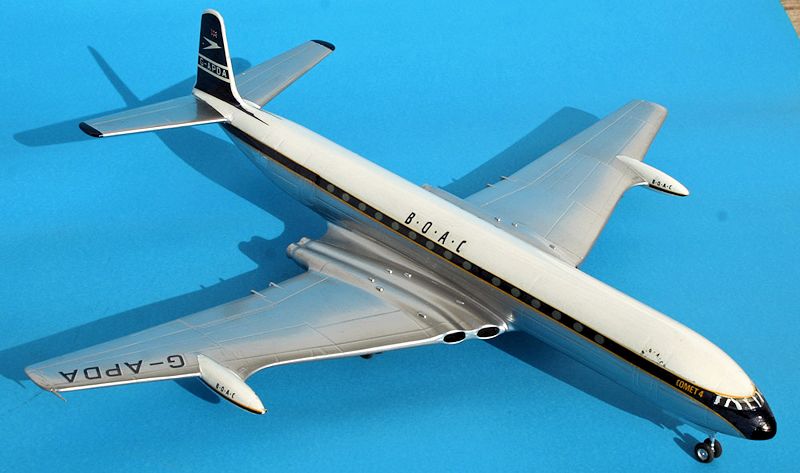
The large decal sheet has markings for three
BOAC aircraft, G-APDA, with extra letters provided for G-APDF and G-APDT. G-APDA
was the test airframe, c/n 6401, F was c/n 6407 and T was c/n 6420. The cheat
line decals include representations of the cabin windows. The decals are very
dull, a bit out of registration with a lot of cracks.
The instruction sheet details seven instruction steps, and the side of the box
has a three view painting and decalling diagram.
I started with a dry fit of the main airframe
parts, fit was good, with just a little flash needing removed from the tailplane
attachment slots. Took the opportunity to work out the weight needed to stop it
tail sitting, I ended up with 50 grams of lead behind the cockpit bulkhead, two
20 gram and one 10 gram wheel balance weights. Pa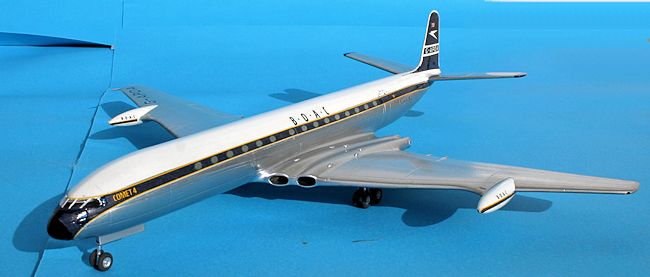 inted
the cockpit dark grey, then closed up the fuselage. Fitted
well, with a small gap at the base of the tail. Left it
clamped up to harden. Next day I filled the gap with Mr Surfacer, and put a
small drop into the sink marks. I repaired the two sprue attachment scars under
the fuselage.
inted
the cockpit dark grey, then closed up the fuselage. Fitted
well, with a small gap at the base of the tail. Left it
clamped up to harden. Next day I filled the gap with Mr Surfacer, and put a
small drop into the sink marks. I repaired the two sprue attachment scars under
the fuselage.
While that was all hardening I assembled the
wing and tailplane halves. Again just about perfect fit, with a light sand
needed along the joints and no filling.
I then fitted the wings and tailplanes to the
fuselage. Tabs at the roots assured a strong fit and set the dihedral on the
tailplane. There were small gaps at the roots, a line of Mr Surfacer was enough
to fill them. I then added the exhaust nozzles, wheel doors and undercarriage
legs. A light sand and the airframe was ready for priming.
With airliner kits, it's all in the painting and finishing, not one of my strong
points. I gave the model an all-over prime with a light grey epoxy paint. Very
high gloss, it fills any slight imperfections and sanding marks, and highlights
any faults. I needed to do a bit mo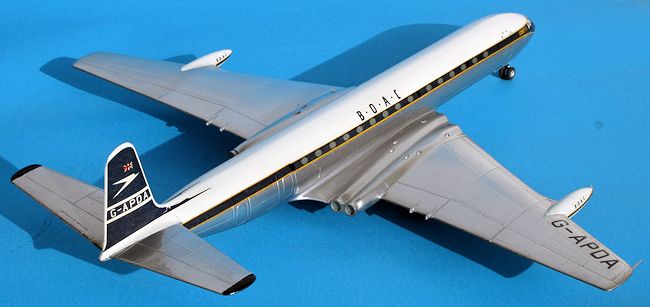 re filling and sanding on one of the wing
roots.
re filling and sanding on one of the wing
roots.
A few of days to harden, then a coat of Tamiya
AS-20 gloss insignia white from a rattle can, that's when the fun really
started. Started to lift and bubble in three spots around the wing tanks, the
lacquer had attacked the primer. Why in only those small areas? Anyway, sanded
those areas and re-coated with gloss white enamel. Much better. A
week of hardening then I masked the white parts and primed the rest of the
airframe again, this time with a thin coat of gloss black to provide a base for
a natural metal finish.
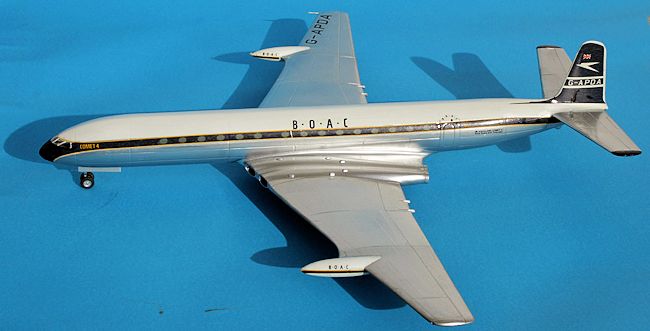
More waiting around, just a few hours this time as I wasn't going to handle the
model, then a coat of White Knight Chrome, the best natural metal paint I can
get here, (Alclad lacquers being very hard to get). Another day and then another
coat. After another few days I removed the masking, needed a touch up in a
couple of spots. The paint is very easily damaged so I left it a few weeks to
really harden before any further work.
While the fuselage was in the paint shop, I
turned my attention to the wheels. Not a lot of work here, just removal of a
mould seam on every part. I painted the wheel hubs silver, and the tyres Tamiya
German grey. The wheels are designed to rotate, but I didn't try hard to achieve
that. I added the wheels after the decaling had been done.
Early in the build process I gave the decals
three coats of Microscale liquid decal film, I didn't like the
 chances of them
surviving a dip in water, let alone being applied. Despite all that decal film,
the decals did break up, fortunately in large hunks, which I was mainly able to
manipulate together. They were much thinner than I expected, and tended to fold,
and also tended to lift and curl when dry, despite using micro-set. I repaired
them using a mixture of floor polish and micro-sol.
chances of them
surviving a dip in water, let alone being applied. Despite all that decal film,
the decals did break up, fortunately in large hunks, which I was mainly able to
manipulate together. They were much thinner than I expected, and tended to fold,
and also tended to lift and curl when dry, despite using micro-set. I repaired
them using a mixture of floor polish and micro-sol.
The colours were not very solid, and on anything
other than a white or metal background probably would not be much good. I had a
lot of difficulty with the long cheat line decals especially. They did however
conform well, no silvering on the high gloss surface. I had to touch up the
decals in several places, using hand brushed Tamiya acrylic paint.
Just about last, I added the windscreen clear(ish) part, and hand
painted the frames.
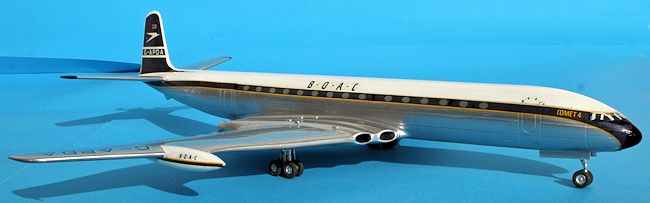
I sealed the decals, and the rest of the model,
with several coats of sprayed floor polish, which dulled down the chrome paint,
but lifted the gloss on the decals. I use a cheap external mix airbrush just for
floor polish, it's too uncontrollable for painting, but works fine with polish
with a drop of dish washing soap added to the bottle.
A
very easy build of the first jet airliner to be in regular service. The kit fit
very well, with no problem areas, and I had only a few difficulties in the long
painting process. The decals were a chore, but ended up reasonably acceptable. I
would not have used them if I could have found some others.
I
took about four hours to build the kit, with a month of waiting for paint to
dry, and another few hours
 decaling in several sessions.
The scale is a bit odd, but works well, providing a reasonable sized kit,
spanning 14 ½ inches. For those imperialist reading, the scale works out to one
inch to eight feet, and is sometimes used for large ship models.
decaling in several sessions.
The scale is a bit odd, but works well, providing a reasonable sized kit,
spanning 14 ½ inches. For those imperialist reading, the scale works out to one
inch to eight feet, and is sometimes used for large ship models.
This kit needs a bit of attention from the aftermarket guys. Decals for the many
schemes of the multitude of operators, resin bits for the engine intakes and
exhausts, and maybe SAC could provide a decent undercarriage. All wishful
thinking, the market is probably too small.
In the late 1950's Frog released a number of kits in the rather odd 1/96
scale, several airliners, as well as the trio of British 'V' bombers. Some
appear from time to time. Glencoe has released the Viscount, and Eastern Express
released the Britannia. I haven't seen any of the others for many years, there
was a Douglas DC-7, and a Caravelle, there may have been others. Avoid the
Lancaster!
Recommended if you can get it. Throw away the
decals!
Jackson, A.J.
De Havilland Aircraft since 1909.
Putnam, London, 1978
Wilson, Stewart.
Viscount Comet & Concorde, Aerospace Publications, Weston
Creek, 1996
http://en.wikipedia.org/wiki/De_Havilland_DH.106_Comet
Peter
Burstow
May
2014
If you would like your product reviewed fairly and fairly quickly, please
contact
the editor
or see other details in the
Note to
Contributors.
Back to the Main Page
Back to the Review
Index Page