Heller 1/75 Couzinet Arc-en-Ciel
| KIT #: | ? |
| PRICE: | $ long out of production |
| DECALS: | One option |
| REVIEWER: | Chris Peachment |
| NOTES: | A kit from 1964, with all the primitive drawbacks that that entails. But still unique |
| HISTORY |
The Couzinet 70 was a 1930s French three-engined commercial monoplane built by
Rene Couzinet. From a very young age he had been fascinated by aviation and also
observing the flight of swallows. Which would go some way to explaining that
beautiful tail on the aircraft. In 1924 he attended the Graduate School of
Aeronautics, before joining the French Air Force in November 1925, where he
became a 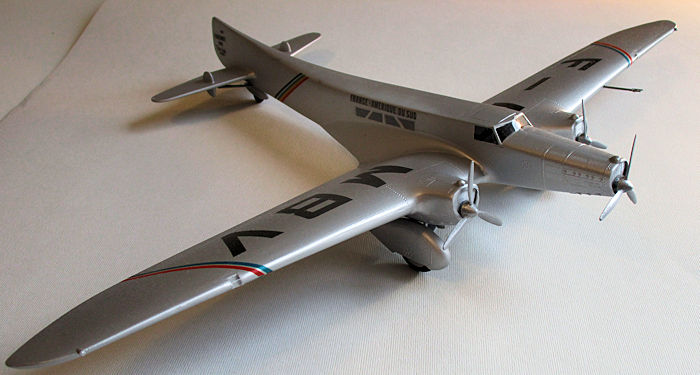
Hispano Suiza lent him three engines without charge, and he raised a loan of $50,000. The Arc en Ciel's first flight was on 7 May 1928. The aircraft manufacturer Les Mureaux took charge of the first prototype, with Couzinet consulting. From March 6 to April 5, 1932, it completed the first air link from France to New Caledonia. The Biarritz model equipped with more powerful engines, went on to perform in Europe and Africa, including carrying Pierre Cot, France's Air Minister, between Moscow and Paris. And several flights in Africa including the islands of Cape Verde. Returning from North Africa it crashed on the Cote D'Or on 30 October 1933.
On 16January 1933, piloted by Jean Mermoz and accompanied by Couzinet, it crossed the South Atlantic from Senegal to Natal in less than 12 hours. Their return to Le Bourget on May 21 was greeted by 15,000 people, and the aircraft was then operated by Air France until 1937.
| THE KIT |
I acquired this long-sought-after kit thanks to the kindness of one of our readers.
In a previous piece on a Caudron Racer, I said something to the effect that Heller kits were very good for their time and also had the bonus of allowing you to build many French aircraft which were otherwise not kitted. Then I mentioned that I had long been looking out for an Arc-en-Ciel. Tony Morgan emailed to me that he had an old one which had been re-boxed in the US under the Buzzco label. Would I like it? I certainly would.
The kit when it arrived revealed itself to be very much of its period, and it was a pleasant walk down memory lane to remind oneself of the sort of thing with which we used to amuse ourselves back then.
 The sprues are very thick (good for the spares box) and they come equipped with
plentiful flash, almost enough to use as spare plastic card for future scratch
builds. Resin builders have become used to wafers of resin surrounding their
parts. This looked much the same.
The sprues are very thick (good for the spares box) and they come equipped with
plentiful flash, almost enough to use as spare plastic card for future scratch
builds. Resin builders have become used to wafers of resin surrounding their
parts. This looked much the same.
There were also sink marks all over the place especially anywhere there was a locating pin, and moulding seams on almost every piece. So there was much clearing up to be done. Which I don't mind at all, because it took me back to the dawn of modelling, when the latest Airfix offering was bliss.
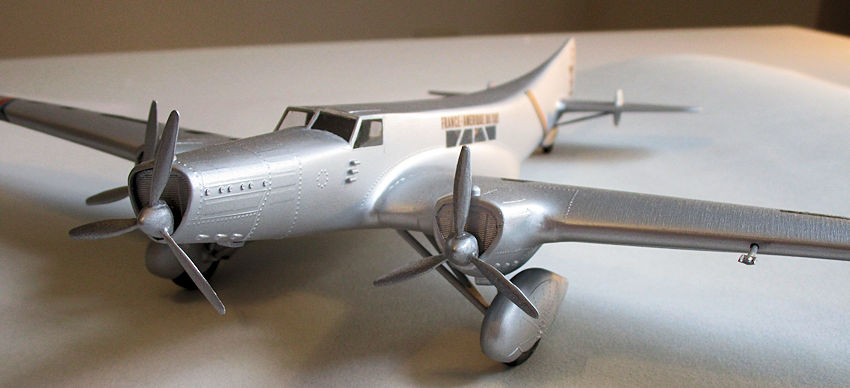
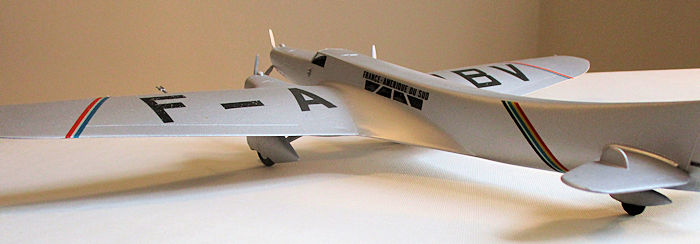
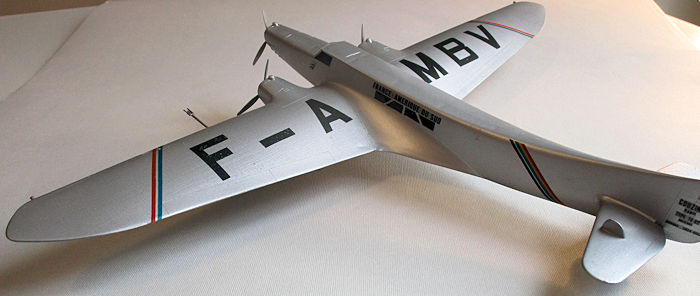
Tony had wondered whether to make it a 'What If' kit, as a tri-motor torpedo plane such as the Italian Air Force used. I can see the logic of this, but decided early on to do it straight out of the box, as this is surely one of the most beautiful airliners ever designed. The swoop of that tail still takes my breath away. And the spats speak of 1930s art deco streamlining.
Incidentally Heller, being French and therefore eccentric, used to use only metric scales of 1/50 or 1/100. This one falls in between at 1/75. Though after all the sanding necessary I dare say it has come down closer to the Gentleman's Scale. It certainly doesn't look out of place in any collection of 1/72.
| CONSTRUCTION |
After the flash was cleared away, a few dry runs revealed that the fit was about par for the course of 50 years ago. Which is to say terrible. I removed all the locating pins, and that allowed much better alignment. There is no interior detail, and so I roughed up a quick cockpit area, though not very detailed as I soon realised that it would be invisible.
The windows
are supposed to be glued inside before starting, but they none of them fitted,
which gave me pause. Fortunately the front screen is two flat plates and so I
There are only a handful of parts, but each one need sanding and fettling. Especially bad was the fit of the wings, which left a clear gap of a couple of millimetres all the way round at the roots. There was nothing to be done about that but fill it with plastic card shims, and then sand it down, using copious filler. Ah the joys of modelling when was young.
The only area in which I departed from an out-of-the-box treatment was the wheels. These are very large, and, as moulded, have no distinction between wheel and tire. They look like two big saucers, and so I cut four circles of 10 thou plastic with a circle cutter, dished them with a chisel handle and stuck them in place after painting silver first. A nice result, which had the bonus of a clear demarcation line.
The basics of the big beast were finished in no time, but the two major problems that remained were the decals and the transparencies.
| COLORS & MARKINGS |
The carrier film on the decals was badly yellowed, and so I stuck them to the inside of a window and let them roast in the sun for about three weeks. Very little happened, alas. So I tried cutting around them with a scalpel and then did a practice run. Surprisingly they didn't break up. But after an hour of sitting quietly on the model they began to curl at the edges. The glue had died. I don't know the general life span of decal glue, but it had been sitting in its box for 40 years, so I hope it had a happy life.
 What I didn't tell you was that thanks to some cunning foresight I had taken the
decals down to my local copy shop and ran off some copies onto laser decal
sheet. It is always worth dong this with old kits, especially if, like this one,
there aren't any aftermarket alternatives. I copied them in colour, but also in
black and white, since black lettering always come out a little sharper that
way. After carefully trimming around the edges, they are as you see. Not at all
bad, although someone not very clever at Heller forgot that the rainbows on each
side of the fuselage need to be handed. They are both the same, and so the
yellow appears higher on one side than the other. I do not grieve over this,
long winter evenings.
What I didn't tell you was that thanks to some cunning foresight I had taken the
decals down to my local copy shop and ran off some copies onto laser decal
sheet. It is always worth dong this with old kits, especially if, like this one,
there aren't any aftermarket alternatives. I copied them in colour, but also in
black and white, since black lettering always come out a little sharper that
way. After carefully trimming around the edges, they are as you see. Not at all
bad, although someone not very clever at Heller forgot that the rainbows on each
side of the fuselage need to be handed. They are both the same, and so the
yellow appears higher on one side than the other. I do not grieve over this,
long winter evenings.
As to the transparencies, I used clear packing tape (Sellotape, or Scotch tape
to you) which worked well. The side windows are easy, but the front screen has a
curved lower edge, and so I messed around with paper templates, trimming them
with a scalpel until they fitted. Then they can be used to cut out some of the
clear tape, after it has been stuck down to a ceramic tile. I keep an old tile
around the place, as it is
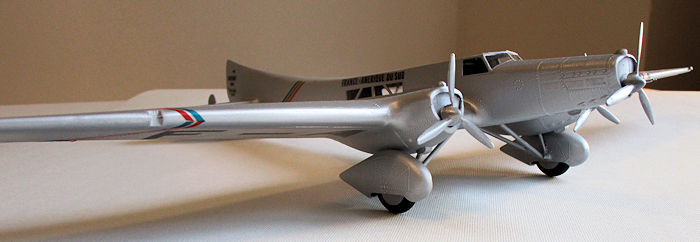
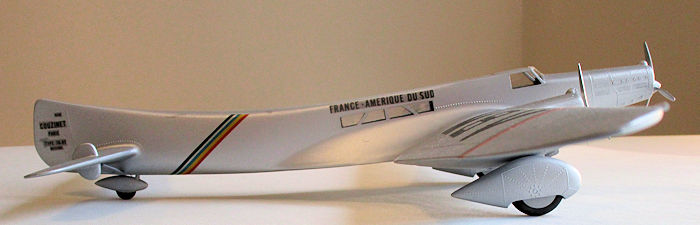
After it had been sprayed silver all over, I used some different brands and shades of silver to add a little contrast especially around the engine covers, though that doesn't show up in the pictures.
I note from a couple of websites, that the Japanese, who make this aircraft from a resin model that is out there, favour a cream finish. It looks very nice, but I can't find any evidence of it in the few photos that exist of the aircraft. Still it makes a sort of sense, since many French airliners favoured that colour, especially the Farman 223s of the pre-war era.
| CONCLUSIONS |
I am at last the proud owner of one of the most beautiful aircraft ever made. So thank you very much Tony Morgan. It was worth the 50 years wait.
| REFERENCES |
http://jn.passieux.free.fr/html/Couzinet70.php
http://alain.vassel.pagesperso-orange.fr/arcdoc.htm
http://aerostories.free.fr/constructeurs/couzinet/page3.html
http://ufologie.patrickgross.org/aircraft/couzinet.htm
December 2015
Copyright ModelingMadness.com
If you would like your product reviewed fairly and fairly quickly, please contact the editor or see other details in the Note to Contributors.