| KIT #: | SMK72-20 |
| PRICE: | $30.00 on sale |
| DECALS: | Two options for the same airplane. |
| REVIEWER: | Torben Plesberg |
| NOTES: | Maestro decal sheet for Transair Sweden |
| HISTORY |
In 1960 I started to visit Kastrup Airport regularly as an aircraft spotter. One of the aircraft types always to be seen was the C-46. There were two operators of the type: Fred Olsen Lines and Transair Sweden. The Norwegian operator Fred. Olsen ran a cargo line from Oslo to Copenhagen. Transair Sweden carried passengers on the shortest international airline: from Bulltofta to Kastrup and vice versa. The distance between Copenhagen and Malmö is less than 30 kilometers, and flying time from entering the aircraft in Kastrup and to setting your feet on Swedish soil was 20 minutes.
The C-46 from Fred Olsen had a nick name: “Old Noisy”. During taxiing there was a terrible noise from the undercarriage, as if the bearings were short of oil!
The
Curtiss C-46 was born as a “war bird”. The prototype was called CW-20 and flew
for the first time in March 1940. It had a new and patented “figure eight”
fuselage, which was stronger than a conventional fuselage and offered a very
spacious cabin. It was designed as a twin engine plane to keep the running
 costs
as low as possible. However, this meant that the engines should be rather
powerful. The prototype was later bought by the USAAF for evaluation as the
C-55. The evaluation was positive, and 46 aircraft were ordered initially. The
CW-20 was sold to BOAC and flew as G-AGDI “St. Louis”.
costs
as low as possible. However, this meant that the engines should be rather
powerful. The prototype was later bought by the USAAF for evaluation as the
C-55. The evaluation was positive, and 46 aircraft were ordered initially. The
CW-20 was sold to BOAC and flew as G-AGDI “St. Louis”.
The C-46 was a great success as a military transport aircraft. It served mainly in the Pacific Theatre of war and it was the workhorse for supplying troops in China from bases in India. It had a longer range and could carry a larger load than any other allied twin-engine transport aircraft. The normal load was 20 tons, and overload was 22.5 tons. On one spectacular flight a C-46 took off with 152 persons on board. It was on an emergency evacuation transport flight out of Viet Nam. This would not have been possible with a C-47!
However the C-46 got a sad nick name: the Flying Coffin, because there were many unexplained explosions and fires in the air. After the war, there was time to find an explanation to these accidents. The reason for the explosions was at length traced to leaks in the fuel plumbing, and this resulted in pooling of gasoline in the wings. The fuel pumps had an open electrical system, and a spark might ignite the gasoline fumes. The problem was dealt with, and all aircraft got new fuel pumps with the electrical system closed. Furthermore, there was built in a vent to avoid gasoline pooling in the wings, and the plumbing was done more carefully. The problem was solved, but the US forces did no longer need all these C-46 aircraft and a lot of these aircraft were sold to civil operators.
 The C-46
had to compete with the C-47, which thanks to its smaller engines was much
cheaper to operate. Nevertheless, there was a market for the C-46. Some firms
were specializing in converting the military transport plane into civil
airliner. It was a question of making an attractive cabin with comfortable
passenger seats – and a striking color scheme for the airline customer. The
C-46s for TSA were all converted by L B Smith Aircraft Corporation, and the
designation was actually: C-46C Super Smith.
The C-46
had to compete with the C-47, which thanks to its smaller engines was much
cheaper to operate. Nevertheless, there was a market for the C-46. Some firms
were specializing in converting the military transport plane into civil
airliner. It was a question of making an attractive cabin with comfortable
passenger seats – and a striking color scheme for the airline customer. The
C-46s for TSA were all converted by L B Smith Aircraft Corporation, and the
designation was actually: C-46C Super Smith.
The total production of the C-46 amounted to more than 3000 aircraft, a small figure compared to the C-47, with more than 10.000 built. After the war a lot of C-46 served with many South American and Asian Air Forces. Besides many airlines operated the C-46 all over the world, mostly in USA (twelve airlines) and Brazil (16 airlines). Even in 2000 there were C-46 operators, but I guess they are finished by now.
| THE KIT |
The kit
was designed by William Brothers Model Products, but is released by the British
S & M Models. It comes in a big sturdy box. The sprues are in medium grey
styrene. It is not a super-detailed kit, but enough to build a nice replica of
an aircraft rarely seen as a model. There is an option for three - or four
 bladed propellers. The decal sheet is for the prototype CW-20 as operated by
BOAC during the war as St. Louis G-AGDI. There are two options for this
aircraft: blue letters with white outline or blue letters without white outline.
Very remarkable- but no wonder, since it is a British release.
bladed propellers. The decal sheet is for the prototype CW-20 as operated by
BOAC during the war as St. Louis G-AGDI. There are two options for this
aircraft: blue letters with white outline or blue letters without white outline.
Very remarkable- but no wonder, since it is a British release.
The instructions are three A4 pages, two of these showing clearly how to put the model together. The third page is a message from S & M Models telling about the only injection kit of C-46 to a 1/72 scale. It says that the kit is an old tooling and not to currant technical standards. It promises further decals for the C-46 to be available – from Maestro Decals of Sweden.
The clear parts contain the canopy to the stepless cockpit and 10 square windows. It was not my intention to build the prototype CW-20. I would prefer an aircraft of the TSA, the Swedish airline I know from my visits to Kastrup Airport in the sixties. Fortunately, Maestro Models, the maker of the BOAC decal sheet, has a sheet for the C-46 of TSA, too. This is a comprehensive sheet and enables you to model any of the 11 C-46, that served with the TSA. This sheet costs more than the kit! (USD 45)
| CONSTRUCTION |
 After a
closer look at the parts, I found the kit very much up to what I can see on my
own photos of the C-46. I decided to do a TSA plane, since I bought the decal
sheet covering this airline. Now I had to decide which individual aircraft my
model was going to be. The engine nacelles made the choice easy for me: Only one
of the aircraft had the engine nacelles of the kit, the SE-EDR, so this was my
choice, and there was no need for modifying the nacelles.
After a
closer look at the parts, I found the kit very much up to what I can see on my
own photos of the C-46. I decided to do a TSA plane, since I bought the decal
sheet covering this airline. Now I had to decide which individual aircraft my
model was going to be. The engine nacelles made the choice easy for me: Only one
of the aircraft had the engine nacelles of the kit, the SE-EDR, so this was my
choice, and there was no need for modifying the nacelles.
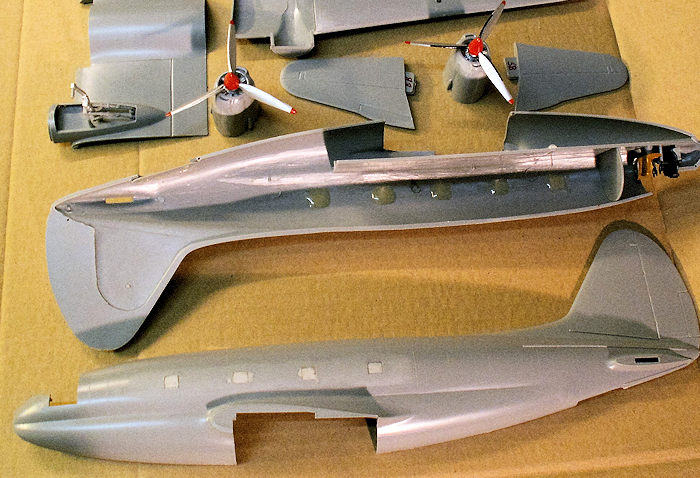
Wing and tail plane halves fit perfectly together, and the fuselage halves, too. However, the starboard wing stub was far too high – almost two mm. I had to remove a lot of plastic. A knife would not do, but my Proxxon angled mini drill with a circular milling cutter was the perfect tool for this job. It takes a very steady hand to do this operation without mishaps! There was another irregularity: The fuselage and canopy were not symmetrical, and both had to be corrected by sanding. The canopy had furthermore to be polished up with toothpaste to regain its transparency.
Since my model should have 10 windows in the backboard side and twelve in the starboard side, I decided to fill the nine window openings. The decals had the windows “built in”, and it would be an impossible job to make all the windows as holes with transparent panes and get the decal fit properly! The illusion of windows is rather good – in the least good enough for me, I would say.
The
propeller assembly was rather poor, or “not up to current technical standards!”,
and because the TSA planes had spinners, I decided to make the propellers
properly and able to turn. The propeller shafts were two mm gauge brass rod, and
the spinners were turned in acryl. Before the spinners were cut from the acryl
rod, the hole for the shafts were drilled through the center of the spinners.
The top of the spinners w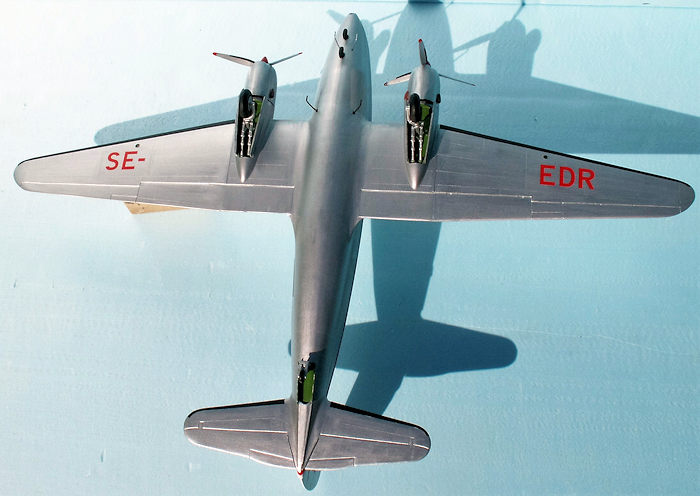 ould then be the forward end of the shafts, and
therefore they were turned to match the curving of the spinners. Now the
spinners were cut free from the acryl rod, and the shafts glued in place. Thanks
to the shafts, the spinners were easy be held in the chuck of the lathe, and the
three holes for the propeller blades were drilled with a 1.8 mm drill using the
dividing device of the lathe. I made a couple of stop rings of Ureol, and they
could be pressed in place on the shafts – no glue necessary.
ould then be the forward end of the shafts, and
therefore they were turned to match the curving of the spinners. Now the
spinners were cut free from the acryl rod, and the shafts glued in place. Thanks
to the shafts, the spinners were easy be held in the chuck of the lathe, and the
three holes for the propeller blades were drilled with a 1.8 mm drill using the
dividing device of the lathe. I made a couple of stop rings of Ureol, and they
could be pressed in place on the shafts – no glue necessary.
Everything else was simple to do by following the instructions. However, the two ADF “Bullet” antennas were rather much out of alignment and they had to be sanded and filled a lot to get a reasonable appearance. The two bullet antennas are placed on the belly under the cockpit with a distance of about 1.5 cm. Their basis have a different slope, and the one with the bigger slope is placed in front of the one with the smaller slope.
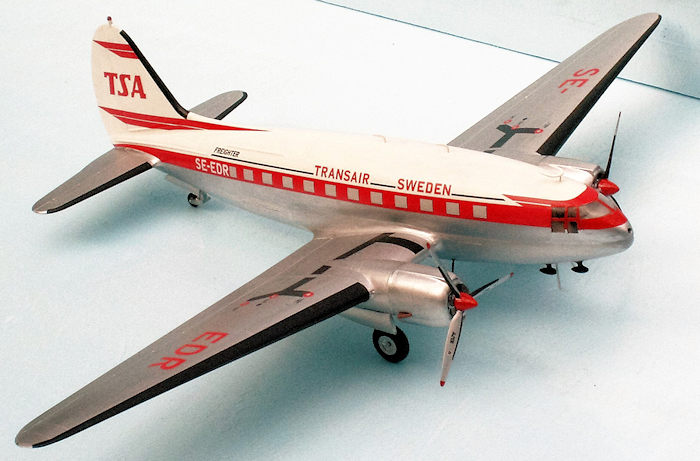
The other antennas to be seen on my photos were all scratch built with brass or iron as material. There are four antennas of type 5 as shown in the instructions. You are supposed to make them yourself from scrap plastic or wire. They should be placed in pairs on the belly under the nose and under the wings. The “horseshoe” antenna – type 4 – is placed a little behind the canopy on the dorsal. Then there are two “door handle” antennas on the dorsal, one placed above the second E in SWEDEN and the second placed a little before the S.
The last small detail was the beacon placed on the top of the fin. It was made of a small piece of acryl.
| COLORS & MARKINGS |
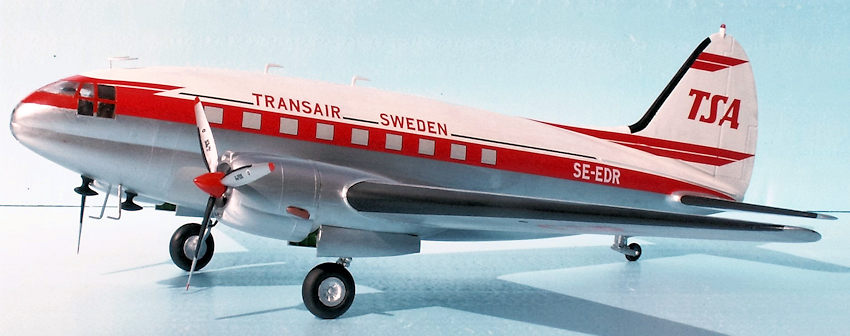
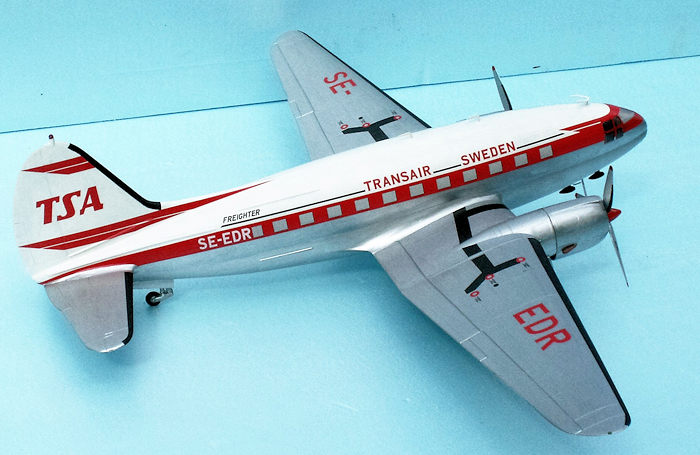
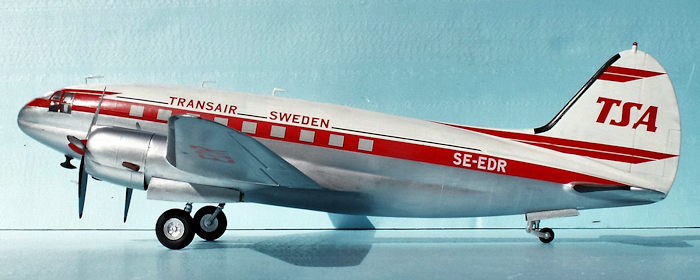
It is only possible to model a TSA C-46 if you buy the decal sheet from Maestro Models. It is an A4 sheet and it covers all eleven C-46 of the TSA. With the decal sheet comes another A4 sheet showing the complete color scheme of an ordinary C-46 airliner, and a C-46 as it looked while on charter by the UN on a peacekeeping mission in the Congo in 1960-63.
 The color
scheme is quite simple: Aluminium, the whole aircraft (HB 2702), except the
white top of the fuselage and fin (HB 22). There are de-icing devices on the
front of the outer wings, the tail planes and the fin, Model Master flat black.
The spinners and propeller tips are red (Revell 31). The exhaust pipes are brick
red (HB 70). Wheel wells and innerside of doors are Zinc-chromate (Revell 360).
Undercarriage legs are silver (HB 11) and the tires are tire black ( ? ).
The color
scheme is quite simple: Aluminium, the whole aircraft (HB 2702), except the
white top of the fuselage and fin (HB 22). There are de-icing devices on the
front of the outer wings, the tail planes and the fin, Model Master flat black.
The spinners and propeller tips are red (Revell 31). The exhaust pipes are brick
red (HB 70). Wheel wells and innerside of doors are Zinc-chromate (Revell 360).
Undercarriage legs are silver (HB 11) and the tires are tire black ( ? ).
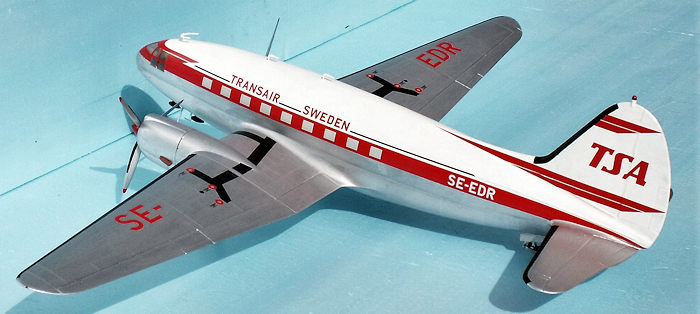
The white top of the fuselage got five layers of gloss white before the result was good enough. The Aluminum color had a better covering and two layers were sufficient. The place where the white and aluminum meet should be covered by the large longitudinal decal with the windows. I used a flat broad brush for these painting jobs, and they were quickly done.
The decaling was exciting. Would it be possible to put on the large red center-band without problems? The decals had the right thickness and they were very easy to apply. The quality was first class, as one could expect from a USD 45 decal sheet. As soon as one of the halves of the fuselage was decaled, it got a layer of Satin Cote for protection. The same procedure for the decaling of the wings. The sheet showing the complete color scheme of the TSA C-46 was a great help during the decaling job.
| CONCLUSIONS |
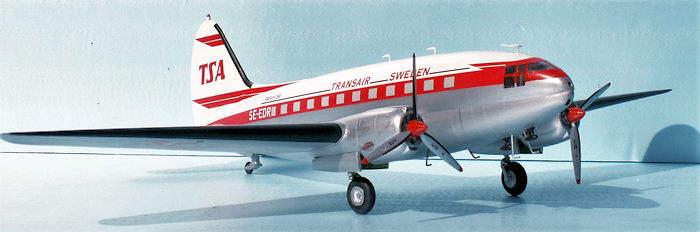 If you
want to build an airliner C-46 Commando to a 1/72 scale, it is the only game in
town. Time will show if more decal sheets will be released making it possible to
model a C-46 from some of the many other operators, who offered transport with
this very special airliner. There were as many as 90 civil operators worldwide.
In my case a more than 50 year old dream came true building the C-46 from
Transair Sweden. I can only recommend other modelers to do the same, and build
their own local airline C-46 - if the suitable decals are available of course!
However, I would say, this is not a kit for beginners, some experience is
necessary to deal with a kit, which is not up to current technical standards.
If you
want to build an airliner C-46 Commando to a 1/72 scale, it is the only game in
town. Time will show if more decal sheets will be released making it possible to
model a C-46 from some of the many other operators, who offered transport with
this very special airliner. There were as many as 90 civil operators worldwide.
In my case a more than 50 year old dream came true building the C-46 from
Transair Sweden. I can only recommend other modelers to do the same, and build
their own local airline C-46 - if the suitable decals are available of course!
However, I would say, this is not a kit for beginners, some experience is
necessary to deal with a kit, which is not up to current technical standards.
| REFERENCES |
Wikipedia: Articles on C-46 and Transair Sweden.
My photos of the C-46 from the sixties taken at Kastrup and Bulltofta Airports.
20 October 2016
Copyright ModelingMadness.com
If you would like your product reviewed fairly and fairly quickly, please contact the editor or see other details in the Note to Contributors.