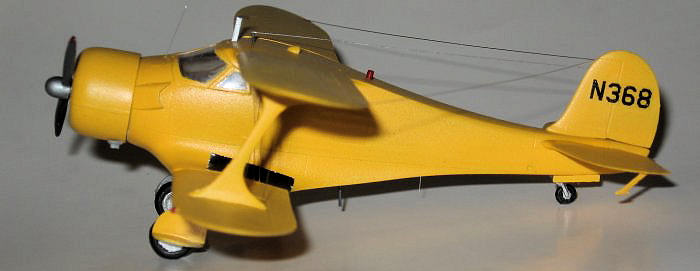
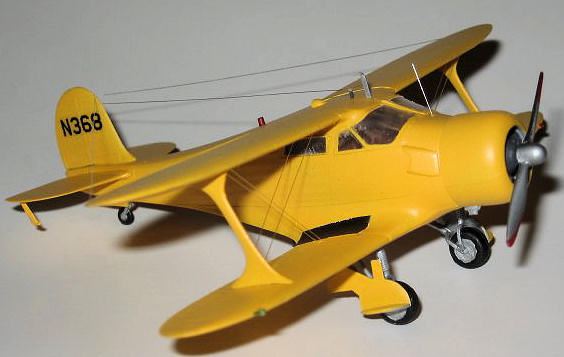
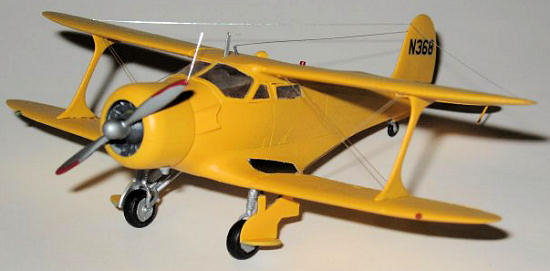
Sword 1/72 Beech Staggerwing
| KIT #: | SW 72010 |
| PRICE: | $17.98 when new in 1990 |
| DECALS: | Two Options |
| REVIEWER: | Brian Baker |
| NOTES: |
Short Run Technology, Advanced Skills Required. Probably OOP, but listed
on Sword’s website. |
| HISTORY |
The
Beechcraft Model 17 “Staggerwing”, so named for the negative stagger of the
biplane wings, with the lower wing slight ahead of the upper wing, was a true
classic biplane of the nineteen thirties.
Walter Beech, who had cut his teeth on the Travelair biplanes, along with
such greats as Lloyd Stearman and Clyde Cessna, left Travelair after the firm
was acquired by Curtiss Wright in 1931, and soon formed the Beech Aircraft
Company.
In 1932, the first
prototype was ready for flight.
Since the last Travelair he was associated with was the Model 16, it was logical
that Beech’s first airplane was designated Model 17. The plane was designed by
Herb Rawdon and Ted Wells, and was a fast, easily handled four seat airplane for
business executives.
The first
models had a fixed landing gear with large wheel pants, and were powered by a
420 hp. Wright radial engine. For its day, it was a really ‘hot” airplane,
especially with the 700 hp. Wright, and
with a smaller engine had a cruising speed of over 200 mph. Later
 models had
smaller engines, and a profusion of variants existed, depending upon type of
engine installed.
These included
Wright, Jacobs, and Pratt and Whitney radials, ranging in horsepower from
225 hp. to 700 hp.
I’ve heard
stories of WWII pilots flying AT-6’s chasing Staggerwings and not being able to
catch them.
Not bad for a biplane.
models had
smaller engines, and a profusion of variants existed, depending upon type of
engine installed.
These included
Wright, Jacobs, and Pratt and Whitney radials, ranging in horsepower from
225 hp. to 700 hp.
I’ve heard
stories of WWII pilots flying AT-6’s chasing Staggerwings and not being able to
catch them.
Not bad for a biplane.
In 1939, the Army bought several D-17S models for personnel transports for American diplomats, due to the airplane’s reputation and the fact that the type had a very successful racing career, setting transcontinental speed records, along with an altitude record for airplanes in its class. When war broke out, many Model 17’s were taken over for the military, and the airplane continued in production for the Army as the UC-43 and for the Navy as GB-1 and GB-2. A total of 328 of all models were acquired by the USAAF, and 18 GB-1’s and 342 GB-2’s for the Navy. Others served in foreign air forces, notably the RAAF and the RAAF. At the end of the war, the UC-43’s and GB’s were declared surplus, and were acquired by civilian owners. That didn’t end production, however, and 20 G-17S models were produced from 1946 to 1949 . Civilian owners continued to operate the airplane in its original role, and many civilian and ex-military Model 17’s are still flying today, their classic-antique value far exceeding what they were originally sold for. They are a fairly common sight at EAA and AAA fly-ins, but pilots do require extensive tailwheel skills for safe operation. The successor to the Staggerwing was the 1946 Beechcraft Model 35 “Vee-Tail” Bonanza, another classic in its own right.
| THE KIT |
The Sword
kit is the first injection molded
1/72 scale model of this kit that I’m aware of, although I believe Rareplanes
did a vacuform model of the type about 30 years ago.
I bought one then, but have never been masochistic enough to attempt to
build it, although it appears to be accurate if lacking in surface detail.
The Sword kit, consisting of at least 50 pieces, including six injection
molded clear windshield and window components, all of which are normally used.
Detail is fair to good for this type of kit, although there is some flash
to be removed, and major parts are sometimes butt fitted into place.
The wings
are not, however, so assembly is not that difficult. The interior is pretty
good, consisting of a floor, seats, control column (The Staggerwing had a
wing-over wheel control, like the later Bonanza), and an instrument panel.
Although the glass is quite thick, you can still see some detail through
the forward windshield, and much less through the side windows.
There is no wheel well detail, with these being mainly the underside of
the cockpit floor.
The engine is cast on a small disk, which fits into
 the two piece
cowling. A back plate disk also fits inside, and this mounts to the firewall,
providing a secure mounting for the cowling.
The prop is molded without a spinner, as most early models didn’t have
these.
The landing gear looks very
spindly, but mounts properly to the wheel wells, and the wheels, although
requiring some trimming, fit neatly into the gear struts.
the two piece
cowling. A back plate disk also fits inside, and this mounts to the firewall,
providing a secure mounting for the cowling.
The prop is molded without a spinner, as most early models didn’t have
these.
The landing gear looks very
spindly, but mounts properly to the wheel wells, and the wheels, although
requiring some trimming, fit neatly into the gear struts.
Instructions are printed on one 8 ½ by 11 inch sheet, made into four pages. The
history is printed in English and Czech on the front page, and the inside sheets
give exploded instruction drawings that are very useful during assembly.
A color guide is provided for the interior, although I would question
some of the colors. A photo of the interior of one of these planes obtained
on-line is very useful. The back page has two three views of the aircraft the
decals are provided for,
a
USAAF UC-43,
42-68340, of
the 67th Recon. Group, 1943 (No location given), and a Traveler (FZ430) of an
RAF Communications Flight in
| CONSTRUCTION |
The
cockpit assembly is first, and although the instructions say to attach the
sidewall panels to the floor, I disobeyed instructions and attached them to
the fuselage sides, as I wasn’t sure whether the cockpit assembly would fit
into the fuselage halves.
The
 floor was easy to trim, although some trimming was required. Some of the
small parts were REALLY small, including the rudder pedals, which cannot be
seen from outside anyway.
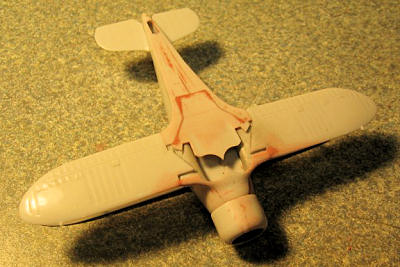
Some
filler was required on the fuselage and engine cowling.
The wing panels were one piece, and fitted into their positions
easily, with only a little filler required.
Be sure to use an accurate three view drawing, as there isn’t one
provided in the instructions.
There should be a very slight amount of dihedral on both wings, but it is
hardly noticeable.
I would
suggest adding the side windows before the fuselage halves are joined, and
also the two piece windshield, as it lines up perfectly when the halves are
joined.
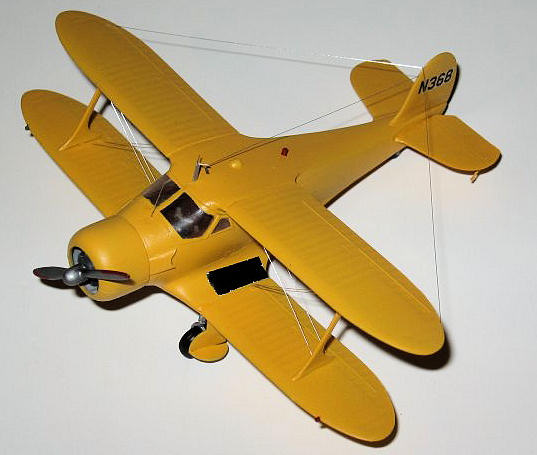
After filling,
attach the lower wings, making sure that the dihedral angle is
correct. Then attach the interplane struts (this will be one of the easiest
biplane to build because there are no cabane struts to worry about) and line
them up so that the upper wings can be attached.
The tailplanes are butt fitted into place, but these are easy to do.
After the required
filling
and sanding, the airplane can be painted.
This can get tricky if you are doing a camouflaged version, but the
kit is pretty robust once the wings are attached, so handling shouldn’t be a
problem.
floor was easy to trim, although some trimming was required. Some of the
small parts were REALLY small, including the rudder pedals, which cannot be
seen from outside anyway.
Some
filler was required on the fuselage and engine cowling.
The wing panels were one piece, and fitted into their positions
easily, with only a little filler required.
Be sure to use an accurate three view drawing, as there isn’t one
provided in the instructions.
There should be a very slight amount of dihedral on both wings, but it is
hardly noticeable.
I would
suggest adding the side windows before the fuselage halves are joined, and
also the two piece windshield, as it lines up perfectly when the halves are
joined.
After filling,
attach the lower wings, making sure that the dihedral angle is
correct. Then attach the interplane struts (this will be one of the easiest
biplane to build because there are no cabane struts to worry about) and line
them up so that the upper wings can be attached.
The tailplanes are butt fitted into place, but these are easy to do.
After the required
filling
and sanding, the airplane can be painted.
This can get tricky if you are doing a camouflaged version, but the
kit is pretty robust once the wings are attached, so handling shouldn’t be a
problem.
| COLORS & MARKINGS |
| CONCLUSIONS |
If you want to get away from the ordinary fighters and bombers, this model is a good choice. Although the kit has been around for over 10 years, it is still a good one, and with some careful attention to detail, a nice model can be made. I did mine OTB (almost) and it took about a week off and on to complete it. The kit is worth getting, and can probably be found at swap meets as well as hobby dealers. Get at least one of these while they are still available. I’ve got one more in my stash, and It will probably wind up as a floatplane. Recommended.
July 2011If you would like your product reviewed fairly and fairly quickly, please contact the editor or see other details in the Note to Contributors.