| KIT #: | 72-391 |
| PRICE: | $50.00 |
| DECALS: | One option |
| REVIEWER: | Peter Burstow |
| NOTES: | Resin kit |
| HISTORY |
A substantially modified version of the single, unnamed D.H.80, the D.H.80A Puss
Moth was de Havilland's answer to customer demand for cabin comfort and an end
to the traditional flying clothes for themselves and their ladies.
 Problems with airflow disturbances over the centre section were eliminated by
not having a centre section.
There
was high interest in the aircraft and mass production began at once, 260 being
built by De Havilland from 1930 to 1933. A further 25 built by de Havilland
Canada.
Problems with airflow disturbances over the centre section were eliminated by
not having a centre section.
There
was high interest in the aircraft and mass production began at once, 260 being
built by De Havilland from 1930 to 1933. A further 25 built by de Havilland
Canada.
| THE KIT |
 The fuselage casting is in one piece, solid aft of the cockpit, with a separate
engine nacelle. No pesky fuselage joint to clean up. The cockpit parts include
the pilots seat and a bench for the two passengers. There is a control stick,
rudder bar and an instrument panel.
The fuselage casting is in one piece, solid aft of the cockpit, with a separate
engine nacelle. No pesky fuselage joint to clean up. The cockpit parts include
the pilots seat and a bench for the two passengers. There is a control stick,
rudder bar and an instrument panel.
There are a large number of struts to make up the wing support, the
undercarriage and the cockpit roof framing. The instructions call for several
pieces of wire to be added to the framework but no measurements are given.
The piece of clear card is intended for the cabin windows, made up of numerous
small panels. The instructions suggest using Clearfix as an alternative. Either
way some careful masking will be needed.
A number of extra parts are present, some small bombs, alternate smaller wheels
and a pair of skis. These are to cater for some of the other boxings of the kit,
which differ only in decals and painting.
The instructions are a single A4 sheet, clearly printed in Czech and quaint
English, a colour profile and plan on one side, a short history, a parts layout
and an exploded diagram for showing construction on the other. There are two
prints of the same photo of
 the kit subject, and an additional photo detailing
the strut arrangement. It's needed, there is a complicated strut assembly
supporting the wings, and the construction diagram is less than clear and wrong
in detail. I anticipate a bit of trouble getting this all together. There is a
colour chart with references to generic names, AGAMA and Humbrol numbers, but no
reference apart from the profile as to what goes where.
the kit subject, and an additional photo detailing
the strut arrangement. It's needed, there is a complicated strut assembly
supporting the wings, and the construction diagram is less than clear and wrong
in detail. I anticipate a bit of trouble getting this all together. There is a
colour chart with references to generic names, AGAMA and Humbrol numbers, but no
reference apart from the profile as to what goes where.
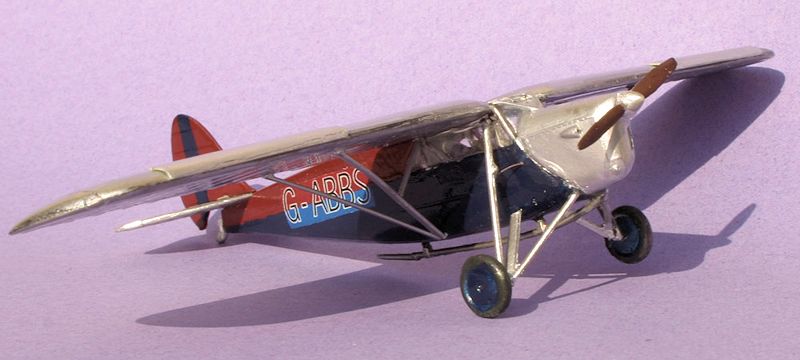
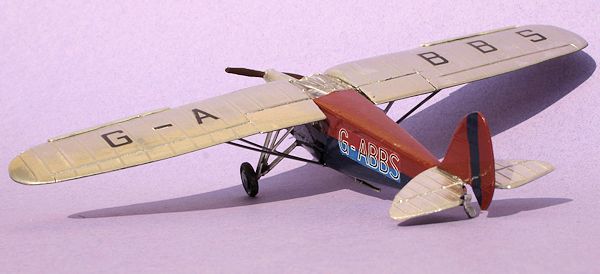
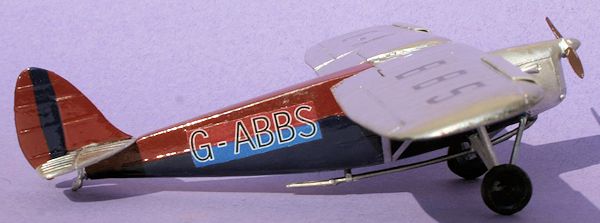
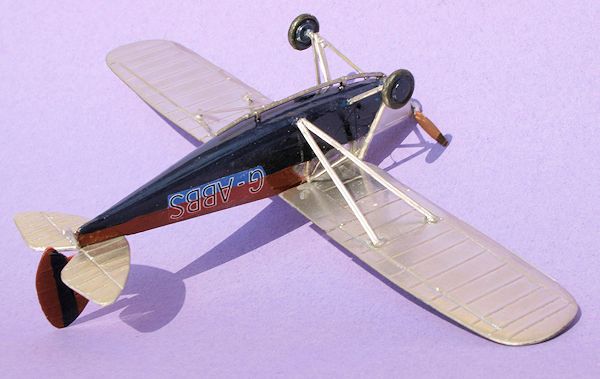
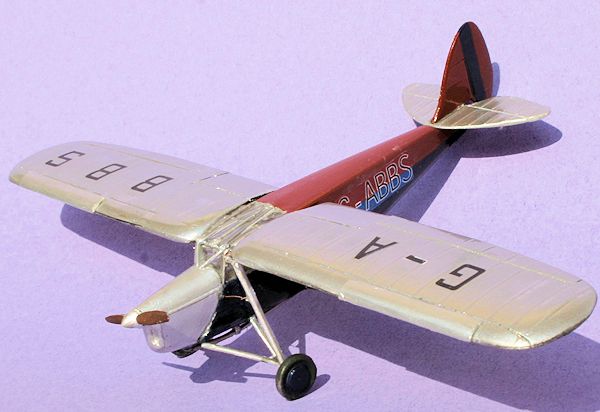
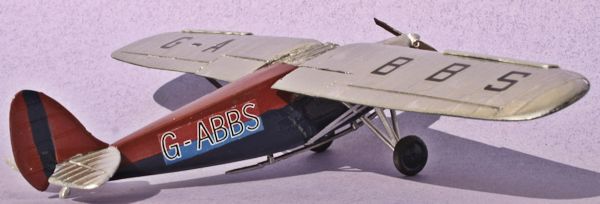
The decals are for a single aircraft G-ABBS, in silver, red and blue, which was
in the Prince of Wales flying club. The registration letters for the sides of
the aircraft are printed with a blue and red background, nice enough, but it
means matching two colours or lots of trimming.
| CONSTRUCTION |
I painted the
fuselage and fin burgundy and royal blue as the best match I could get to the
decals. Then I painted the wings silver after a gloss black primer. I painted
and buffed the cowling and tailplane with Mr Metal Colour aluminium.
I added the
seats, control stick and rudder bar to the cockpit, and did a little detail
painting. There was no information on the instructions so I used light grey for
the cockpit generally, with brown seats and picked out a few details in black
and silver. I added belts to the pilot seat only, using thin strips of masking
tape.
 The
thin cockpit framing was the only connection for the wings, which being solid
resin, were relatively heavy. I had already broken some of the framing while
cleaning up flash, so I had real doubts that it would hold up the wings, even in
the short term. I made a spar from 1mm brass rod to add a lot of strength to the
assembly. This allowed easy adjustment of the sweep and dihedral and prevent any
spreading of the cockpit frame. This rod would remain visible after
construction, but it seemed to be the best approach.
The
thin cockpit framing was the only connection for the wings, which being solid
resin, were relatively heavy. I had already broken some of the framing while
cleaning up flash, so I had real doubts that it would hold up the wings, even in
the short term. I made a spar from 1mm brass rod to add a lot of strength to the
assembly. This allowed easy adjustment of the sweep and dihedral and prevent any
spreading of the cockpit frame. This rod would remain visible after
construction, but it seemed to be the best approach.
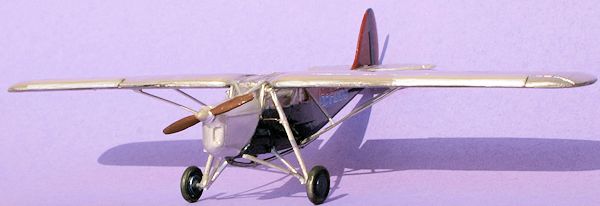
With the wings firmly attached it was
time to start the strut structure. The thin resin struts were about as strong as
over-cooked spaghetti and barely capable of holding themselves together let
alone holding the wing up. I had one break as I removed the flash, before I had
even detached it from the stub. I replaced the main wing “vee” struts with
Contrail aerofoil struts of about the right size.
The resin
undercarriage legs looked like they would hold up the model, and they didn't
break while detaching them from the stub, so they were used, time will tell if
they are strong enough. The Puss Moth had an unusual mechanism to rotate the
wheel leg fairings to provide an air brake. I added a length of thin wire to
replicate the actuator which is clearly visible in some photos I found on the
internet. All the wing and undercarriage struts were then brush painted
aluminium.
After finishing
the cockpit detailing, I added the solid resin cowling. The cockpit framing
struts were very fragile, I replaced all of them with various sizes of
polystyrene strip. The kit supplied only a flat sheet of clear plastic, to be
cut up to build the cockpit glazing, but as no template was provided I didn't
use this method. After the framing was painted, I glazed the cockpit using Micro
“Kristal Klear”. The side windows were a little large for this method but I
managed it after many attempts.
 Using
Kristal Klear, or other PVA type white glues, for glazing, is a bit tricky. It
works fine for small windows and portholes, and is great for airliner windows.
It only works for flat glazing. For these small openings, up to around 5mm
across, it is quick and easy, gives better results than injection moulded parts,
and is less fiddly than cutting clear plastic to fit. As the size of the opening
increases it gets more difficult. It is possible to cast bubble canopies and
astrodomes etc. using white glue, but it takes weeks to harden, and never goes
really clear.
Using
Kristal Klear, or other PVA type white glues, for glazing, is a bit tricky. It
works fine for small windows and portholes, and is great for airliner windows.
It only works for flat glazing. For these small openings, up to around 5mm
across, it is quick and easy, gives better results than injection moulded parts,
and is less fiddly than cutting clear plastic to fit. As the size of the opening
increases it gets more difficult. It is possible to cast bubble canopies and
astrodomes etc. using white glue, but it takes weeks to harden, and never goes
really clear.
The technique I
use is with a toothpick, smear the glue around the edges of the opening, getting
right into the corners, and then drag a film of glue across the opening. You
need a surprisingly large amount of glue to achieve this. The end result is a
thin window, usually very clear, though sometimes containing small bubbles. Do
not be alarmed when it goes cloudy with a coat of floor polish, it will clear
again after a day or two.
Before completing
construction I tried the decals. They were printed on continuous white film,
with a coloured background surround,(see preview for a picture). I used the
fuselage side registration decals, but was unhappy with the match with my paint.
I lost patience trimming the wing registration letters, so used a set of code
letters from a Ventura sheet, V7251, WW2 code letters, probably not the right
size or font, but close enough, and they worked perfectly.
I then finished
assembly by attaching the remaining small bits, the slots, wheels, prop, tail
skid, fin and tailplane. The exhaust pipe, which broke three times, was then
added. A little touch up painting, and a coat of floor polish to protect the
decals, and it was done.
| CONCLUSIONS |
The decals were
problematic and I really should have replaced the fuselage registrations. The
lack of clear parts just added to the fun. The instructions were inadequate and
incorrect in some details.
The nearest comparison I can make is
with early Merlin, but not as good. Probably not worth the expensive price
unless you really want one. Do not attempt without lots of scratch building
experience. I was well outside my comfort zone with this one, so I did a whole
lot of useful stuff to avoid finishing it, like sweeping the workroom floor and
washing the dog. The
result was OK, and it looks better than the old Frog kit. Not recommended.
| REFERENCES |
http://en.wikipedia.org/wiki/De_Havilland_DH.80_Puss_Moth
April 2013
If you would like your product reviewed fairly and fairly quickly, please contact the editor or see other details in the Note to Contributors.