| KIT #: | 720200 |
| PRICE: | $32.00 direct |
| DECALS: | One option |
| REVIEWER: | Peter Burstow |
| NOTES: | Resin kit with vac windscreen |
| HISTORY |
 After
parting with the company that bears his name, Clyde Cessna and his brother Eldon
rented the defunct Travel Air facility and built some tiny racing planes. One of
these was the CR-3 racing aircraft of 1933.
The CR-3 was ordered by
Johnny Livingston
and built by Clyde and Eldon Cessna as a modification of the mid-winged CR-2.
After
parting with the company that bears his name, Clyde Cessna and his brother Eldon
rented the defunct Travel Air facility and built some tiny racing planes. One of
these was the CR-3 racing aircraft of 1933.
The CR-3 was ordered by
Johnny Livingston
and built by Clyde and Eldon Cessna as a modification of the mid-winged CR-2.
| THE KIT |
About 25 resin parts in a segmented bag, come in a tiny box, for a non-tiny
price. There is a vac-formed windscreen, and a decal sheet in several pieces,
with the garish markings of the only one b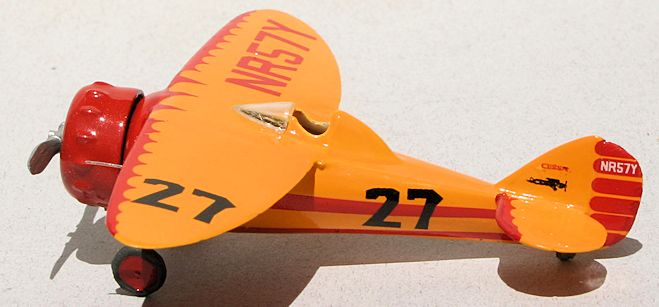 uilt.
The parts are very cleanly cast, with fine detail and only a tiny mould
seam and some flash to clean up. Only the smaller parts are still attached to a
pouring stub, so very little preparation is needed. A first examination found no
signs of moulding glitches or bubbles.
uilt.
The parts are very cleanly cast, with fine detail and only a tiny mould
seam and some flash to clean up. Only the smaller parts are still attached to a
pouring stub, so very little preparation is needed. A first examination found no
signs of moulding glitches or bubbles.
The tiny windscreen is slightly cloudy. The decals appear to be crisply printed
with no registration problems, coming with a correction sheet, with a revised
decal for the side of the plane, three stripes instead of two, and a couple of
letter 'N's which were left off the registrations. The instructions show 4
assembly steps, a painting and decal guide, and a brief history. Location of the
small parts is vague, and without part numbers a bit of guess work will be
required. There is no detail paint information provided.
| CONSTRUCTION |
First of all the resin parts were all washed in warm soapy water to remove any
mould release oil. The fuselage halves were cleaned up
and given a light sand on the mating surfaces. I then joined up the fuselage
halves. The seat and control stick were installed. The i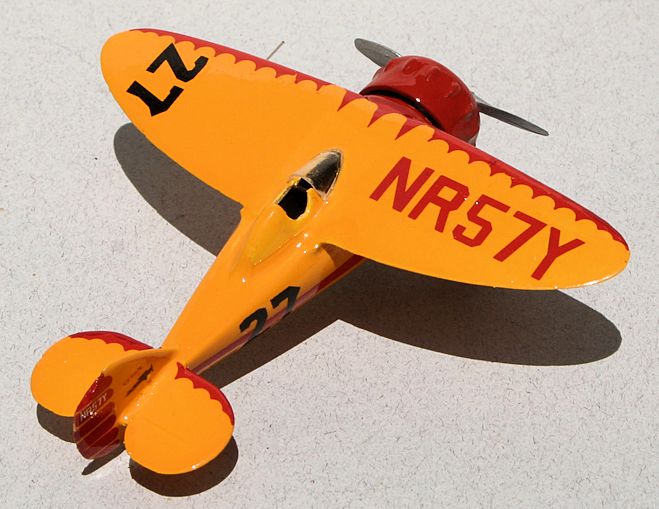 nstrument
panel was fitted to the underside of the wing centre section. I painted the
cockpit floor, sidewalls and undercarriage bay buff, the seat and instrument
panel brown, and picked out details in black and silver. I added etched lap
straps from the spares stash. Then
I
added the one piece wing. The wing roots needed a little sanding to get it to
fit properly.
nstrument
panel was fitted to the underside of the wing centre section. I painted the
cockpit floor, sidewalls and undercarriage bay buff, the seat and instrument
panel brown, and picked out details in black and silver. I added etched lap
straps from the spares stash. Then
I
added the one piece wing. The wing roots needed a little sanding to get it to
fit properly.
There was small gaps where the wing meets the top of the fuselage. These were
filled with superglue. I put a thin bead of Mr Surfacer around the fuselage main
joint. When it was all dry and hard, I sanded all the joints lightly, and
touched up a few spots.
While the filler on the main parts was drying I got on with preparing the rest
of the parts. Using a scalpel, I removed the tailplane and rudder castings from
the pouring stubs, and cleaned them up. I dipped the vac-formed windscreen in
floor polish and set it aside.
| COLORS & MARKINGS |
I gave the model a good wash with warm soapy water to remove any dust and crud.
First a overall spray with Tamiya white primer, found a few spots that needed
repair. The instructions specified overall “yellow”. I
used gloss golden yellow, which is a little orange. I did a check after the
first coat, did some dust removal and
 illed a
couple of spots.
illed a
couple of spots.
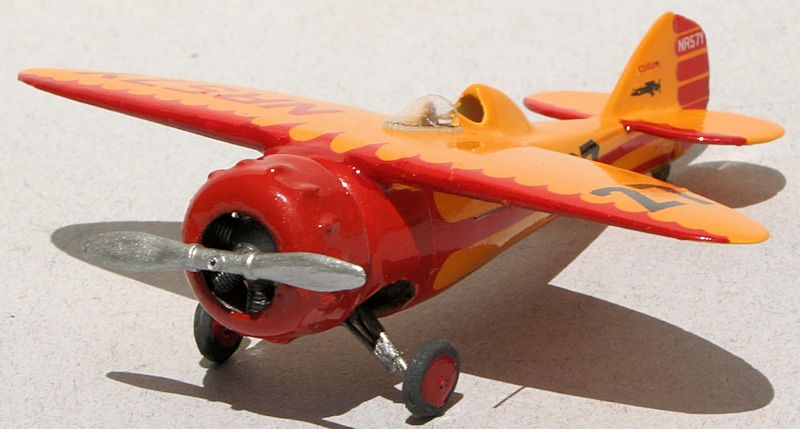
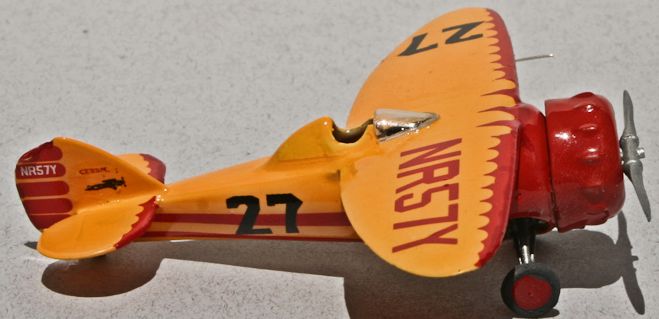
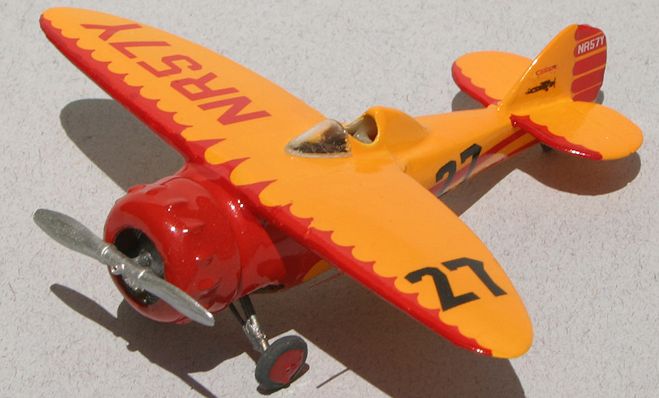
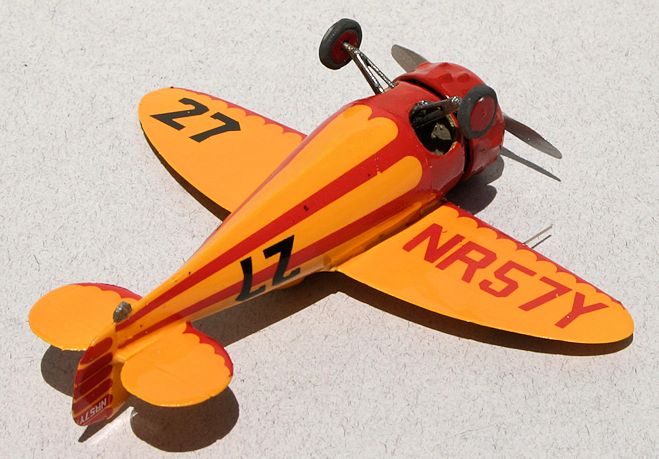
The kit decals were applied using micro set. Suffered a bit from breaking, but not too bad. The Cessna logo for some reason is spelt 'Cessn' but it's so small I doubt anybody other than the laser police would notice. I used the two stripe version, as that what the few photos I could find showed. The kit instructions show three stripes, but the box art showed two! A minor problem was the provision of three left hand and only one right hand decal for the tailplane leading edges, I put one on upside down under the tailplane to get over that, and used plenty of micro-set. I then gave the leading edge decals a coat of micro sol, to help them conform. A coat of floor polish protected them and hid the carrier film.
| FINAL CONSTRUCTION |
I added the resin engine and cowling, painting the engine Mr Metal Colour 'Iron'
and the inside of the cowling 'Aluminium'. Then I hand painted the cowling and
front fuselage using Dulux 'Wildfire Red' enamel.
 I managed
to lose one of the tiny undercarriage struts, and another broke, so I replaced
them with wire of about the same gauge, then decided to go whole hog and
replaced the main legs as well. My new wire assembly is much stronger, and even
though the model is tiny, I really don't trust resin legs in the long term. The
instructions were very vague about how the u/c went together, I think I got it
right using some reference photos. The undercarriage doors were fitted sometime
in July of 1933, and the rear canopy was modified. The resin wheels were nice,
with a little hub detail, but the doors were plain, so I left them off.
I managed
to lose one of the tiny undercarriage struts, and another broke, so I replaced
them with wire of about the same gauge, then decided to go whole hog and
replaced the main legs as well. My new wire assembly is much stronger, and even
though the model is tiny, I really don't trust resin legs in the long term. The
instructions were very vague about how the u/c went together, I think I got it
right using some reference photos. The undercarriage doors were fitted sometime
in July of 1933, and the rear canopy was modified. The resin wheels were nice,
with a little hub detail, but the doors were plain, so I left them off.
The tail skid, prop and the windscreen were added. I attached the tiny screen
with a film of floor polish. Made a pitot using a bit of fishing line, it's
shown on the right wing on the box-art, should be on the left wing. I then did a
little detail painting, and went over the leading edges with gloss red to hide
the gap between the decals. I did not do any weathering. Gave it another overall
coat of floor polish.
| CONCLUSIONS |
A very enjoyable build, a good first resin kit for those hesitant to try their
hand at them.
Recommended for all.
| REFERENCES |
http://www.air-racing-history.com/aircraft/Cessna%20CR-3.htm
March 2014
If you would like your product reviewed fairly and fairly quickly, please contact the editor or see other details in the Note to Contributors.