Aero Base 1/160 Gee Bee R-2
|
KIT # |
B 103 |
|
PRICE: |
$37.99 |
|
DECALS: |
None |
|
REVIEWER: |
Norm Samuelson |
|
NOTES: |
Nickel silver stripped down airframe |
|
HISTORY |
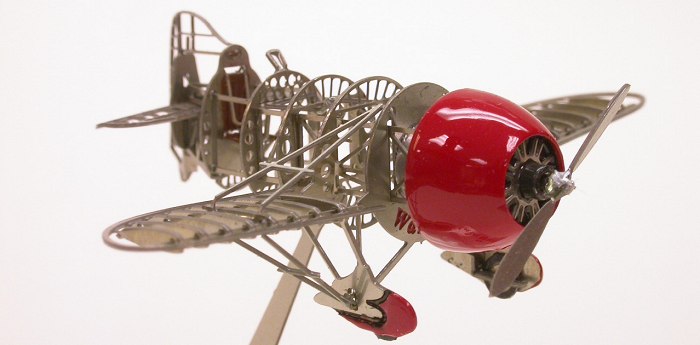
The Gee Bee’s were among the most famous of the Golden Age air racers. The epitome of the largest power plant with the smallest possible airframe, they are often referred as “a barrel with wings”, and, similar to a bumble bee, shouldn’t be able to fly with such small wings. They had a reputation of being dangerous; few of their pilots survived more than a season of racing without mishap. One of the most famous (and successful) of the Gee Bee pilots, Jimmy Doolittle, later equated flying them to the high-powered fighters of WW II. Being so far ahead of their pilots’ experience, most weren’t aware of the dangers of the tremendous power and torque in such a small airframe, and the fast reactions necessary to compensate.
The season of 1932 saw two new airframes come out of the small Springfield, MA plant of the Granville Brothers. The R-1 was built for sprint races like the Bendix Trophy, and had a Pratt & Whitney Wasp Sr. of 750 hp. The R-2 was almost identical, but was intended for the long distance cross country races, and had a 530 hp Wasp Jr. The most visible structural difference between the two was a smaller engine cowl on the R-2.
|
THE KIT |
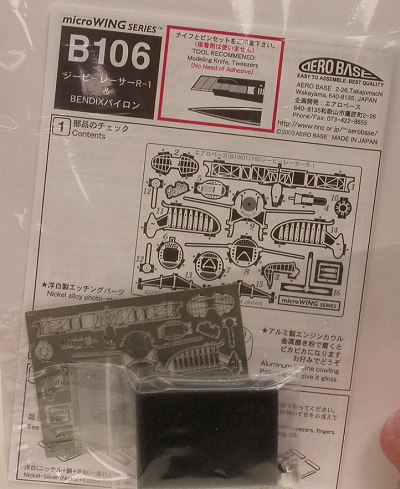
The kit comes as a sheet of photo-etch, a turned aluminum cowl, and a white metal pilot figure. Also included is a photo-etch display stand and an optional black plastic base for the aircraft to sit on. All is contained in a clear plastic sealed envelope with a printed cardstock protective sleeve. Not a lot for the price, but very high quality and engineering. The series covers the Wright Flyer, a number of historic pioneer aircraft, a variety of WW I fighters, and a dirigible! Please note; the unassembled kit shown is the R-1, #B106, which is identical in aircraft construction.
|
CONSTRUCTION |
The first thing I do when working with a kit this
small is get out my illuminated magnifier. I also work on a large (18 x
24) piece of cardstock, to try to keep up with parts. I do all of my
cutting with a Xuron PE cutter, or with a brand new curved X-acto
 blade on a 12 x 6 x
¼” thick glass. If the blade gets dull, I immediately replace it, as the
sprue nubs are much cleaner with a new blade. As I cut them, I file and
sand where required, and remove parts as I need them per the instructions
(yes, I do look at them, but I can’t read the Japanese instructions, I
just look at the pictures).
blade on a 12 x 6 x
¼” thick glass. If the blade gets dull, I immediately replace it, as the
sprue nubs are much cleaner with a new blade. As I cut them, I file and
sand where required, and remove parts as I need them per the instructions
(yes, I do look at them, but I can’t read the Japanese instructions, I
just look at the pictures).
|
COLORS AND MARKINGS |
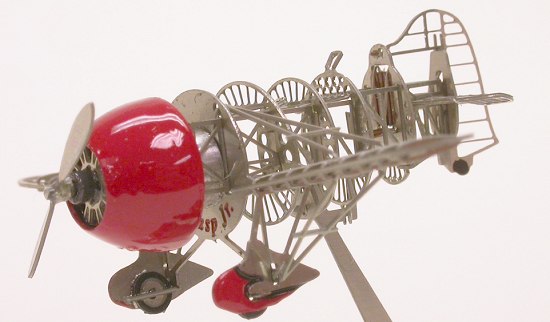
The most difficult part of the kit (for me) was painting. I wanted to add some color to the nice silver airframe. The R-1 and R-2 were known for their flashy red and white scalloped paint jobs. I painted the cowl with Testors Guards Red enamel (with a brush!) and put it in the oven to bake at 125 degrees for about 2 hours (don’t try this with a plastic kit). The gloss is smooth and shiny as glass. I also painted the etched scallops on the wheel pants, the engine casing in the cowl, the tires, and the seat. The details are difficult just because they are so small, but they do add some interest to the monochrome silver.
|
FINAL CONSTRUCTION |
One of the reasons justifying the expense of this
kit for me is the excellent engineering involved. The entire kit can be
assembled without adhesives; tabs are inserted into slots, bent over, and
it’s time for the next piece. Most of the tabs are
 hidden or in a
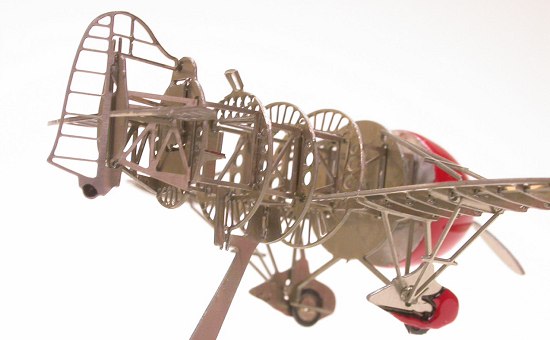
nondescript location. The wings are one-piece; the ribs are simply bent
90 degrees to the leading and trailing edges. Pay attention to which way
you twist the ribs, as all should be bent with the same twist direction.
The assembly can actually be done in a couple of hours. I used my “Hold &
Fold” brake to bend the elevators down, and the rudder cocked a little,
just to add some interest, but the majority is built with a small flat
screw driver and a couple of needle-nosed pliers. I added a little bit of
white glue to the windscreen frame to represent glass, and reinforced a
couple of joints with the same at my discretion.
hidden or in a
nondescript location. The wings are one-piece; the ribs are simply bent
90 degrees to the leading and trailing edges. Pay attention to which way
you twist the ribs, as all should be bent with the same twist direction.
The assembly can actually be done in a couple of hours. I used my “Hold &
Fold” brake to bend the elevators down, and the rudder cocked a little,
just to add some interest, but the majority is built with a small flat
screw driver and a couple of needle-nosed pliers. I added a little bit of
white glue to the windscreen frame to represent glass, and reinforced a
couple of joints with the same at my discretion.
On completion, I checked alignment of all
components, wiped off fingerprints (where I could), and dipped it all in
Future. I let it wick off and dry thoroughly, and it’s done. The Future
has two advantages;
(1) It seals the metal and gives a nice gloss, and
(2) It reinforces all of the tabbed joints, keeping them nice and tight.
Make sure any excess Future is blown out of the lightening holes in the airframe, or it looks like lots of tiny portholes!
|
CONCLUSIONS |
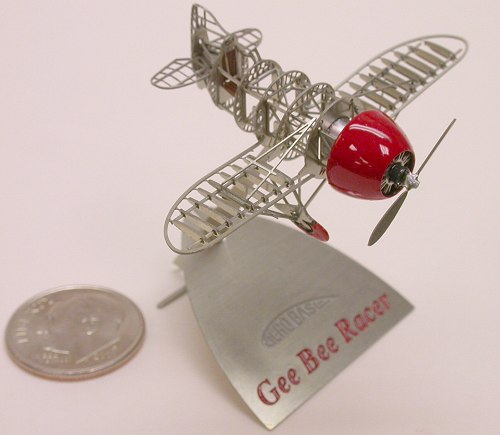 In conclusion, this
kit was a blast to build. The wingspan is only 1 7/8”; it is tiny! It’s
my second in the series (I built the Spirit of St. Louis first), and I
have the Gee Bee R-1 to build, with a PE pylon to fly around. They aren’t
100% accurate, but considering the scale and assembly, they are pretty
close. I won’t build them all because of the cost, but they are real
attention-getters, being so small and detailed, and fun to build and
complete in a relatively short time. If you are steady and can see the
parts, get one and try it out. They are easy to build and great fun to
display.
In conclusion, this
kit was a blast to build. The wingspan is only 1 7/8”; it is tiny! It’s
my second in the series (I built the Spirit of St. Louis first), and I
have the Gee Bee R-1 to build, with a PE pylon to fly around. They aren’t
100% accurate, but considering the scale and assembly, they are pretty
close. I won’t build them all because of the cost, but they are real
attention-getters, being so small and detailed, and fun to build and
complete in a relatively short time. If you are steady and can see the
parts, get one and try it out. They are easy to build and great fun to
display.
|
REFERENCES |
“Gee Bee, the Real Story of the Granville Brothers and their Marvelous Airplanes”, by Henry A. Haffke
Copyright ModelingMadness.com. All rights reserved.
If you would like your product reviewed fairly and fairly quickly, pleasecontact the editor or see other details in the Note to Contributors.