Revell 1/32
Piper PA-18 Super Cub
|
|
04208 |
|
PRICE: |
$31.00 |
|
DECALS: |
4 options |
|
REVIEWER: |
|
|
NOTES: |
New mold; complete
engine |
|
HISTORY |
The Piper
PA-18 Super Cub is a two-seat, single-engine monoplane. Introduced in 1949 by
Piper Aircraft, it was developed from the Piper PA-11, and with a design and
construction heritage back through the J-3 to the Taylor E-2 Cub of the 1930s.
In close to 40 years of production, over 7,500 were built. Super Cubs are
commonly used for bush flying, banner and glider towing, and other situations in
which short-field performance is required. It is considered to be one of the
most sought after bush planes in the world. Even new bush planes, such as the
Fairchild
 F-11 Husky, cannot take off and land in as short a distance as the
Super Cub.
F-11 Husky, cannot take off and land in as short a distance as the
Super Cub.
The PA-18 Super Cub was the ultimate development of Piper's
original J-3 Cub aircraft. The four seat development of the Cub, the PA-14
Family Cruiser, was the basis for the Super Cub, but the Super Cub differed by
having seating for two in tandem (as on the Cub), all metal wings and, in its
initial form, a 90hp Continental C-90 in the PA-18-90 or a 108hp Lycoming O-235
engine in the PA-18-105. The Super Cub flew for the first time in 1949, and
certification was awarded on November 18 in that year. The first production
Super Cubs were delivered starting in late 1949, and the new model replaced the
PA-11 Cub Special on Piper's production lines.
While based
on the design of the earlier Piper Cubs, the addition of an electrical system,
flaps (3 notches), and a much more powerful engine make it a very different
flying experience than earlier Cubs. Although the "standard" Super Cub was
fitted with a 150 horsepower Lycoming engine, many were equipped with a 180 hp
powerplant. The high-lift wing and powerful engine made the Super Cub a prime
candidate for conversion into a floatplane or a ski plane. In addition, the
PA-18A (an agricultural version) was produced to apply either dry chemical or
liquid spray to fields.
The Super Cub
retained the basic "rag and tube" (fabric stretched over a steel tube frame)
structure of the earlier J-3 Cub.
The first
true Super Cubs had flaps, dual fuel tanks, and an O-235 Lycoming engine
producing about 108 hp (115 hp for takeoff only); however, a 90 hp Continental
without flaps and an optional second wing tank was available. Their average
empty weight was 800-1000 pounds with a gross weight of 1,500 lbs. These Cubs
would take off in about 400 feet (at gross weight) and land in about 300 feet
(taking full advantage of the flaps). The Super Cub is famous for its ability to
take off and land in very short
 distances. With its light wing loading, some can
take off in 50 feet and land in 30. The later O-290 Lycoming-powered Cubs (135
hp) could take off in about 200 feet. The landing distance remained the same at
about 400 feet, or 300 feet using the flaps. With the introduction of the
Lycoming O-320 at 150-160 hp, the Cub's allowable gross weight increased to
1,750 lbs. while retaining the capability of only 200 feet required for takeoff.
distances. With its light wing loading, some can
take off in 50 feet and land in 30. The later O-290 Lycoming-powered Cubs (135
hp) could take off in about 200 feet. The landing distance remained the same at
about 400 feet, or 300 feet using the flaps. With the introduction of the
Lycoming O-320 at 150-160 hp, the Cub's allowable gross weight increased to
1,750 lbs. while retaining the capability of only 200 feet required for takeoff.
The 100kW (135hp) Lycoming O-290 powered PA-18-135 appeared
in 1952, while the definitive 110kW (150hp) Lycoming O-320 powered PA-18-150 was
certificated on
The Super Cub is one of Piper's most successful and long
lived aircraft programs, with production spanning over four decades.
The Super Cub remained in production with Piper through
until 1981, when almost 7500 (including 1700 military) had been built over an
uninterrupted 32 year production run. Piper continued building 250 Super Cubs on
behalf of Texas-based WTA who held the manufacturing and marketing rights from
1981 until 1988. In 1988 Piper resumed marketing responsibility for the Super
Cub and continued low rate production (100 total). Financial troubles meant that
Super Cub production ceased in 1992, before resuming once more the following
year. Finally in late 1994 Piper announced that the Super Cub would not form
part of its model line for 1995 and that it would cease production after the
last of 24 on order for distributor
|
THE |
The Super Cub is an
interesting addition to the resurgent 1/32 scale aircraft kit world, and
continues Revell AG’s recent line of civil sector aircraft kits. What you get in
the box is seven sprues of white plastic parts (about 78) and a large sprue of
clear plastic parts, plus a rather large decal sheet. The molding is crisp with
little to no flash evident.
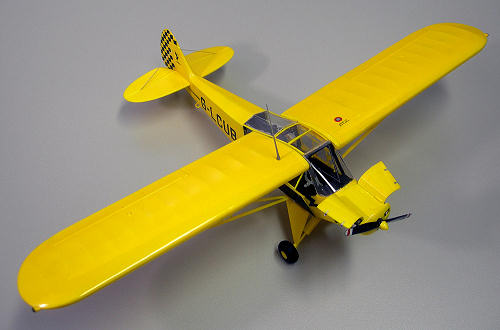
Of
particular note are the fabric surfaces, which are very realistic. The kit
includes decals for several different instrument panel configurations.
Other options include an alternate tail wheel strut and
the option to install wheel brakes, which was not a normal feature of most of
these aircraft. For a detailed look at the kit in the box, see
the Boss' Preview.
|
CONSTRUCTION |
This is only my second Revell AG kit in
recent years, and after numerous Hasegawa and Dragon kits, the Revell
instructions take a little “getting used to.” But the relatively small number of
parts (compared to a Dragon armor kit with say 500+ parts) makes this task much
easier. I set out to follow the exact sequence of assembly recommended by the
instructions; however, given my tendency to “know better tha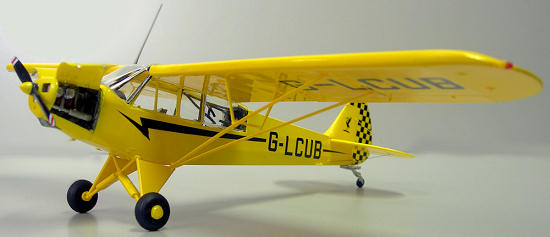 n the kit
manufacturer,” I deviated at one point, and this almost resulted in a disaster
(more on that later).
n the kit
manufacturer,” I deviated at one point, and this almost resulted in a disaster
(more on that later).
Construction begins with the cockpit, and
Revell has very accurately reproduced the details of the real cockpit cockpit. I
installed the tubular steel frames that frame up the cockpit interior. The Super
Cub had its framing on the inside, which allowed Revell to create a separately
molded interior section to build up within the tubular frames. I mounted the
dual sticks, rudder pedals with heel brake tabs and two seats to the floorboard,
which I then installed inside the framing. Once this was done, I added the
instrument panel and coaming, and then sandwiched the interior between the
fuselage halves. At this stage, I spray-painted the interior overall flat black
and painted various small pieces with a brush. I used the instrument panel decal
rather than paint the instruments.
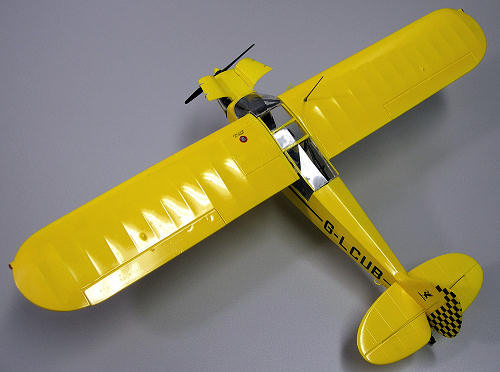
I assembled the wings, including their
struts, but, at this stage, chose not to attach them to the fuselage with the
kit’s main spar arrangement that is molded in clear and doubles as one of the
overhead windows (my thinking here was I would paint the wing
 assemblies and
then install them later). Incidentally, this main spar is a really nice touch,
as it keeps the wings solid and at the right angle once they are installed.
assemblies and
then install them later). Incidentally, this main spar is a really nice touch,
as it keeps the wings solid and at the right angle once they are installed.
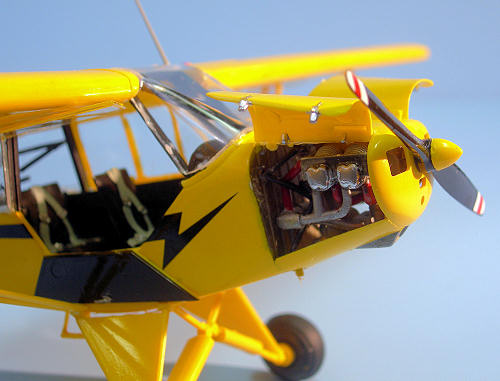
Next, I moved to the assembly of the very
nicely detailed Continental engine. Detailers can add spark plug wires to
increase the fidelity of their model. The engine is really a model in itself,
but I found some fit and alignment issues. I glued the engine supports to the
engine rear and then proceeded with assembly of the engine, and then attached
the intake manifold and the exhaust pipes. I proceeded to paint all of the
various engine parts with a brush. The next step was to attach the engine to the
firewall. At this point, something went astray in my assembly process, as I
found I had several fit and alignment problems. After a lot of fiddling and bad
language, I was able to get the engine to at least look like it belonged in the
model’s fuselage.
I then glued the separately molded rudder to
the tail and the tail wheel assembly to the fuselage. I painted the inside of
the engine cowl’s top the airplane’s exterior color, which was going to be
Chrome Yellow, and then
glued that
and the front cowl to the fuselage.
|
COLORS & MARKINGS |
Once everything was assembled, I headed
to my basement paint booth. I masked off the cockpit with blue painter’s tape. I
then stuffed wet Kleenex into the openings around the engine to prevent
overspray on it. After the paint was dry, I was ready for the final assembly. 
And here is where the problem became
apparent. Rather than pay attention to the instructions, I glued the wings and
their spar to the fuselage, thinking I could then install the remaining windows
in the cockpit. Wrong! This proved to be a major mistake, as I had to fiddle and
adjust and cajole these parts into a semblance of a fit, given that I had
VIOLATED the recommended assembly order. Man, talking about frustrating.
Once I managed to get a halfway decent
alignment of the windows with the fuselage, the wing, and the cowl, the final
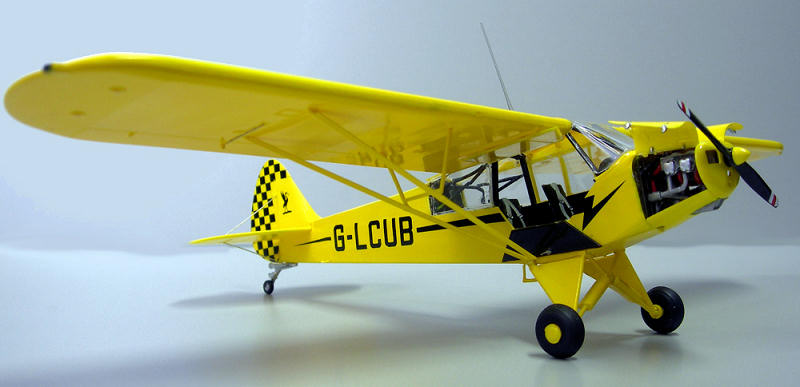
touch was to cut a length of stretched sprue to serve as a radio antenna.
I cut the sprue at an angle to match the somewhat “aerodynamic” antennas
found on Super Cubs and mounted it on the top of the wing. I then brush-painted
the antenna with Testors steel.
|
CONCLUSIONS |
This was a nice diversion from the military aircraft and armor kits I normally build. The kit is impressive when built up, and is a great addition to anyone’s collection, especially if you want an eye-catching piece of aviation history with a bright color scheme! I highly recommend this kit to anyone with a little modeling experience.
|
REFERENCES |