Airmodel 1/72 Granau Baby
| KIT: | Airmodel 1/72 Granau Baby |
| KIT #: | AM 335 |
| PRICE: | € 4.50 |
| DECALS: | No |
| REVIEWER: | Carmel J. Attard |
| NOTES: |
an early release vac form kit, no decals or interior details. |
| HISTORY |
Gliders have not always given the due importance when it comes to kit issues
considering the roles they have played for introducing aviation enthusiasts to
induction flying and the role it played during the war. There are several series
of sporting gliders. Some of the early ones were relatively crude type on which
pilots could learn their skill, others were intermediary trainers and there are
also advanced high performance types. In the interests of both of lightness and
cheapness, single seaters were initially used for training. Just before the war,
car-towing and winches were beginning to be standard practice for launching
 gliders.
For training a two-seater is normally used which has a single plywood fuselage
of streamlined shape, with flat sides, and strut-braced wings of moderate aspect
ratio. In addition to two seaters there are similar single seater types,
relatively cheap with a fair performance called intermediaries. The beautifully
streamlined advanced sailplanes used for soaring are works of art. Although
winch launching is still used with these high performance sailplanes, it is more
usual to use a powered aircraft to tow them off to a good starting height and to
cut them adrift in the neighbourhood of a thermal.
gliders.
For training a two-seater is normally used which has a single plywood fuselage
of streamlined shape, with flat sides, and strut-braced wings of moderate aspect
ratio. In addition to two seaters there are similar single seater types,
relatively cheap with a fair performance called intermediaries. The beautifully
streamlined advanced sailplanes used for soaring are works of art. Although
winch launching is still used with these high performance sailplanes, it is more
usual to use a powered aircraft to tow them off to a good starting height and to
cut them adrift in the neighbourhood of a thermal.
 cross
section. The structural design being developed from the wooden light aircraft.
It has no concentrated load, no engine vibration or torque and relatively low
landing and flight speeds. The stresses in a glider being much lower than in a
powered aircraft.
cross
section. The structural design being developed from the wooden light aircraft.
It has no concentrated load, no engine vibration or torque and relatively low
landing and flight speeds. The stresses in a glider being much lower than in a
powered aircraft.
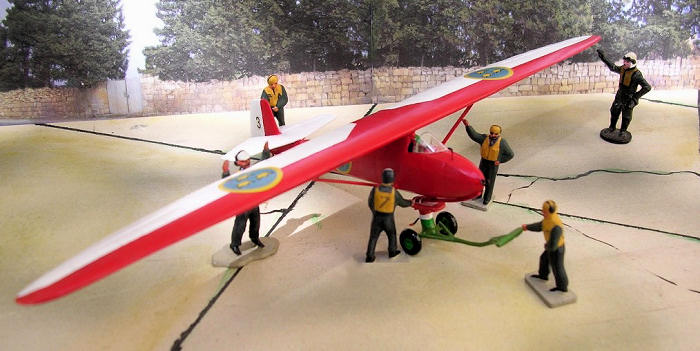
The Grunau Baby has a thick wing section employing
a single spar with thin plywood leading edge. It has struts that support a wing
of simple construction. The high shoulder-wing layout of the Grunau is almost
universal and it keeps the wings clear of the ground when landing, so minimising
the chances of damage from hitting ground obstacles.
It
has the essential instruments as air-speed indicator, sensitive altimeter,
compass, venture operated instruments such as directional gyro, turn and bank
indicator and possibly artificial horizon. The Granau Baby was employed by a
number of air forces principally for induction training of cadets. One such air
force is that of
| THE KIT |
The kit comes packed in a polythene bag containing the sheet of vacform white plastic that carried the kit parts, and this was complete with an A4 size instruction sheet which on one side is depicted 4-view scale plans and suggesting pre war German markings that carried civil registration with a red bend on tail fin and rudder having a swastika on a white disc. On the other side of the instruction sheet there is an exploded assembly drawing of the kit and the carrier trolley. Small items not included with the kit are also depicted in order to give indication of what small items would be needed for scratch building. The vacform sheet contains wing and fuselage halves. No decals are supplied and a simple arch windscreen has to be provided by one's good self.
| CONSTRUCTION |
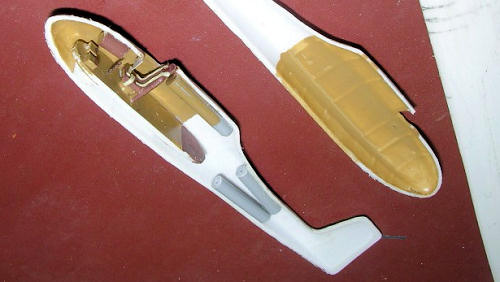 Construction
starts with the cockpit area. This is mainly scratch built from the backing
plastic sheet. The cockpit is of simple construction and consists of a floor
which is cut to fit the inside width, a seat complete with a headrest, control
column, rudder pedals, and a seat harness to go with the crew seat. The next
main task was to score the edge of the vacform parts and bend them till they
snap from the backing sheet. Sanding of the parts follows starting with the two
tail plane parts. These happened to be slightly blistered on the outer face and
therefore needed to bring down by sanding or scraping using a modelling knife.
The two piece to and bottom main planes also needed similar treatment and
fashioned to conform to the scale plans. This also required re-engraving the
ailerons and other surface detail that had to be removed to bring down the
thickness of the wing sections. The engraving was done using a blunt blade
scored against a 6 inch steel rule.
Construction
starts with the cockpit area. This is mainly scratch built from the backing
plastic sheet. The cockpit is of simple construction and consists of a floor
which is cut to fit the inside width, a seat complete with a headrest, control
column, rudder pedals, and a seat harness to go with the crew seat. The next
main task was to score the edge of the vacform parts and bend them till they
snap from the backing sheet. Sanding of the parts follows starting with the two
tail plane parts. These happened to be slightly blistered on the outer face and
therefore needed to bring down by sanding or scraping using a modelling knife.
The two piece to and bottom main planes also needed similar treatment and
fashioned to conform to the scale plans. This also required re-engraving the
ailerons and other surface detail that had to be removed to bring down the
thickness of the wing sections. The engraving was done using a blunt blade
scored against a 6 inch steel rule.
The fuselage was then cut, sanded and the floor
fitted after making adjustment to the width in order to fit in place. Whole
 assembly
painted khaki as for fabric. The seat was brown and having green canvas head
rest. Seat straps in light Khaki were added. Instrument panel was also added but
interior detail won’t destruct modellers as this is sparse and very little can
be seen from the tiny open cockpit. A landing skid is cut and fitted to lower
fuselage. Joint lines required a little filler followed by sanding.
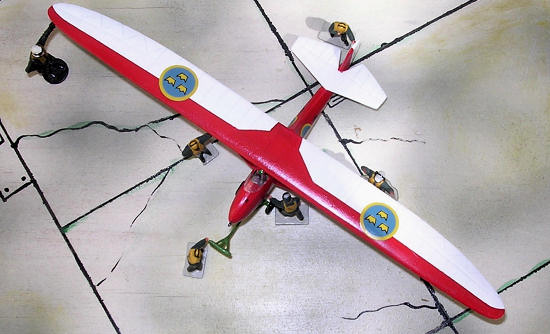
The main planes were carefully
glued to the upper fuselage in accordance to the scale plans.
assembly
painted khaki as for fabric. The seat was brown and having green canvas head
rest. Seat straps in light Khaki were added. Instrument panel was also added but
interior detail won’t destruct modellers as this is sparse and very little can
be seen from the tiny open cockpit. A landing skid is cut and fitted to lower
fuselage. Joint lines required a little filler followed by sanding.
The main planes were carefully
glued to the upper fuselage in accordance to the scale plans.
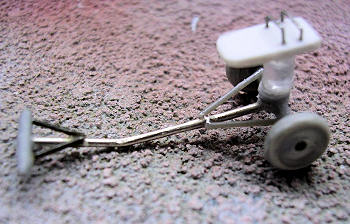
The wing to fuselage area also required some filler and reshaping. Wing struts were cut from surplus plastic and fitted in place. The tail planes were also fixed in place and tail plane struts made from stretch sprue added. Tail skid was also made from a piece of shaped sprue. A trolley was built from a piece of metal paper clip with side brackets added to using super glue. Two inverted ‘U’ metal bits were also glued to the flat top of the trolley so that the fuselage skid can slide and hold the glider on the trolley. A pair of wheels from spares box was added to complete the carrier trolley.
| COLORS & MARKINGS |
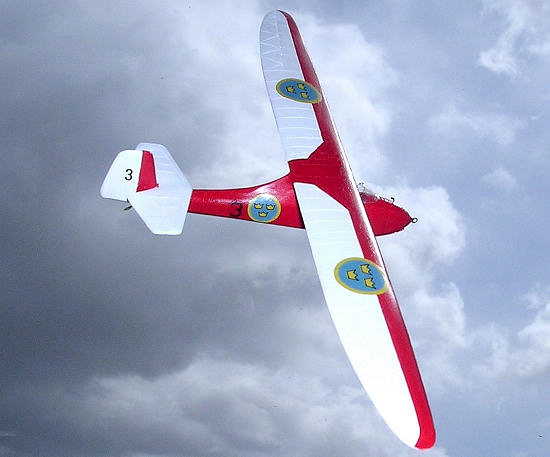
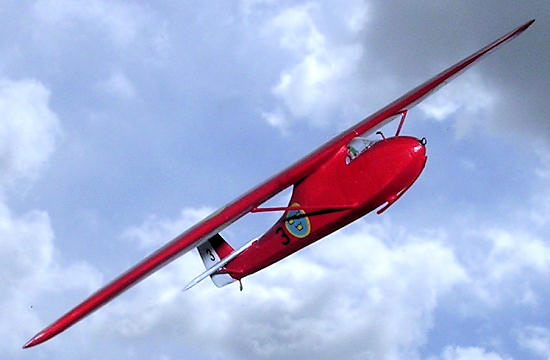
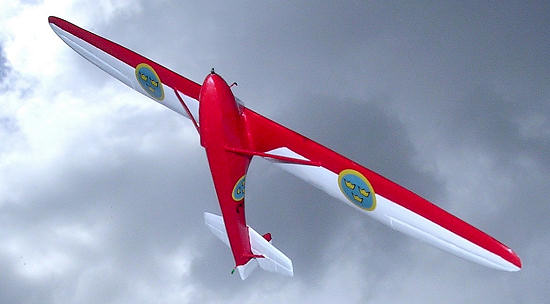 The
glider kit was completed in color markings picked from a photo that someone took
in
The
glider kit was completed in color markings picked from a photo that someone took
in
| CONCLUSIONS |
April 2008
If you would like your product reviewed fairly and quickly, please contact me or see other details in the Note to Contributors.