
| KIT #: | A056 |
| PRICE: | £16.50 |
| DECALS: | Four options |
| REVIEWER: | Frank Reynolds |
| NOTES: |
| HISTORY |
The French aircraft industry was in a state of stagnation during the Nazi
occupation of World War2 but managed to keep its technology base intact by
manufacturing transport and trainer aircraft for the occupiers. In the early
post war years French industry showed remarkable energy and innovation with a
series of radical aircraft for the jet age. Some were jet powered, others had a
ramjet or mixed power plant, some tail-less designs, others ramp-launched and
lacking a wheeled undercarriage. As with the USA, USSR and Great Britain there
seemed to be no end to the weird and wonderful creations flowing from the
factories. In France, it was a period of
many prototypes but few production aircraft and by 1950 only the Ouragan single
seat 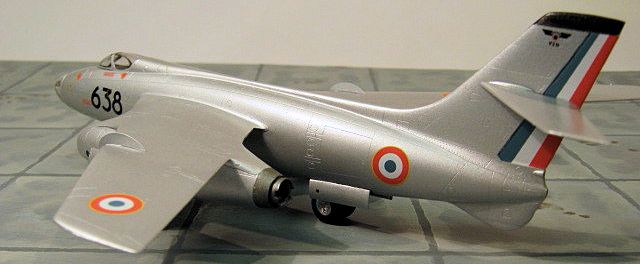 single jet fighter had been ordered into production. As the result of a
1951 French Air Force requirement a specification was drawn up for a multi-role
twin jet aircraft that could serve both as a bomber and a heavy fighter.
single jet fighter had been ordered into production. As the result of a
1951 French Air Force requirement a specification was drawn up for a multi-role
twin jet aircraft that could serve both as a bomber and a heavy fighter.
In October, 1952 the first of three Vautor prototypes flew. Ultimately some 140
aircraft were produced for the Armee De L’Air as it was expected to be an
interim type pending the introduction of more sophisticated aircraft. It was
powered by a pair of Atar 101 axial flow turbojets, an engine design developed
by a team at BMW in Germany in the latter days of World War 2, the project
subsequently transferred to France to permit rapid development of jet engine
technology. The Vautor was so characteristic of its period as aircraft designers
fought to integrate the new generation of engines into airframe designs and
solve problems such as where to place the engines and how to incorporate
undercarriage assemblies into the airframe.
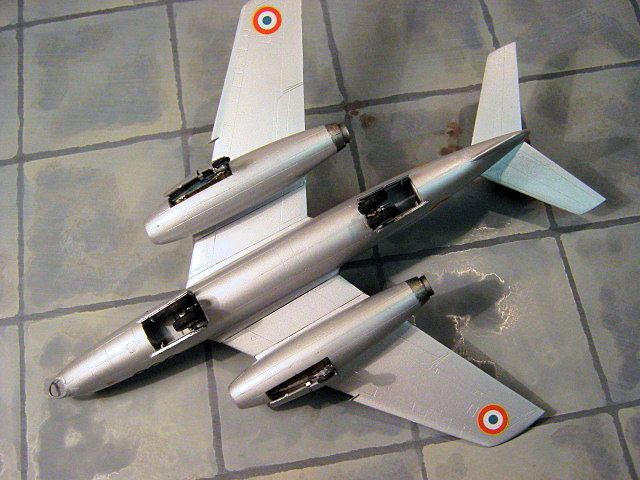
The design reflected some of the quirks of the period, with the bombardier
buried in a separate nose compartment. The main undercarriage was a bicycle type
housed in separate bays under the front and rear fuselage and small outrigger
wheels retracted into the side of the engine nacelles. The solution chosen was
vaguely reminiscent of Boeing’s B-47 six-jet bomber and closely mirrored the
Yak25/28 series from the USSR.
The Vautor was produced in three distinctive and contrasting versions. The II.N
was an all-weather heavy interceptor with a two-seat canopy and a solid nose
housing four 30mm cannon, later refitted to carry four semi-active underwing
missiles. 70 were built.
The Vautour II.A was a single seat tactical bomber with the nose cannon of the
II.N and an internal weapons bay for three 1,000lb bombs. They did not see
squadron service in France and 25 of the 30 built were
 transferred to the
Israeli Air Force.
transferred to the
Israeli Air Force.
The Vautor II.B, of which 40 were built was intended as a tactical strike
aircraft with a nuclear option. No cannon were fitted and the glazed nose housed
a navigator/bombardier. The weapons bay could carry three 1,000lb bombs with an
additional two or four 1,000 or 500lb bombs underwing.
The Vautor was capable of about Mach 0.9
(680mph) at sea level and had a tactical radius of 750 miles.
The first operational bomber unit , Escadre De Bombardement 1/93 Bourgogne stood
up at Cognac on 1 March 1958 and in replacing the Douglas B-26 in French service
illustrated just how important the Vautor was in terms of advanced capability.
In the course of 1959 the type was involved in well-publicised long range
flights to Ethiopia, Chad, Iran, Congo, Madagascar
and Thailand to emphasise the long reach of France’s new state of the art
weapons systems. The type was
progressively replaced from 1964 by the much more capable Mirage IVA but the
gradually dwindling fleet lingered on into the early 1970s. Some 12 II.B
airframes were modified for a high/low level reconnaissance role and some were
diverted to monitoring French nuclear tests in Polynesia.
The Vautour proved to be a rugged and versatile type that brought the Armee de
l’Air into the jet and nuclear age.
| THE KIT |
The project comes in a stout tray-type box that proclaims the kit to be
“Designed and concept invented in France. Tooling and moulding made in the Czech
republic”. The instructions even refer to the Czech-based CMK kits website. So
the package is a familiar one that applies to products from CMK/Special
Hobby/MPM and that is reassuring.
I am a big fan of Special Hobby/MPM kits and must have made ten or more of them
in the last couple of years. I like the fact that you get everything that you
need in one box, with no pressure to buy aftermarket items. There are four
frames of parts moulded in a medium grey soft plastic and one of clear. The
plastic has neat and subtle etched detail and was essentially free from flas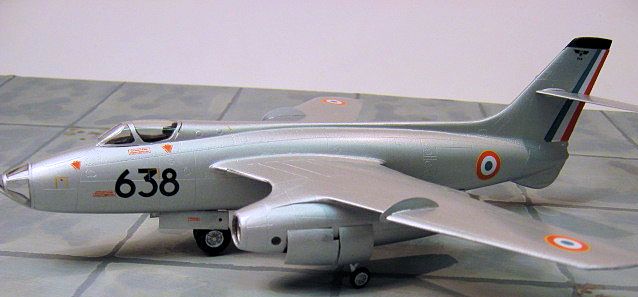 h,
with the sprue gates small and unobtrusive. There were the inevitable ejector
towers that are to be expected with shorter run kits, but these can be easily
trimmed away at the construction stage. Five small bars of resin details are
provided to cover the engine intakes and exhausts, small undercarriage parts and
a host of tiny levers and door hinges some of which proved too challenging for
my 1949 model year eyesight. There is a sheet of stainless steel etch for the
seatbelts, instrument panel and rudder pedals and a tiny piece of film for the
instruments.
h,
with the sprue gates small and unobtrusive. There were the inevitable ejector
towers that are to be expected with shorter run kits, but these can be easily
trimmed away at the construction stage. Five small bars of resin details are
provided to cover the engine intakes and exhausts, small undercarriage parts and
a host of tiny levers and door hinges some of which proved too challenging for
my 1949 model year eyesight. There is a sheet of stainless steel etch for the
seatbelts, instrument panel and rudder pedals and a tiny piece of film for the
instruments.
The clear parts are commendably thin and form a one-piece hood for the pilot and
a clear nose cone for the bombardier.
The instructions are a 12 page booklet of A5 size in grey scale with a parts
chart, 16 stages of pictograms for assembly and a choice of four colour schemes
with a helpful link to the CMK web site where colour profiles of the subject are
said to be available. Colour call outs are restricted to the Gunze Sangyo paint
range, with no equivalents or FS numbers specified.
The smallish decal sheet is nevertheless comprehensive offering a choice of four Armee de l’Air aircraft in overall natural metal. The decals are neatly printed in good register and include a range of tiny stencils.
| CONSTRUCTION |
This is a well engineered kit that is well at the upper end of the spectrum for
short run moulds but it still rewards careful assembly in dry fitting all parts
before committing to glue. In most cases the joining faces between parts will
benefit from a light pass over with a fine grade sanding stick.
Construction commences with the interior and the separate compartments that form
the cockpit, nose area and the two main wheel bays are built up from flat plates
and bulkheads. There are plastic side consoles for the pilot and bombardier and,
for my taste, more than adequate knobs and levers in tiny resin castings with
the seat belts and main instrument panel in etched stainless steel. The two
ejector seats are built up with separate arm rests and head rests. The
complexity of the interior would do justice to a 1:48 scale kit. Colour
 call
outs suggest that much of the crew area is black painted and the reality is that
much of the interior will be concealed. The gear bays were finished in matt
aluminium.
call
outs suggest that much of the crew area is black painted and the reality is that
much of the interior will be concealed. The gear bays were finished in matt
aluminium.
The instructions suggest that the gear legs are assembled before the fuselage
halves are joined and I followed this sequence since the upper parts of the legs
are seated into plastic half hooks cemented to the face of the interior
bulkheads and this sequence gives maximum opportunity to ensure that the hooks
are correctly aligned and fully secure. The gear legs are a remarkable piece of
engineering for a 1:72 kit, the nose leg in particular consisting of no less
than 13 parts including the wheels and the rear leg 10 parts. Such a pity that
they are buried inside the completed fuselage.
With the various internal compartments secured, the fuselage halves went
together without fuss. I had reasoned, correctly as it turned out later, that no
nose weight would be required.
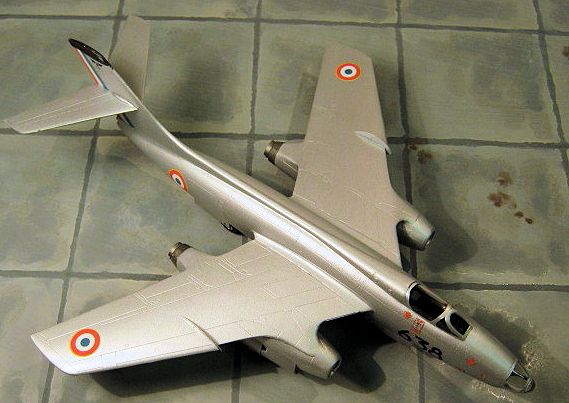
Attention next turns to the wings, formed as separate port and starboard units
and quite the most impressive mouldings that I have seen in a so called short
run kit. They are formed in one piece from root to tip including the subtle
leading edge droop of the outboard section. The only lower sections required are
a small plate that fills in the inner section between the engine nacelles and
the fuselage.
The engine nacelles are split vertically and each outboard half has a cut out
which is backed by a curved panel with a representation of the side face of the
Atar engine. The intake and exhaust sections are provided in sharply moulded
polyurethane resin beautifully crafted to fit inside the nacelle halves with
minimal adjustment. Although not mentioned in the instructions each resin insert
has a faint vertical datum line cast
 in to aid alignment.
The resin inserts are moulded blanked off to the rear so there is no see
through effect. Although the resin was a joy to fit, I had a little trouble
aligning the inserts inside the plastic intakes, probably more a case of
operator error than design flaw.
in to aid alignment.
The resin inserts are moulded blanked off to the rear so there is no see
through effect. Although the resin was a joy to fit, I had a little trouble
aligning the inserts inside the plastic intakes, probably more a case of
operator error than design flaw.
I built the wings as separate sub assemblies complete with engine nacelles, then
fixed the wings to the fuselage halves secured with good sized locating tongues
that were a positive fit. So far only minor traces of filler were necessary
along some of the main joints. I left the tailplane halves until the end of the
build, guessing that the rudder stripe decals might get in the way.
After leaving the airframe to harden up overnight I added the metal wing fences
secured with superglue and fixed the transparencies masked with Tamiya tape.
The whole airframe was then primed with Tamiya Fine white primer from a rattle
can while the tailplane and gear door parts were primed separately.
| COLORS & MARKINGS |
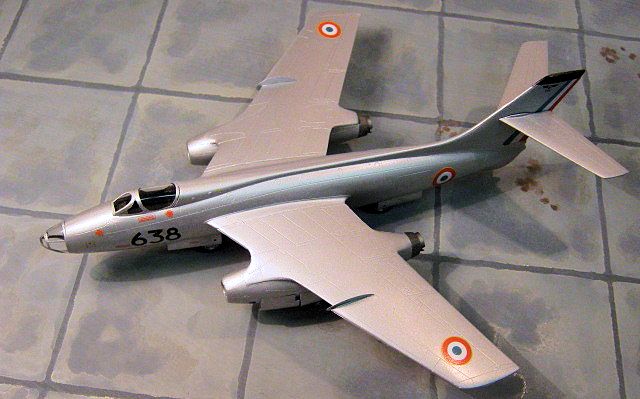
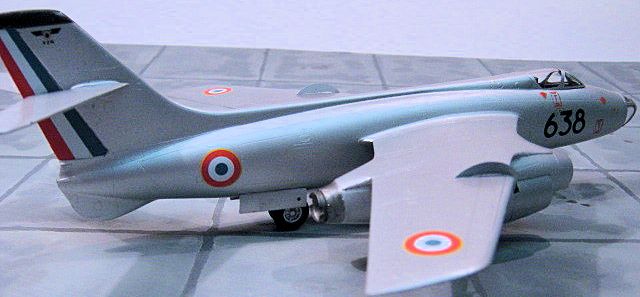 All four choices were of natural metal airframes, I chose the one of the four
that did not have an black anti-glare panel on the nose but did feature a
blue/white/red striped rudder. The whole aircraft was sprayed in Tamiya XF-16
Flat Aluminium and the fin tip picked out in X-18 Semi Gloss Black.
All four choices were of natural metal airframes, I chose the one of the four
that did not have an black anti-glare panel on the nose but did feature a
blue/white/red striped rudder. The whole aircraft was sprayed in Tamiya XF-16
Flat Aluminium and the fin tip picked out in X-18 Semi Gloss Black.
Again left to settle overnight the whole airframe was then rubbed down with an
ultra fine sanding stick and then brush finished with two coats of Future/Klear.
The decals went on with little fuss and responded well to Micro Sol and Set. I
carried on applying the progressively smaller stencils until my eyesight and
patience wore out. When the decals had dried out the airframe was then finished
with a sprayed coat of Xtracrylic Semi-Gloss varnish
| FINAL CONSTRUCTION |
 The main gear legs and doors were added. I found that the rear legs sat too far
into the fuselage and had to be packed out further with small wedges of plastic
card so that the wheels sat clear of the fuselage. This was a bit annoying after
I had spent so much time in the early stages of the build in aligning the fixing
hooks, but probably operator error again.
The main gear legs and doors were added. I found that the rear legs sat too far
into the fuselage and had to be packed out further with small wedges of plastic
card so that the wheels sat clear of the fuselage. This was a bit annoying after
I had spent so much time in the early stages of the build in aligning the fixing
hooks, but probably operator error again.
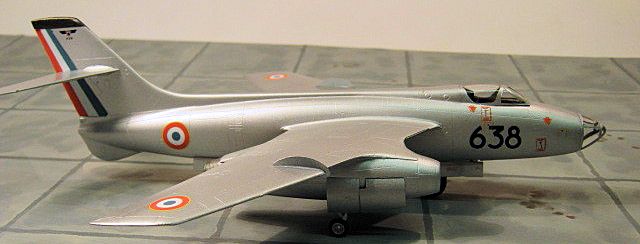
When the main gear had dried I jigged the aircraft on a flat surface and added
the outrigger legs and wheels to the pockets in the side of the nacelles. Doing
this with a jig (actually sliding paint jars under the wing tips) allows the
outriggers to be fiddled and adjusted to be in contact with the ground while the
glue sets. Finally the nacelle gear doors and tailplanes were added. Voila!
| CONCLUSIONS |
Like most kits from the MPM/Special Hobby stable I found this an absolute
pleasure to build, so congratulations to Azur for their concept and design. As
with all models of this kind, slow and steady are the watchwords with plenty of
overnight breaks to allow things to settle.
I got this one on sale from Hannants, but even at the normal UK retail of around
£24-00 this would still be good value for money. The box contains everything
that is needed to produce a well detailed result and a choice of four finishes
is reasonably generous
I liked it, I enjoyed the build. Recommended
to those with a taste for less obvious subjects.
| REFERENCES |
“The World’s Fighting Planes” by William Green. Macdonald & Co, 1964
Air Enthusiast No. 42. Key Publishing, 1991
March 2014 If you would like your product reviewed fairly and
fairly quickly, please
contact
the editor or see other details in the
Note to
Contributors.