Revell/Lindberg 1/96 Avro Vulcan
| KIT #: | 4431 |
| PRICE: | $10.00 at a swap meet |
| DECALS: | One option |
| REVIEWER: | Peter Burstow |
| NOTES: |
| HISTORY |
| THE KIT |
The decal sheet has markings for VX777, the second prototype. The decals are
somewhat dull, but in good registration.
| CONSTRUCTION |
 I
started with a dry fit of the main airframe parts, fit was good, with just a
little clean up of the joining surfaces. The instructions suggested 15 grams
weight was needed to stop it tail sitting, I ended up with 30 grams of lead in
the nose and under the cockpit floor, using a 20 gram and a 10 gram wheel
balance weight.
I
started with a dry fit of the main airframe parts, fit was good, with just a
little clean up of the joining surfaces. The instructions suggested 15 grams
weight was needed to stop it tail sitting, I ended up with 30 grams of lead in
the nose and under the cockpit floor, using a 20 gram and a 10 gram wheel
balance weight.
Started construction with the elevators, ailerons and rudder, joined the halves,
and clamped with clothes pegs. Added the crank to the elevator. Then joined up
the intake parts, needed clamped as they were slightly warped. A little trap is
that they are handed, but have the same part numbers.
I
then assembled the cockpit, joined the pilot and seat halves and added them to
the floor. There is a nasty join line down the front of each figure, but it
can't easily be seen once the cockpit is closed up, so I ignored it. Fitted the
floor and weights into the starboard fuselage half, checked that it closed up
OK, then painted the whole cockpit semi-gloss black.
I
painted a little detail on the pilots, really all that can be seen of the
cockpit when it's closed up. However, what can be seen is a great void, all the
way to the tail. Did the easy fix, and painted the whole inside of the fuselage
halves black. Did the same to the inside of the wing halves as well.
 I
assembled the wing halves, trapping the intakes, and adding the elevators,
ailerons and intake splitter plates. There was a slight warp at the root, that
needed clamping to close it up properly. Added a few clothes pegs mainly around
the tips, and left it all overnight. The leading edge needed a light sand to
tidy up the joint. I filled the sink holes inside the intake with a drop of Mr
Surfacer, difficult to sand, really should have fixed them before joining the
intake halves.
Closed up the fuselage halves, trapping the rudder and left it clamped up to
harden.
I
then fitted the wings to the fuselage. Tabs at the roots assured a strong fit
that locked the wings in place, didn't really need glue. There was a small gap
at the roots, a line of Mr Surfacer was enough to fill it. I then added the
exhaust nozzles.
| COLORS & MARKINGS |
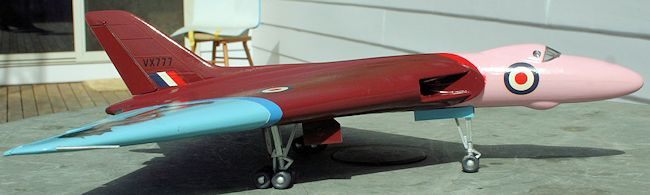
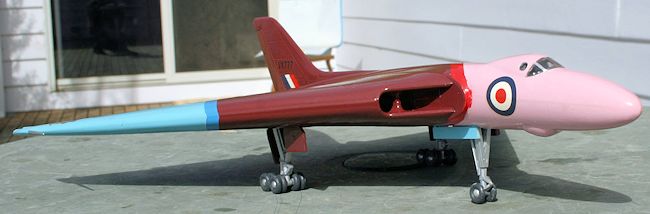
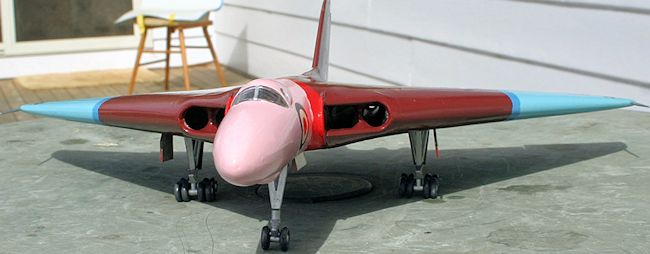
The first two prototype Vulcans were finished in gloss white, so I ignored the
instructions, and box art, which showed a camouflaged aircraft. As I attempted a
gloss white paint job, my rattle can turned from a spray can to a dribble can,
despite being nearly full. Being too lazy to drive down to the shops and buy
some more paint I thought I'd use what was available. My first try was overall
light blue, which looked fine, until I realised that it
 was
going to be in the display case with the Lindberg Victor, also overall blue, so
it needed something different.
was
going to be in the display case with the Lindberg Victor, also overall blue, so
it needed something different.
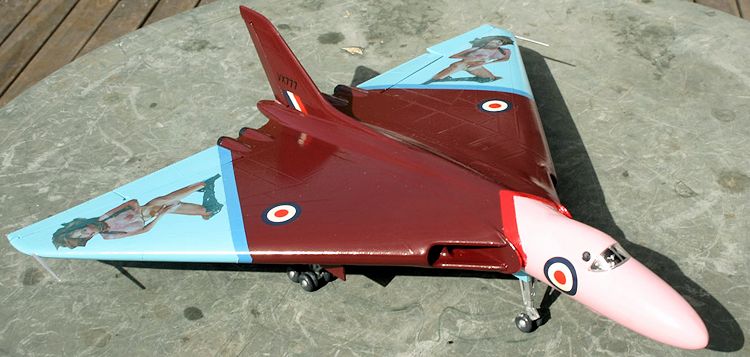
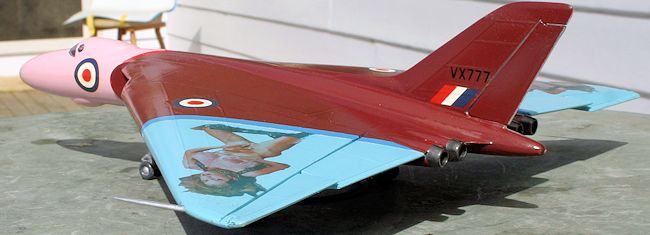
The pink group build started at this time, so a trip to the shops to get some
pink paint, and another can of gloss white. I had a bit of an experiment using
photoshop to come up with a scheme. I used a rattle can gloss pink, cherry red,
burgundy, blue and light blue enamels. After the first coat I found a few more
sink holes and a couple of spots that needed cleaned up. Lots more masking,
painting and waiting for paint to dry. The pink paint, called 'Sherbet' was very
soft, and showed tape marks after the masking was removed. I sanded it back, and
reverse masked, then resprayed the pink. After seeing the end result I think
gloss white was the way to go!
While the fuselage was in the paint shop, I turned my attention to the
undercarriage. Needed to remove a mould seam on every part. I painted the legs
and wheel hubs silver, and the tyres Tamiya German grey.
I
used the kit decals representing the second prototype, they were thick and dull,
but reacted ok to Micro Sol.
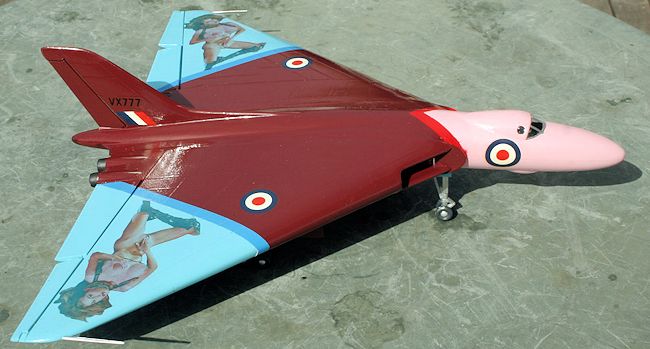 I added
some home made nose art decals from a picture I found on the internet. Our
editor may well fuzz them out (Nah. Details are rather
indistinct, so I think it is safe. Ed). I laser printed the decals
on Microscale 'trim film' and had a bit of a struggle getting the A5 size film
through my A4 printer. The decals were very transparent, should have been
printed on white film rather than clear.
I added
some home made nose art decals from a picture I found on the internet. Our
editor may well fuzz them out (Nah. Details are rather
indistinct, so I think it is safe. Ed). I laser printed the decals
on Microscale 'trim film' and had a bit of a struggle getting the A5 size film
through my A4 printer. The decals were very transparent, should have been
printed on white film rather than clear.
Just about last, I added the windscreen, and hand painted the frames. I used
Micro Kristal Klear for the portholes. Then added the undercarriage and pitots.
I sealed the decals, and the rest of the model, with several coats of matt varnish, which didn't really hide the high gloss, but evened out the decals.
| CONCLUSIONS |
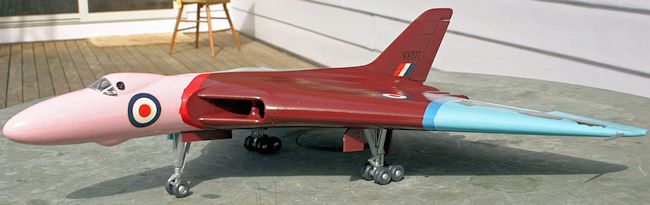 A very
easy build of an iconic jet bomber. The kit went together with no problems. Only
a few hours to build, and a month doing the paint. This is not the Frog kit,
which had the phase 2 wing shape of the B.1 production version. 1/96 is an odd
scale but for this size aircraft I think it is OK, the 1/72 Airfix Vulcan B.2
kit is a monster, and the various 1/144 and 1/200 kits a little small.
A very
easy build of an iconic jet bomber. The kit went together with no problems. Only
a few hours to build, and a month doing the paint. This is not the Frog kit,
which had the phase 2 wing shape of the B.1 production version. 1/96 is an odd
scale but for this size aircraft I think it is OK, the 1/72 Airfix Vulcan B.2
kit is a monster, and the various 1/144 and 1/200 kits a little small.
I
was stunned when I first saw a Vulcan in the mid 1960's, and always wanted to
model it. Only took 50 years to finally do it.
R.I.P. Greg.
| REFERENCES |
Jackson, A.J. Avro
Aircraft since 1908. Putnam, London, 1990
Wilson, Stewart. Vulcan,
Boeing B-47 & B-52, Aerospace Publications, Weston Creek,
1997
http://en.wikipedia.org/wiki/Avro_Vulcan
May 2014
If you would like your product reviewed fairly and fairly quickly, please contact the editor or see other details in the Note to Contributors.