Aeroclub 1/48 Gnat T.1
| KIT #: | |
| PRICE: |
£26.50
(cheap it isn't) |
| DECALS: | Four options |
| REVIEWER: | Dan Lee |
| NOTES: |
Short Run
kit with metal parts and vac canopy |
| HISTORY |
The Folland Gnat
was a reactionary byproduct of the sophisticated, bigger, faster, heavier and
powerful mantra that dominated the aircraft industry in the beginning of the jet
age. W.E.W. "Teddy" Petter, the
designer of the Lightning, rebelled against that trend and designed a cheap
lighter fighter jet that could defend
 Originally,
the Gnat was to be similar to the Me-163 Komet, a little rocket point defense
fighter. That idea didn’t work out
as rocket powered fighters proved to be an aviation dead end so Teddy opted for
conventional jet engines instead which were becoming more compact at the time.
Originally,
the Gnat was to be similar to the Me-163 Komet, a little rocket point defense
fighter. That idea didn’t work out
as rocket powered fighters proved to be an aviation dead end so Teddy opted for
conventional jet engines instead which were becoming more compact at the time.
Work progressed on the
lightweight fighter till 1957 when most
The two seat T1 Gnat
became famous as the mount of various RAF acrobatic teams, but more famously
with the Red Arrows who flew them till 1979 when they were replaced by the
In Indian hands,
the Gnat/Ajeet was known as the Sabre Killer in the various Indo/Pakistani wars
and proved to be a tough foe for the American trained Pakistani pilots due to
its amazing agility and small size—No22 Squadron of the IAF was named the Sabre
Slayers. They served with
distinction till they were replaced by Indian made Mig-21s in the late 70s.
However, as one realizes, the small size of the Gnat/Ajeet fighter
limited its payload and range.
Finland was another
user of the Gnat F1, buying 12 copies for its air force.
| THE KIT |
 It has all
the hallmarks of a limited run kit from lots of flash, rough parts, poor fit and
no guide pins. The white metal parts have some flash, but no serious flaws
to the parts.
It has all
the hallmarks of a limited run kit from lots of flash, rough parts, poor fit and
no guide pins. The white metal parts have some flash, but no serious flaws
to the parts.
There are a grand
total of 24 plastic parts in light grey styrene and 31 parts in white metal
(landing gear, cockpit, antennas and wheels.) The assembly instructions
are reasonably detailed with arrows pointing at specific areas and not vague
areas, but typical for short run kits. The copy of the kit I purchased
came with both injection molded and vaccuform canopies.
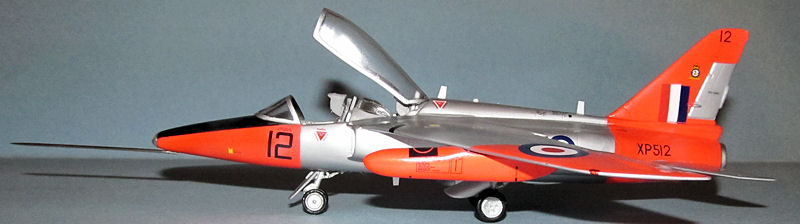
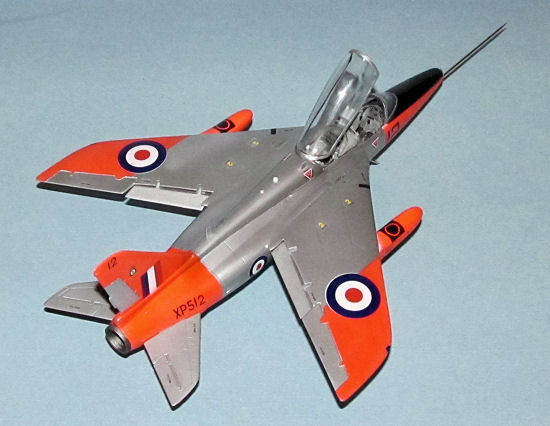
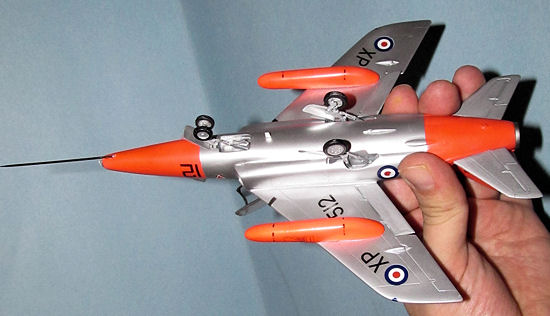
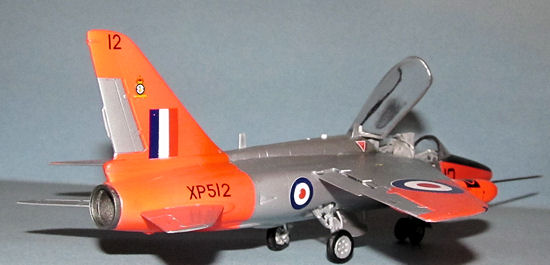
The paint guide is good (if not better) as those from major model makers. The four options are detailed with the stencil locations clearly marked. Two of the four options are for early 1960s trainers with NMF/aluminum lacquer and day-glo orange markings while the third option is a late 60s Gnat with light grey instead of NMF/aluminum lacquer and the final option is the 1970s signal red and light grey trainer scheme.
| CONSTRUCTION |
It is going back a
few years so I may have forgotten a few things.
If I recall correctly, the Aeroclub Gnat fuselage went together
reasonably well for a short run kit.
This still means a lot of sanding and filling was required.
The pieces didn’t have the best fit and required a fair amount of sanding
to get them to line up. One of the
things I did wrong is that I sanded down part of the
 forward
wing reinforcements when I used CA glue to fill in the gaps.
If I followed the instructions and used Milliput or even Mr Surfacer
instead then I would have avoided that self inflicted problem.
forward
wing reinforcements when I used CA glue to fill in the gaps.
If I followed the instructions and used Milliput or even Mr Surfacer
instead then I would have avoided that self inflicted problem.
At the time, I left
out most of the cockpit pieces with the exception of the instrument panels.
The metal parts were primed with Tamiya metal primer spray and then the
interior parts were sprayed with Tamiya XF-19 Sky Gray.
Thanks to the long
layoff (three years) between working on this kit, I had to deal with those
phantom seams using CA glue.
When the assembly was completed, I proceeded to polish the plane with various grits of sanding cloths to prepare for the silver surface.
| COLORS & MARKINGS |
I masked off the
day-glo orange areas and sprayed on Model Master Insignia White enamel first and
then when it was dry, I sprayed on a couple of coats of MM Day Glo Orange enamel
(outside in the garage as I don’t use enamels or lacquers in the house.)
The coats of Day
Glo turned out to be thicker than I thought and I ended up with a ridge where
the masking tape was. I did not see
them until I sprayed on the Tamiya Old Silver from the spray can, polished,
gloss coated and decaled part of the model and then was forced to sand/polish
them away. My frustration with this
put this model on the shelf of doom for almost 6 years.
After I
 cleaned
off the dust, I masked off and sprayed the tail pipe Tamiya Burnt Iron.
cleaned
off the dust, I masked off and sprayed the tail pipe Tamiya Burnt Iron.
The Decals didn’t
work out as well as I hoped as some of the stencils disintegrated when put in
water while the white on the decals wasn’t opaque enough so the day glo orange
showed through. I had to use
post-it notes to mask the tail flash decal and spray on Tamiya gloss white to
make the white, white while I left the roundels alone.
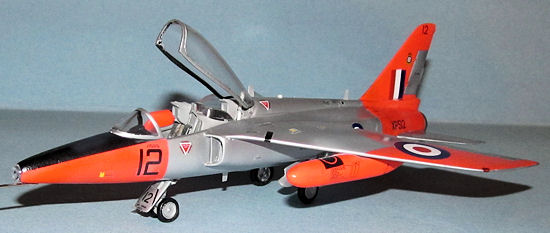
I had a better time
with the interior decals. I used
the Mike Grant jet cockpit placcards and instrument sheet to add some color to
the interior as there was no surface details on the white metal instrument panel
and I wanted something more than just black dots for the dials and gauges.
I didn’t add any wash as trainers were kept in extremely good condition.
| CONSTRUCTION CONTINUES |
The various metal
bits and landing gear doors including the landing gear were primed and sprayed
Tamiya AS-12 Aircraft Aluminum or Old Silver.
I did not use the metal antenna and went with 5 thou plasticard instead.
All the parts were glued in using
 CA glue.
The wheels were hand painted RLM 66 dark grey.
CA glue.
The wheels were hand painted RLM 66 dark grey.
I added the
ailerons to the plane which had been painted Old Silver.
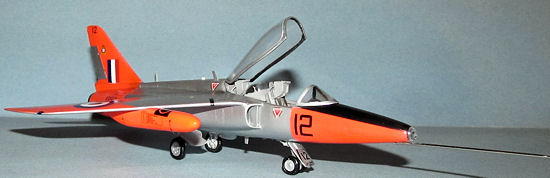
The canopy and
interior clear parts were masked off and sprayed flat black and then the canopy
pieces were sprayed with Tamiya TS-30 Old Silver.
I cut some plastic rod that was painted grey to act as the canopy brace
and hinge mechanism. The canopy was
glued in with some CA glue.
I drilled a small
hole in the nose and inserted an MV lens for the landing light that was small
enough to go in but not prevent the clear plastic nose from aligning with the
fuselage. The clear plastic
nosecone was glued in with Elmers white glue.
Lastly, I took a
surplus needle, cut it to the appropriate length as per instructions and super
glued it to the nose.
| CONCLUSIONS |
 The
Aeroclub Gnat isn’t one of my better builds and shows off my lack of
skills/knowledge some six years earlier.
It proved to be a way tougher build than I thought.
However, the color scheme is striking as it is a pain in the rear and
shows that given enough motivation and time one can build something from the
shelf of doom.
The
Aeroclub Gnat isn’t one of my better builds and shows off my lack of
skills/knowledge some six years earlier.
It proved to be a way tougher build than I thought.
However, the color scheme is striking as it is a pain in the rear and
shows that given enough motivation and time one can build something from the
shelf of doom.
I know this kit is out of production and can be rather hard to find. If you do have it then be warned that this is a rather challenging kit and can be hard even for an intermediate builder with experience building a few short run kits.
December 2012
If you would like your product reviewed fairly and fairly quickly, please contact the editor or see other details in the Note to Contributors.