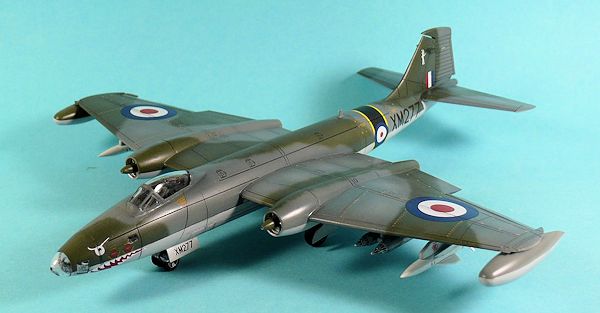
Airfix 1/72 Canberra B.(I)8
| KIT #: | A05038 |
| PRICE: | $21.95 SRP |
| DECALS: | Three Options |
| REVIEWER: | Martin Pohl |
| NOTES: |
| HISTORY |
The Canberra had its origins
in a 1944 Air Ministry requirement for a successor to the de Havilland Mosquito
– a high altitude, high-speed bomber with no defensive armament. Several British
aircraft manufacturers submitted proposals. Among the companies short-listed to
proceed with development studies was English Electric, a well-established
industrial manufacturer with very little aircraft design experience, though when
a desperate need for bombers arose during the early years of the Second World
War, English Electric had built the Handley Page Hampden and later the Handley
Page Halifax four-engined bomber under licence.
In 1944, Westland Aircraft's
technical director and chief designer W. E. W. Petter prepared a design study
for a twin-engined fighter bomber, the P.1056, based on two fuselage-mounted
Metrovick F.2/4 "Beryl" engines. The authorities doubted its suitability for
operations from unprepared fields and at low altitude but could see its
potential as a bomber design; numerous manufacturers refused to take on the
design. Petter left Westland to join the English Electric company in December
1944, where he was
 encouraged to develop his design. EE formed its own in-house
aircraft design team in the following year.
encouraged to develop his design. EE formed its own in-house
aircraft design team in the following year.
In June 1945, the design of
the aircraft that was to become the Canberra bore many similarities to the
eventual design, despite the placement of a single, centrally-mounted turbojet
engine; two wing-mounted engines were adopted later that year. On 7 January
1946, the Ministry of Supply placed a contract for the development and
production of four English Electric A.1 aircraft. It continued to be known as
the English Electric A.1 until it received the name Canberra after the capital
of Australia in January 1950 by Sir George Nelson, chairman of English Electric,
as Australia was the first export customer for the aircraft.
The Canberra had a simple
design, looking somewhat like a scaled-up Gloster Meteor with a mid wing. The
fuselage was circular in cross section, tapered at both ends and, cockpit aside,
entirely without protrusions; the line of the large, low-aspect ratio wings was
broken only by the tubular engine nacelles. The use of swept-wings was examined
but decided against as the expected operational speeds did not warrant it, and
it would have introduced unresolved aerodynamic problems to what was aimed at
being a straightforward replacement for the RAF's Hawker Typhoon and Westland
Whirlwind fighter-bombers.
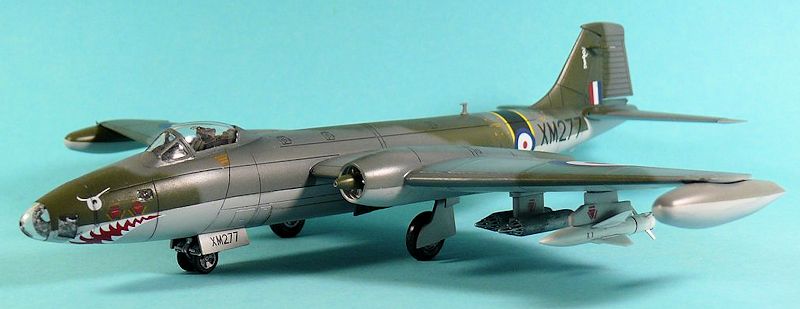
 Canberra B(I) Mk.8:
Third-generation Canberra
derived from B6 as an interdictor. Fitted with a new forward fuselage with
teardrop canopy on the port side, and Navigator station forward of pilot (early
marks had the navigator behind the pilot. Provision for a ventral pack similar
to the B(I)6 with 4 x 20 mm Hispano cannon, one external hardpoint under each
wing for up to 1,000 lb (454 kg) of bombs or unguided rockets, LABS
(Low-Altitude Bombing System) for delivery of nuclear bombs. Prototype converted
from the only B5 and first flown 23 July 1954, 72 built including 17 for export
and two converted from B2s.
(source Wikipedia)
| THE KIT |
My example came in the new
layout red Airfix box which is quite nice and quite stable. Inside you find 4
gray sprues, 2 fuselage halfs, the clear sprue, the instructions and the decals
– ah and yes some commercial prints to become an Arfix Club member. The last I
did not use.
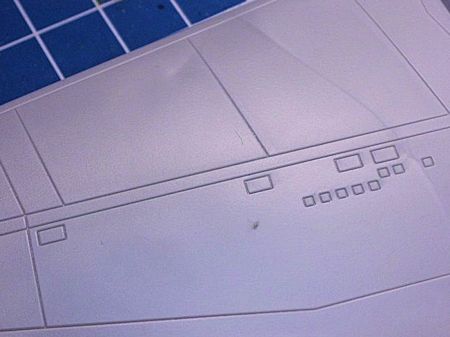
The gray sprues do look very
good. The engraved panel lines are a bit wide perhaps but this is very common to
modern Airfix kits from what I've read so far. For me those panel lines do look
OK. The clear parts are clear – well that’s one can expect, or not? They are a
bit thick I would say but it's acceptable.
The instructions come in a
10 sided A4 booklet. They are easy to follow and pretty clear on optional parts.
Speaking about optional parts, you get some options on external workload which I
can't name as I'm not that familiar with such British stuff. You get the inside
bombs if you wish to build it with an open
 bomb bay and for the wing station you
get some rockets for the outside mount points and 3 different weapons for the
inside pylons, a double rocket pod, a single one and a bomb. I just relied on
the instructions for my workload.
bomb bay and for the wing station you
get some rockets for the outside mount points and 3 different weapons for the
inside pylons, a double rocket pod, a single one and a bomb. I just relied on
the instructions for my workload.
Wikipedia is stating here:
·
Rockets: 2 unguided
rocket pods with 37 2-inch (51 mm) rockets, or 2 Matra rocket pods with 18 SNEB
68 mm rockets each
·
Missiles: A variety of
missiles can be carried according to mission requirements, e.g: 2 AS-30L
air-to-surface missiles
·
Bombs: Total of 8,000 lb
(3,628 kg) of payload can be mounted inside the internal bomb bay and on two
underwing hardpoints, with the ability to carry a variety of bombs.
·
Typically, the internal
bomb bay can hold up to 9 500 lb (227 kg) bombs, or 6 1,000 lb (454 kg) bombs,
or 1 4,000 lb (1,814 kg) bomb; while the pylons can hold 4 500 lb (227 kg)
bombs, or 2 1,000 lb (454 kg) bombs.
Last but not least you get a
color printed sheet showing 4 side views of all the versions you can built with
the decals given.
The decals are nicely printed and fairly thin. Also I did have my problems with them (see below) I'd consider them as good.
| CONSTRUCTION |
 As I don't have much of a
clue of the Canberra I just decided to build it out of the box. So I followed
the instructions more or less. So first the pit, here I decided to do some extra
details for the two seats given which in the end was for nuts as you cant see
much in there. Mostly because it's just damn dark inside.
As I don't have much of a
clue of the Canberra I just decided to build it out of the box. So I followed
the instructions more or less. So first the pit, here I decided to do some extra
details for the two seats given which in the end was for nuts as you cant see
much in there. Mostly because it's just damn dark inside.
After the pit was built and
painted (see below) it was placed into one fuselage half together with the bomb
bay and this inlet to close the pit around the pilot office. Then the fuselage
was closed – quite a nice fit only some sanding here. Only this area around the
pilot's place was a bit of a nightmare but most probably again because of a
two-left-hand syndrome of the builder. So some filler went here and some sanding
has to be done here too.
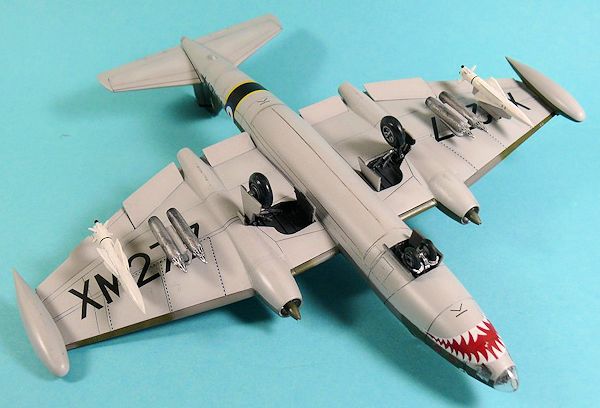
I decided to close the bomb
bay as this way the Canberra just looks slimmer. This gave me some areas to use
filler and sandpaper again. This is not very uncommon to a lot of kits where you
can build some
 inside details given up front. If you decide not to use those
inside stuff the doors to close this often don't fit that well.
inside details given up front. If you decide not to use those
inside stuff the doors to close this often don't fit that well.
The wings went on without
any filler or sanding. So did the rest if there weren't the intakes. I don't
know if it was me or the parts but I had some real big gaps there which again
gave me the chance to practice filing and sanding.
The clear parts went on
quite good so did the external parts – well most probably I rediscovered my way
of “how to behave at the bench” – some days you just should sit and look outside
the window for not to break something … hmm better not the window then.
| COLORS & MARKINGS |
 First the pit inside, well
the instruction stated BLACK – no that's just to dark! I used a dark gray and
gave that a black wash. This way it did get some illusion of depth. It looks
just dark inside when everything is closed, so one could use black too.
First the pit inside, well
the instruction stated BLACK – no that's just to dark! I used a dark gray and
gave that a black wash. This way it did get some illusion of depth. It looks
just dark inside when everything is closed, so one could use black too.
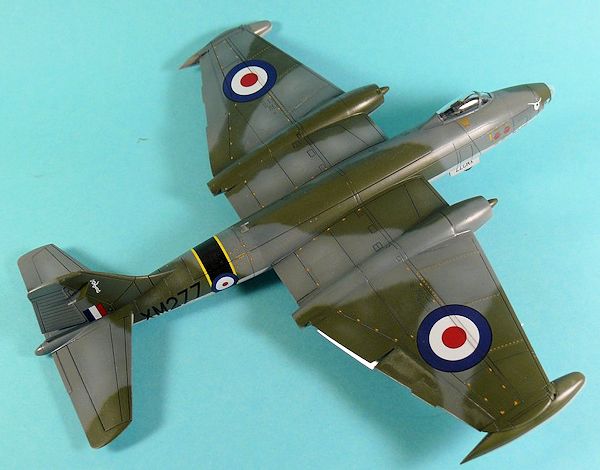
The airframe: After masking
the clear parts did get a dark grey spray over as they look also very dark. Then
the complete Plane did get a light gray base coat. This time I used the Vallejo
base and it worked just great. Then I sprayed the yellow area at the rear of the
fuselage and masked that off. As don't have a lot of colors to be used on
British planes I mixed a gray and a green. First the complete plane was sprayed
gray and then the green was sprayed freehand on top of that. That did get a
light blue filter to tone it to the colors I thought are right. The blue filter
was just about a thimble of white spirit tinted with blue oil paint – just pull
a #3 brush along the opened oil paint tube and wash that in the white spirit,
repeat that 2 times, that's it.
The underside was sprayed
with a mixture of light ghost gray and silver.
Last the black area inside
the yellow stripe was sprayed and a clear cote to seal it all.
 Decaling – well that part
was not easy for me but most probably just
a problem above keyboard – erm, you know what I mean – and not because of
bad manufactured decals. I somehow managed to break all the bigger ones. So this
way it was a good decision not to use the yellow/black stripe decal.
Decaling – well that part
was not easy for me but most probably just
a problem above keyboard – erm, you know what I mean – and not because of
bad manufactured decals. I somehow managed to break all the bigger ones. So this
way it was a good decision not to use the yellow/black stripe decal.
I sealed the decals again
with a clear cote and then I weathered the bird a bit with some lighter shades
of gray or green and a black/brown washing. Painting the gear doors dark gray
and a semi flatt clear cote ended it then.
The external work load I
just painted according the instructions, only some washing were applied there.
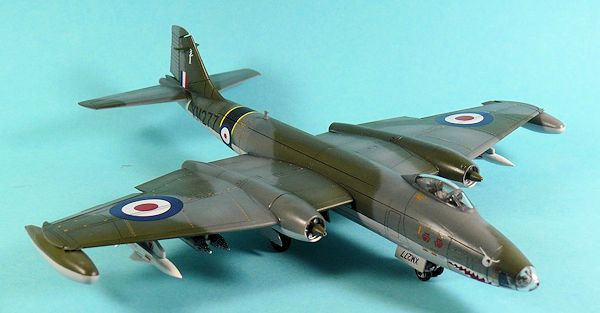
| CONCLUSIONS |
Thanks to my Secret Santa
(also a member here on MM) I did get the chance to build it. It was a nice one
to do. Well honestly I think the Canberra is quite an ugly bird but then seeing
her standing in the cabinet it looks quite nice.
| REFERENCES |
Internet only
If you would like your product reviewed fairly and fairly quickly, please contact the editor or see other details in the Note to Contributors.