Whirlykits 1/72 Fairey F.D. 1
| KIT #: | WPX72007 |
| PRICE: | $ |
| DECALS: | One Option |
| REVIEWER: | Martin Pohl |
| NOTES: | Vacuformed kit with metal parts |
| HISTORY |
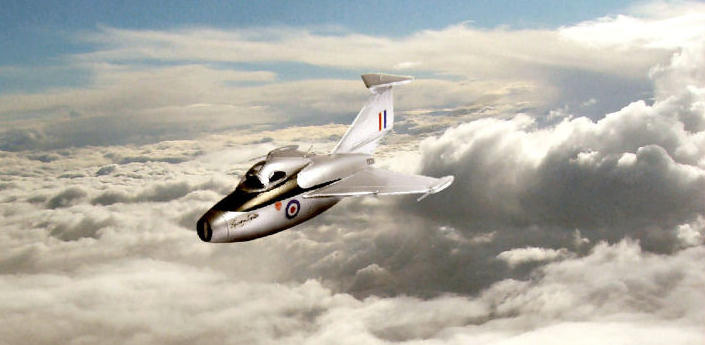
Originally the Fairey F.D.1 was thought to be a vertical takeoff fighter, but
the proposed plane was then intended to be launched from an inclined ramp.
Already in the early design stage the Ministry of Supply changed their minds to
have this aircraft being
 built as a more conventional jet-powered research
vehicle. The design was a mid-wing tail-less delta monoplane, with a circular
cross-section fuselage and engine air-inlet at the extreme front. The engine was
a
Rolls-Royce Derwent 8.
built as a more conventional jet-powered research
vehicle. The design was a mid-wing tail-less delta monoplane, with a circular
cross-section fuselage and engine air-inlet at the extreme front. The engine was
a
Rolls-Royce Derwent 8.
The first F.D.1 (VX350) made its maiden flight on
10
March
1951. Because of serious pitching when gathering speed the F.D.1 got
a small horizontal delta wing on the top of the tail-fin which was intended to
stop this. This additional tail surface limited the top speed to 345 mph (555
km/h).
After a landing accident in September 1951, the F.D.1 was modified with the
removal of the leading-edge wing slats as well as the removal of the streamlined
housings for the anti-spin parachutes that were mounted at the wingtips. With
limited flying after the test program was re-launched in May 1953, and no sign
of the resolution of considerable design deficiencies, the F.D.1 was soon
relegated to non-flying status. Only one F.D.1 was built also three were planned
(VX357 & VX364). The F.D.1 never achieved its design goals and it ended up as a
target in the Shoeburyness,
| THE KIT |
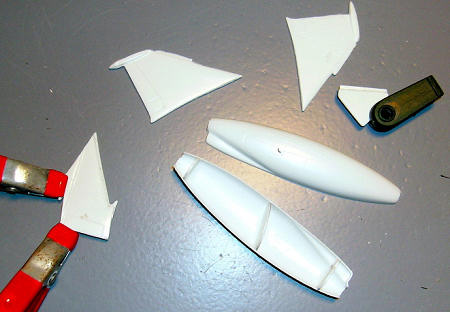
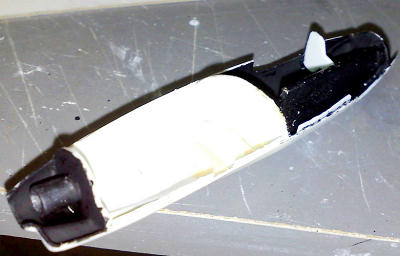
 The kit comes in two
VAC formed plastic cards which will separate into 10 parts, the fuselage halves,
the wings, the small delta wing on top of the tail-fin and the tail-fin itself.
You get also 2 VAC formed canopies and 11 metal parts. Those metal parts
represent the landing gear (7 pieces), 2 for rocket motor fairings, the ejector
seat and the air intake divider. It looks like the molds of the metal parts are
a bit old so the ejector seat looks a little spongy, but as you will not see
that much of the cockpit with a closed canopy it is fair enough. The landing
gear does look good.
The kit comes in two
VAC formed plastic cards which will separate into 10 parts, the fuselage halves,
the wings, the small delta wing on top of the tail-fin and the tail-fin itself.
You get also 2 VAC formed canopies and 11 metal parts. Those metal parts
represent the landing gear (7 pieces), 2 for rocket motor fairings, the ejector
seat and the air intake divider. It looks like the molds of the metal parts are
a bit old so the ejector seat looks a little spongy, but as you will not see
that much of the cockpit with a closed canopy it is fair enough. The landing
gear does look good.
The VAC forming of
the plastic parts is done quite well, so the main panel lines are given. All the
smaller panel lines have to be scribed. This meets the expectations of a VAC
formed kit, at least mine.
| CONSTRUCTION |
 Building VAC formed
kits always intends to do a little scratch build of some parts. For this
particular plane you’ll have to build the cockpit floor and of course all
cockpit details, beside the given ejector seat. You also will have to find a way
to ‘close’ the air intake and the engine hole at the end; otherwise you could
look through. For the landing gear doors there is not that much to do, as those
are closed on the ground. Only some small rectangular openings have to be done
and the inner detail has to be built up, otherwise you will not be able to fit
the landing gear.
Building VAC formed
kits always intends to do a little scratch build of some parts. For this
particular plane you’ll have to build the cockpit floor and of course all
cockpit details, beside the given ejector seat. You also will have to find a way
to ‘close’ the air intake and the engine hole at the end; otherwise you could
look through. For the landing gear doors there is not that much to do, as those
are closed on the ground. Only some small rectangular openings have to be done
and the inner detail has to be built up, otherwise you will not be able to fit
the landing gear.
The completed plane is very small as the fuselage length is less than 3.5 inches (9 cm).
| COLORS & MARKINGS |
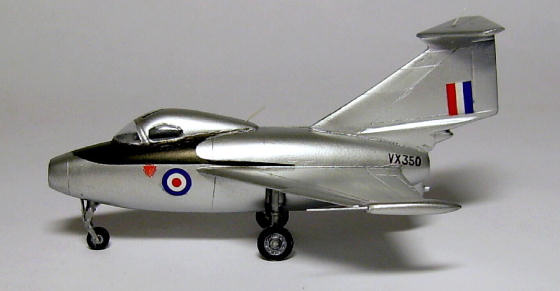
After a complete
sanding the bird got a base of Createx Black Base. This was then polished and a
coat of Model Master Aluminum was then sprayed on top. This color drove me
crazy, cause it just does not want to dry, even after again 2 weeks. So I
stripped it 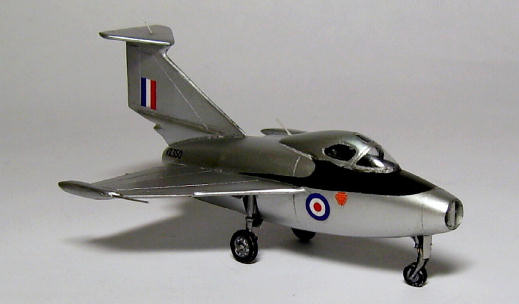 off and put a layer of Alclad Aluminum on. After this was dry, some
panels was masked an get a coat of a different Alclad tone, White Aluminium and
Flat Aluminium. In the end the anti glare black area was masked off and painted
with a flat black, Humbrol.
off and put a layer of Alclad Aluminum on. After this was dry, some
panels was masked an get a coat of a different Alclad tone, White Aluminium and
Flat Aluminium. In the end the anti glare black area was masked off and painted
with a flat black, Humbrol.
And now the decals,
those are made by Whirlybird decals and you will find a long description on how
to handle them. In the beginning they write: ‘…Our decals have no carrier film.
…’ - well this then means you have
to give them a coat – WRONG! – those decals seem to be dry transfers, so I
tested a piece and tried to rub it onto some sheet of plastic – nothing
happened, really nothing. So may be I’m too silly to rub on those dry transfers
but I ended up scanning those decals. I repainted them in a graphics program –
GIMP – and printed them on a decal sheet compatible with my ink jet printer. But
this then meant that I had to mask off the white areas, cause I used an
transparent decals sheet to print the remade decals on.
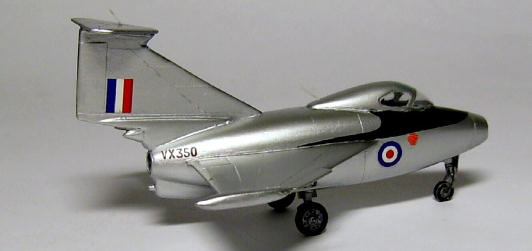
To say something positive on the decals; all decals you will need to build up a VX350, the one and only prototype, are there.
| CONCLUSIONS |
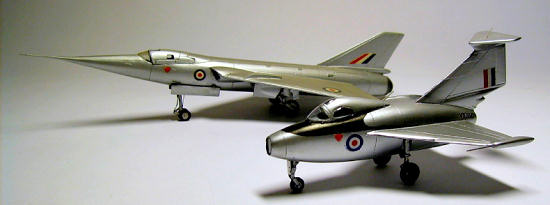 This example of a VAC
formed kit does not differ from others. The parts are formed OK and together
with the metal parts one can make a quite nice examples of the Fairey FD.1.
This example of a VAC
formed kit does not differ from others. The parts are formed OK and together
with the metal parts one can make a quite nice examples of the Fairey FD.1.
If you want to go for a VAC
formed kit and you are searching for one, then this could be a starter. For all
X-Planes or British aviation enthusiast out there this representation of the
Fairey F.D.1 is probably one choice you have, if you are able to purchase one.
So for those enthusiasts I give it a ‘go and get it’. For all the others it is
just a very small kit they most probably will not miss.
| REFEENCES |
Wikipedia
Flugzeuge von A bis Z, Band 2 (Bernard & Graefe Verlag)
October 2008
Copyright ModelingMadness.com. All rights reserved. No reproduction in part or in whole without express permission.
If you would like your product reviewed fairly and quickly, please contact the editor or see other details in the Note to Contributors.