Trumpeter 1/48 Attacker FB.2
| KIT #: | 02867 |
| PRICE: | £23-99 |
| DECALS: | Two options |
| REVIEWER: | Frank Reynolds |
| NOTES: |
| HISTORY |
As a
tail dragger jet fighter the Supermarine Attacker represents one of the dead
ends in aviation development. Supermarine had developed a legend of World War 2
in the Spitfire but struggled to find a true successor. Incremental developments
of the line had evolved a laminar flow wing design that held promise for greater
speeds and this was incorporated in the Spiteful and Seafang propeller driven
fighters, neither of which won a sustained production order in the early years
of peace, nor saw squadron service.
Yet
the advanced wing and undercarriage design that had already been flight tested
in the piston engine fighters promised the possibility of fast track development
of an early jet fighter by marrying these units to a new fuselage designed to
house a jet power plant. The chosen engine, the Rolls Royce Nen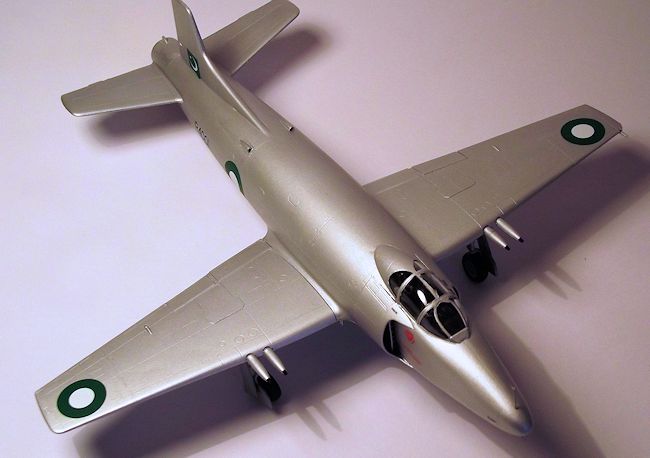 e
was a bulky centrifugal flow type whose dimensions forced Supermarine to adopt a
large and bulbous fuselage, incorporating an all new tail design.
e
was a bulky centrifugal flow type whose dimensions forced Supermarine to adopt a
large and bulbous fuselage, incorporating an all new tail design.
The
Attacker first flew on 27 July 1946, less than a year after the end of World War
2, but received little interest from its most likely customer, the Royal Air
Force. Two more prototypes were completed with a long stroke undercarriage to
naval standards, the first of which was flown on 17 June 1947. Satisfactory deck
operating trials were carried out on the aircraft carrier HMS Illustrious. The
Royal Navy were understandably cautious about the new jet technology, since
early engines were notorious for high fuel consumption and a tendency to be slow
to accelerate. However the Navy was keen to get into the jet world and a total
of 145 Attackers were eventually produced, the first examples going into
squadron service on 17 August 1951. They lasted barely three years in front line
service before being superseded by more capable jets such as the Sea Hawk. Their
service was unspectacular but served to provide the Royal Navy with valuable
experience in the operation of jet aircraft. Remaining Attackers were
transferred to Fleet Reserve squadrons and were operated until the squadrons
themselves were disbanded as an economy measure in 1957.
Attackers were produced in three versions. 52 Attacker F.Mk1 fighters, 8 Attacker FB.Mk1 fighter bombers and 85 Attacker FB Mk.2 fighter bombers. A further 36 Attacker FB Mk.2s were supplied to the Pakistan Air Force. These lacked folding wings and naval equipment, but provided that country’s first jet aircraft.
| THE KIT |
This
is contained in a large and substantial top opening tray type box that is almost
standard for this manufacturer. There are three parts frames in medium grey
plastic, crisply moulded with only a hint of flash around some of the smaller
parts. Surface detailing is subtle and very delicately scribed. The clear
 canopy
is separately packed in a padded bag and there is a small fret of etched metal
parts for the seat belts and small airframe aerials. The instructions comprise
four A4 pages in greyscale with exploded views covering ten stages of
construction. There is a separate full colour double sided A4 sheet illustrating
a choice of two Royal Navy aircraft in the standard colour scheme of the early
1950s being Sky Blue to the fuselage sides, fin and under surfaces with the
uppers in Extra Dark Sea grey. No explanation is given as to which squadrons are
depicted, nor is any type history provided.
canopy
is separately packed in a padded bag and there is a small fret of etched metal
parts for the seat belts and small airframe aerials. The instructions comprise
four A4 pages in greyscale with exploded views covering ten stages of
construction. There is a separate full colour double sided A4 sheet illustrating
a choice of two Royal Navy aircraft in the standard colour scheme of the early
1950s being Sky Blue to the fuselage sides, fin and under surfaces with the
uppers in Extra Dark Sea grey. No explanation is given as to which squadrons are
depicted, nor is any type history provided.
The supplied decals are of little use since the distinctive Black letters and serials numbers are variously the wrong size, the wrong font, or both. Fortunately Hannants in the UK have come to the rescue with a new well researched sheet X48-117 for both the Attacker and the Supermarine Spiteful. Selling for a reasonable £8-99, it offers a choice of three Royal Navy FB.2 Attackers in standard Extra Dark Sea Grey/Sky and the version that I chose, an FB.2 of the Pakistan Air Force.
| CONSTRUCTION |
It
is a novelty to be building a jet fighter that has no requirement for nose
weight so construction can commence with the cockpit interior, as set out in the
instructions.
The
ejection seat consists of twelve parts, being the seat with separate sides,
headrest, pull handle and etch seat belts. A one piece cockpit tub with side
consoles supports a rear bulkhead and instrument panel. The raised detail is
adequate and a decal is provided for the instrument panel. The entire cockpit is
 typical
of British fighters of the period, with just about everything being black. I
sprayed cockpit in Tamiya XF-1 Flat Black, including the interior of the
fuselage nose. The tub can be set aside while tackling the next sub assemblies
shown in the instructions
typical
of British fighters of the period, with just about everything being black. I
sprayed cockpit in Tamiya XF-1 Flat Black, including the interior of the
fuselage nose. The tub can be set aside while tackling the next sub assemblies
shown in the instructions
The
jet outlet is closed at its inner end by a simple disc with fan blade detail
moulded in. This was airbrushed silver, with the blade detail picked out in dry
brushed Black. A small enclosed box in provided for the twin-wheel tail dragger
assembly, this was all painted silver with the tyres picked out in Tamiya XF-85
Rubber Black. The main undercarriage assemblies consist of eight components each
and while an exploded view is provided in the instructions an illustration of
the finished article would have been helpful since the gear doors are attached
to the legs by a separate bracing system that needs careful alignment. Just to
complicate matters the Left and Right have been transposed in the illustrations.
When dry, both leg assemblies were airbrushed in Tamiya XF-16 Matt Aluminium and
the tyres picked out on Rubber Black.
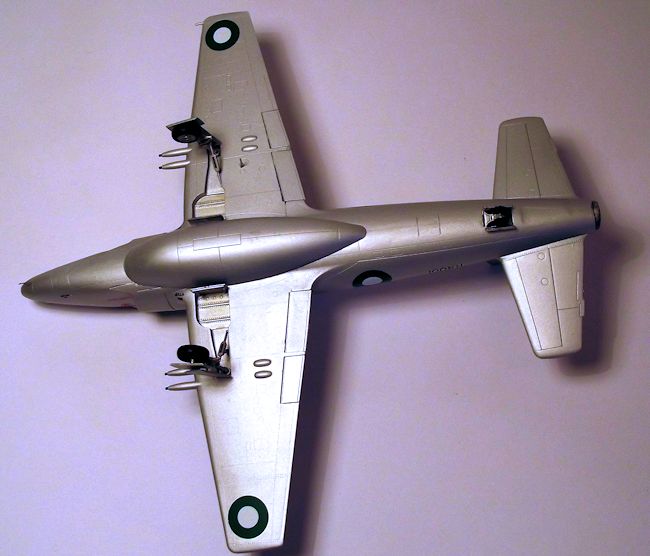
Trumpeter next recommends construction of the wing, with the option to cut off
the tips along scribed lines and construct them folded, for which ribs and a
simple hinge peg are provided. I chose the fixed option since my choice was to
be a de-navalised aircraft. Wheel well boxes are glued to the one piece lower
wing. Trumpeter next recommends construction of the entire wing structure,
including under carriage, flaps and aerial. This is likely to be too fragile
during construction, so I turned back to the fuselage assembly. The cockpit tub,
jet pipe and tail wheel box were glued into one fuselage half and the two halves
closed up without drama. A gun sight and forward coaming were added to the
cockpit and two small intakes to the upper rear fuselage. The large cheek
intakes each consist of a splitter plate and
 curved
intake housing. These were more than a snug fit and needed some light sanding on
their joining faces to get them to settle down. The arrestor hook housing on the
lower rear fuselage was filled in with plastic card, since the Pakistani
aircraft were land based.
curved
intake housing. These were more than a snug fit and needed some light sanding on
their joining faces to get them to settle down. The arrestor hook housing on the
lower rear fuselage was filled in with plastic card, since the Pakistani
aircraft were land based.
The
cockpit hood was added next and proved to be a tight fit over the ejector seat
headrest, so the top of the seat was shaved down a fraction and the paint
touched in. The hood and windscreen were masked out with Tamiya tape trimmed
with a fresh scalpel blade.
The one piece lower wing section was added to the fuselage assembly and needed some sanding at the front and rear edges of the join under the belly. I then added the separate left and right upper wing panels, both of which needed a light sanding along the wing root area to achieve a snug fit. In some areas this kit is so precisely engineered that the fit of parts is almost too good, to the extent that an over enthusiastic application of cement packs out the joints and prevents the parts from settling down. The horizontal tail sections are simple one piece upper and lower panels that are glued into deep positive locking grooves in the rear fuselage. Separate flaps are added to the trailing edge of the wings and I chose the fit them in the up position. The massive conformal fuel tank is then added to the belly to complete assembly of the basic airframe.
| COLORS & MARKINGS |
The
whole airframe was checked over and a small amount of filler was found to be
necessary along the joint between the fuselage halves. I use Revell Plasto as my
current filler of choice where strength is not an issue since it dries
relatively soft and is easier to sand. Some panel lines needed to be rescribed
across the areas of filler. Next the exterior of the cockpit area was given a
quick blast of Dark Grey auto primer from a rattle can to give the inside of the
canopy frames a dark finish. When this dried the whole airframe was finished
with Tamiya White Fine Surface Primer from a rattle can to serve as an undercoat
for the silver finish. The airframe was examined for any scratches and
imperfections that were dealt with by a trace of filler and touching in the
primer.
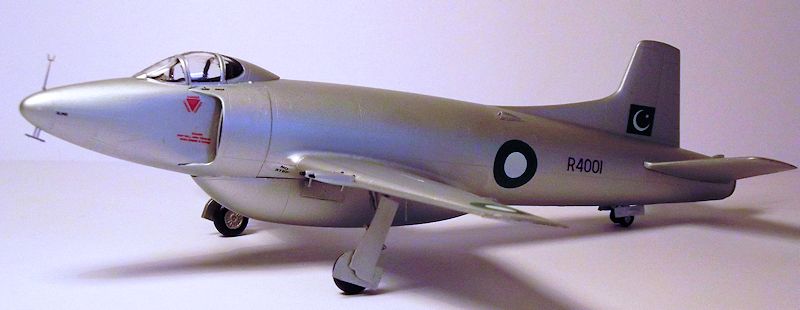
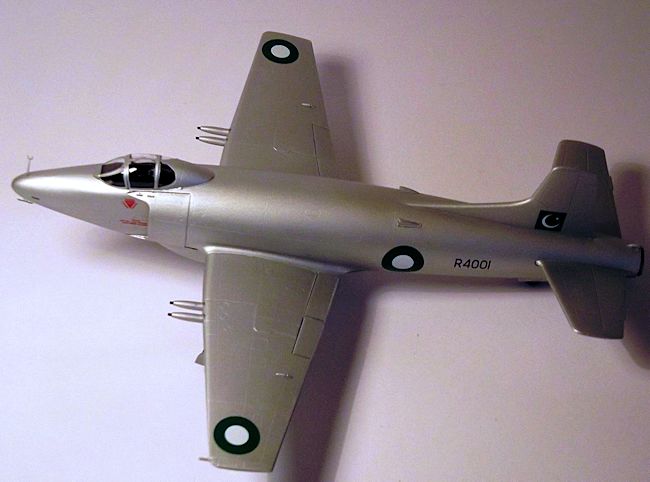
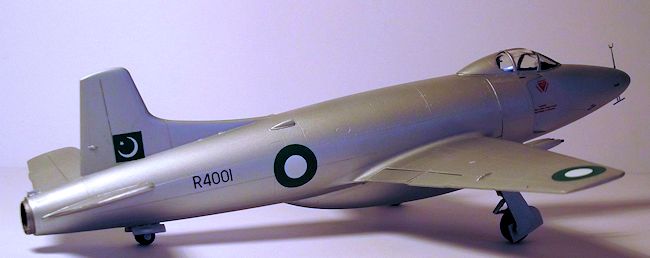
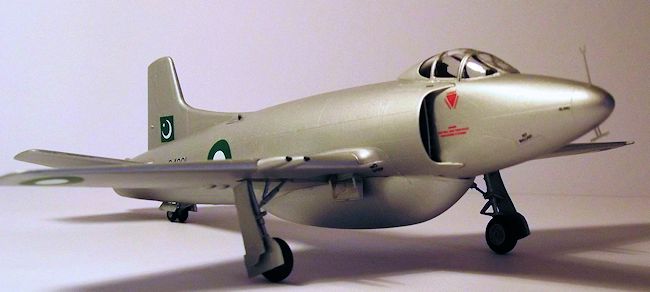 My choice
of finish would be an Attacker FB.2 of the Pakistan Air Force in one of the
simplest colour schemes going – British High Speed Silver. There is no
contrasting anti glare panel, no wing walks, no radome.
Just silver. I
chose Tamiya XF-16 Flat Aluminium, applied with my Iwata HP-C airbrush. I find
that this Tamiya colour suits silver painted post war jets. It is thinned about
70:30 with Tamiya acrylic thinner and two or three coats misted on with the
airbrush set at around 12psi, then finished with two brushed coats of Future/Klear
floor polish. This provides a gloss base coat for the decals. The accessories
such as the undercarriage doors were simultaneously painted ready for attachment
to the finished airframe and everything left for a couple of days to settle.
My choice
of finish would be an Attacker FB.2 of the Pakistan Air Force in one of the
simplest colour schemes going – British High Speed Silver. There is no
contrasting anti glare panel, no wing walks, no radome.
Just silver. I
chose Tamiya XF-16 Flat Aluminium, applied with my Iwata HP-C airbrush. I find
that this Tamiya colour suits silver painted post war jets. It is thinned about
70:30 with Tamiya acrylic thinner and two or three coats misted on with the
airbrush set at around 12psi, then finished with two brushed coats of Future/Klear
floor polish. This provides a gloss base coat for the decals. The accessories
such as the undercarriage doors were simultaneously painted ready for attachment
to the finished airframe and everything left for a couple of days to settle.
National insignia and the airframe serial come straight from Xtradecal’s good
quality sheet. They are thin but strong enough and went on without fuss.
Airframe stencils and warning notices came from the Trumpeter sheet. They are
really thin and need great care in application, having a tendency to fold up.
However they gave a satisfactory result and both
brands reacted well to
Micro Set and Micro sol. Once dry they were secured with
a brush coat of Future/Klear and the whole airframe was finished with two
airbrushed coats of Xtracrylix
Flat Varnish.
I
used a thin wash of Citadel colour Sepia to dirty up the undercarriage bays and
wheel covers to provide some contrast to the overall paint scheme.
| FINAL CONSTRUCTION |
| CONCLUSIONS |
Build the kit, painting the interior Black. Paint the exterior Silver. Apply
decals. Varnish and complete assembly. Stand back and look. It is
straightforward. Trumpeter has a reputation for producing kits that have subtle
detail and a good fit and this one upholds that reputation. But the fit is very
precise, so some e xtra
care is needed in assembly and slight confusion in the instructions takes it
just out of the beginners’ category. The kit decals are a disappointment but the
aftermarket compensates for this.
xtra
care is needed in assembly and slight confusion in the instructions takes it
just out of the beginners’ category. The kit decals are a disappointment but the
aftermarket compensates for this.
This
project has great resonance for me, since most of the AttackerFB.2s were built
at the Vickers Supermarine South Marston plant, just three miles from my home.
As a little kid in the 1950s I was regularly taken by my parents to visit an
older cousin whose cottage was right on the boundary of that airfield. I was too
small to identify the aircraft but I remember the noise. Many of the buildings
still remain in industrial use, but the former runway is now an auto test track.
The
site is the home of Honda UK’s automobile factory. The roar of the Attackers,
and its descendant Swifts and Scimitars is long gone.
| REFERENCES |
Kit
from my LHS, Spot on Models and Hobbies of Swindon, England.
If you would like your product reviewed fairly and fairly quickly, please contact the editor or see other details in the Note to Contributors.