Trumpeter 1/48 Seafang 32
| KIT #: | 02851 |
| PRICE: | £19-99 |
| DECALS: | Three options |
| REVIEWER: | Frank Reynolds |
| NOTES: |
| HISTORY |
Among
the fighter aircraft of World War 2 there is something of a “Lost Class of ‘45”,
being the promising advanced aircraft types that were cancelled as no longer
being needed with the coming years of peace. The Allies’ aircraft manufacturers
had responded to the rise of the Axis Powers in the late 1930s with an intensive
effort to design and build ever more powerful, faster, and more capable
aircraft, so that by 1945 they had designs and prototypes that were close to the
fabled 500mph speed barrier, almost the physical limit that could be achieved by
propeller driven piston engine fighter aircraft. Most of the gains in
performance came with a long series of incremental improvements to existing
designs, although in a handful of cases there were wholly new aircraft. The USA
produced the Curtiss YP-60, Republic XP-72 and North American XP-51J. Australia
built the Commonwealth CA-15, Great Britain the Martin Baker MB-5, the
 Supermarine
Spiteful and its naval equivalent, the Seafang. All were pushing the limits of
what could be achieved with state of the art piston engines and in most cases
provided only a small margin of improvement over in-service types. So their
development was curtailed and they would remain as exotic examples at the end of
a highly developed technology.
Supermarine
Spiteful and its naval equivalent, the Seafang. All were pushing the limits of
what could be achieved with state of the art piston engines and in most cases
provided only a small margin of improvement over in-service types. So their
development was curtailed and they would remain as exotic examples at the end of
a highly developed technology.
Supermarine’s Spitfire series had gone through eight years of intense
development with upgraded engines, a new wing design and progressive
strengthening of the airframe to the extent that, by 1944, the later versions,
the
Mk 21 and beyond, were almost twice the all up weight of the 1936
original and about 100 mph faster. Supermarine proposed amalgamating all of its
knowledge and technical innovation into a wholly new state of the art design as
the type 371 Spiteful that first flew in April 1945. Its specification included
some of the features that had been such a success in the P-51 Mustang, such as a
laminar flow wing for greater aerodynamic efficiency. There was an exceptionally
wide track undercarriage and the pilot sat at the highest point of the fuselage
for the best all round view from a bubble canopy. A large fuel tank was built
into the fuselage immediately behind the pilot and on the centre of gravity. To
accommodate this a
large horizontal and vertical tail was developed to aid stability. This proved
to be so effective that the entire tail unit was fitted to the last series of
Spitfire and Seafires. Armament was standardised at four 20mm cannon,
acknowledging that the dominance of .50cal machine guns was coming to an end.
Large low profile radiator housings were fitted under the wings, giving greater
aerodynamic efficiency.
A
navalised version of the Spiteful, was developed in parallel and had the
manufacturer’s designation of Type 382; 150 examples were ordered in May 1945 to
British Specification N.5/45 and to be known as the Seafang F.32. In order to
speed type development, ten development examples, designated
the Mk.31, were
ordered, being little more than a Spiteful with a hook and the first example
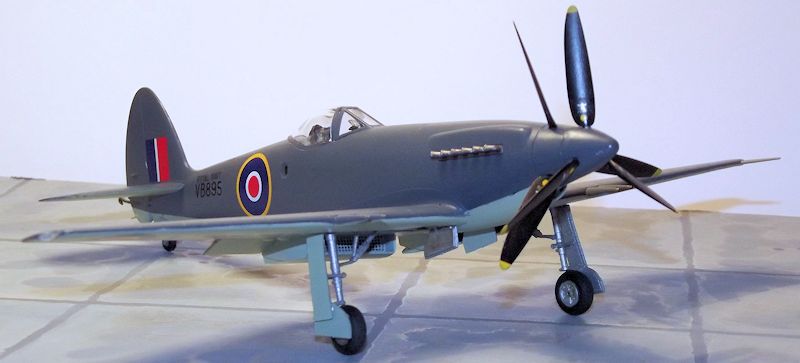
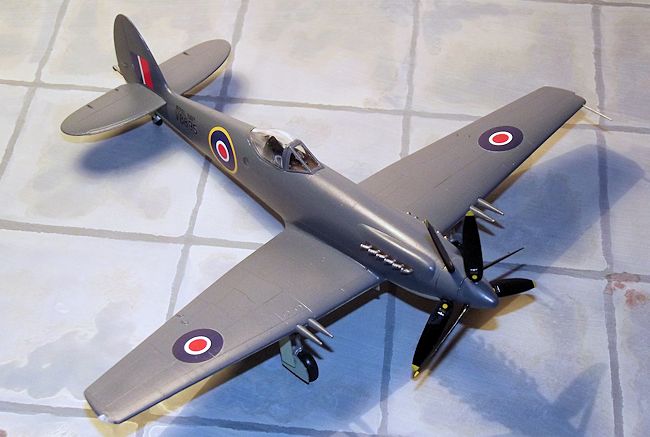
flew on January 26 1946. The fully navalised version, the type 396, as the
Seafang 32, featured a modified main fuel tank in the fuselage to permit room
for a reconnaissance camera installation and folding wing tips. Its most
dramatic feature was the contra rotating propeller assembly, fitted to cancel
out the torque effect of the 2,400 hp Griffon engine and improve deck landing
characteristics. The lower nose was modified by extending the carburettor air
intake forward to the fuselage nose, in a more aerodynamic form.
The
pace of so many military aircraft projects slowed dramatically in the immediate
aftermath of war. Programmes were dramatically cut back or cancelled and the
Royal Navy decided that the Seafang did not offer any significant performance
advantage over late model Seafires being introduced into service. Just eight
Seafang 32s were delivered, six in component form, and the production order was
cancelled.
 In
official trials the Seafang 32 achieved 475mph at 21,000ft, a range of 390 miles
and an initial climb rate of 4,630ft./min. This was impressive and put it into
the top league of fighter designs that pushed towards the magic 500mph.
In
official trials the Seafang 32 achieved 475mph at 21,000ft, a range of 390 miles
and an initial climb rate of 4,630ft./min. This was impressive and put it into
the top league of fighter designs that pushed towards the magic 500mph.
There
were however, potential limitations. The laminar flow wings on the prototypes
were hand built and had excellent aerodynamic characteristics, but production
versions would need engineering compromises so that the good results shown in
tests were unlikely to be achieved in aircraft subject to the wear and tear of
front line service.
The
Seafang came to nought and is another of history’s “What Ifs”. The wing and main
undercarriage design saw successful, if limited, service when incorporated into
the design of the Royal Navy’s first jet fighter, the Supermarine Attacker.
| THE KIT |
The
initial mild surprise is that the kit is not Trumpeter’s previously released
1:48 scale Spiteful with a few add on parts to convert it to the naval variant.
Of the three main parts frames two are wholly new. One frame provides the main
fuselage halves, components for the propeller spinners and the tail hook
assembly. The second provides a one piece lower wing, left and right upper wing
halves, ribs and hinges for a folded wing option and the two propeller
assemblies. The whole of the lower front engine cowl is moulded integrally with
the full span lower wing. The third grey parts frame is common with the earlier
 Spiteful
kit and provides all of the external parts that dangle, droop or otherwise
decorate the exterior such as the undercarriage, flaps, radiators and fuselage
interior.
Spiteful
kit and provides all of the external parts that dangle, droop or otherwise
decorate the exterior such as the undercarriage, flaps, radiators and fuselage
interior.
All
of the parts are crisply moulded and feature delicate engraved lines. I found no
trace of flash and just the smallest amount of sinkage of the fuselage sides in
the cockpit area. The parts are neat, clean, and well engineered. One of the
peculiarities of Trumpeter is the way in which the parts join the plastic
frames, via commendably thin tags that are jointed onto the edge of many parts,
but the result is that when they are cut away for assembly a tiny tag remains on
the joining faces of the parts. It is important to ensure that these tiny
residual tags of plastic are removed with a sanding stick or similar so that the
parts can be joined snugly.
Instructions consist of an eight page booklet in greyscale, showing a parts
chart and six stages of construction, with exploded views. There is a separate
two-sided full colour A4 sheet with three-views of the three alternative paint
schemes offered. Colour call outs are geared to Mr. Hobby, Vallejo, Model
Master, Tamiya and Humbrol paint ranges.
There is a simple sheet of decals, that turns out to be if limited use, as discussed below.
| CONSTRUCTION |
This
begins with the interior and a simple cockpit tub that provides side consoles
with a representation of instruments and controls. There is a simple rear
bulkhead, instrument panel and seat – although the latter is omitted from the
assembly drawing, as are the rudder pedals. The interior is essentially
fictional, but in the style of British aircraft of the period just about
everything is Black and little is likely to be seen through the smallish canopy
when closed so I sprayed everything in Tamiya XF-1 Flat Black. An adequate decal
is provided for the instrument panel and simple seat belts were added from
masking tape. The interior of the fuselage halves around the cockpit was sprayed
Black at this time and when the paint was dry the cockpit area was lightly dry
brushed with silver to bring out the raised detail. The next six sub- sections
of Stage 1 related to the propellers, undercarriage and radiators
as sub
assemblies. These are components that I prefer to deal with later, so I went
straight ahead to Stage 2, the fuselage assembly. I chose to commit all of the
components for the recce camera to the spares box, concluding that a test
aircraft might not be fitted with such equipment.
 There is a
little work to do before the halves are joined. Trumpeter invite you to cut out
a flashed over hole moulded in the left fuselage half to accommodate a window
for the recce camera. Here they have got themselves confused, having moulded one
window in the left side only, while the box top illustrations show two, one on
each side, which is in fact correct and can be confirmed by photographs. It is
easy enough to drill a second hole to match. Trumpeter only provide glazing for
one hole, but this is not a problem for me since I prefer to do such glazing in
Micro Kristal Klear after all paintwork has been finished. The tail wheel is to
be secured in one fuselage half with a positive socket before the fuselage
halves are joined.
There is a
little work to do before the halves are joined. Trumpeter invite you to cut out
a flashed over hole moulded in the left fuselage half to accommodate a window
for the recce camera. Here they have got themselves confused, having moulded one
window in the left side only, while the box top illustrations show two, one on
each side, which is in fact correct and can be confirmed by photographs. It is
easy enough to drill a second hole to match. Trumpeter only provide glazing for
one hole, but this is not a problem for me since I prefer to do such glazing in
Micro Kristal Klear after all paintwork has been finished. The tail wheel is to
be secured in one fuselage half with a positive socket before the fuselage
halves are joined.
The
fictional cockpit interior is glued snugly into a tongue and box arrangement in
the right fuselage half and this now reveals more speculation of the part of
Trumpeter. They have moulded a one piece saddle back to fit behind the pilot’s
seat, set just below the top edge of the cockpit opening, rather in the style of
a P-51. Examination of photographs shows that this area under the canopy,
to the
rear of the pilot’s seat, is an extension of the fuselage spine and flush with
the top of the fuselage, in the style of a low back Spitfire. Trumpeter’s
arrangement appears to be an attempt to allow the rather thick bubble canopy to
sit down over the down slope of the fuselage sides. I decided that any attempt
at trying to reconstruct this enclosed area up flush with the rear spine would
result in a risky attempt to butcher the canopy to fit. This was not worth the
risk, so I just painted the area Extra Dark Sea Grey and hoped that it would not
be too 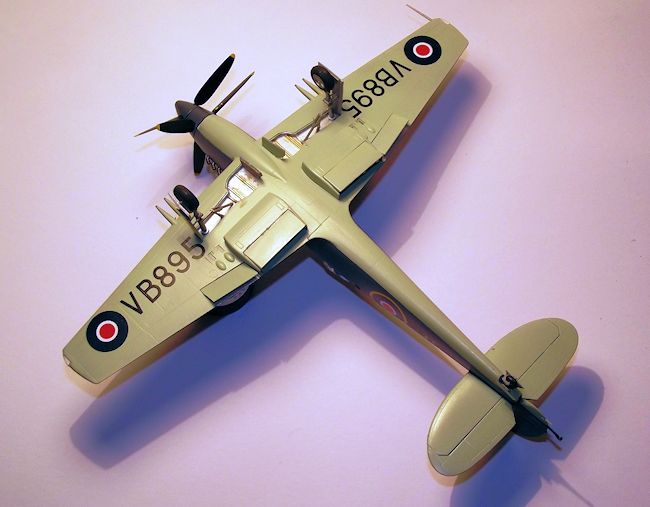 obvious
on the finished product. The fuselage halves were glued and closed up without
any further problems. I added the gun sight and the canopy glazing was masked
with Tamiya tape trimmed with a fresh scalpel blade.
obvious
on the finished product. The fuselage halves were glued and closed up without
any further problems. I added the gun sight and the canopy glazing was masked
with Tamiya tape trimmed with a fresh scalpel blade.
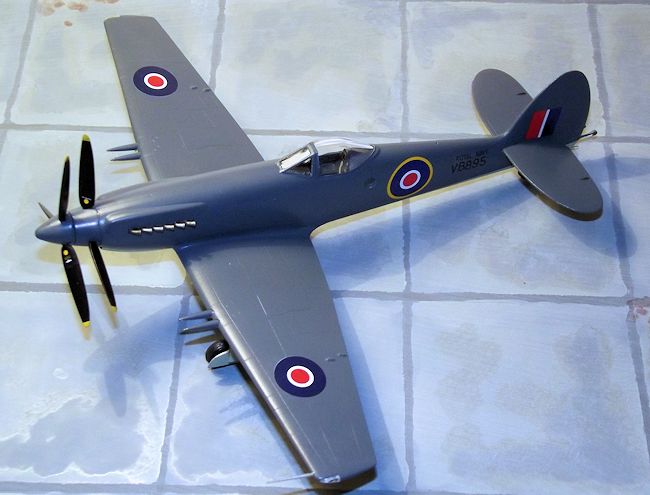
Attention next turns to the wings and the kit offers the option to cut away the wing tips along engraved lines and assemble them with the tips folded. I elected to go with the full span configuration. The wheel wells are separate units that glue into positive locations in the one piece lower wing, which was then glued onto the fuselage structure and left overnight to dry. The following day I added the left and right upper wing panels and was pleased to find that they fitted perfectly, no gaps and no trimming required. The two large underwing radiator assemblies are moulded in one piece and just require the etched metal grilles to the interior to be tacked in place with superglue. When this had settled the main radiator housings were glued in place. The last job required to complete the basic airframe is the tail assembly. Trumpeter have gone for a rather eccentric parts breakdown here, in that the lower section consists of the fixed portion of the horizontal tail – as though a separate elevator is to be added, yet the upper section is all one piece with fixed and elevator sections moulded as one. The horizontal tail parts are glued into positive slots either side of the lower fin.
| COLORS AND MARKINGS |
The
decals supplied are of limited use. Two are for entirely fictional “what ifs”, a
machine in Spanish markings and a Royal Navy scheme of a style carried by
Westland Wyverns in the Suez campaign of 1956. I wanted a finish for an aircraft
that had actually flown, so I considered the third option, a standard Royal Navy
Grey/Sky finish of the early post war period.
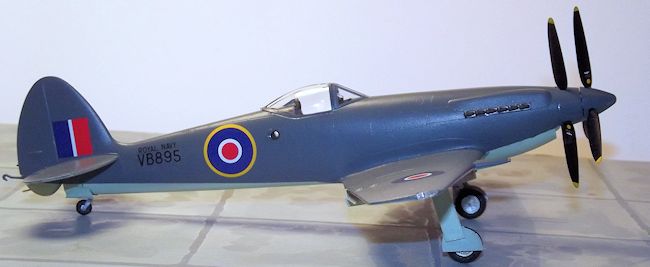
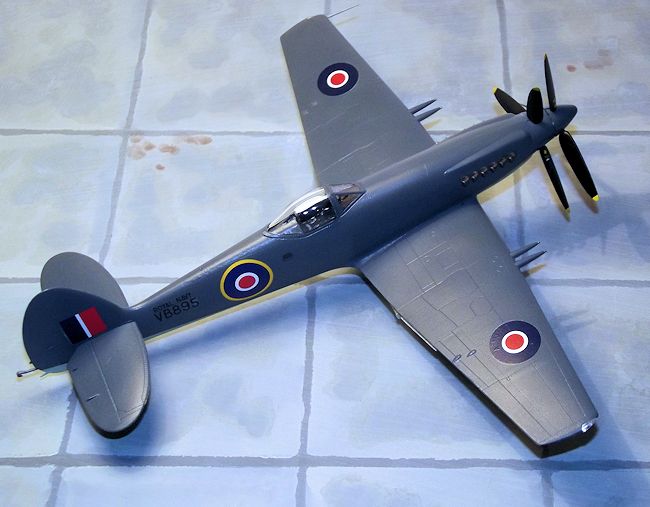
The
lower surfaces were airbrushed in Xtracrylix
XA1007 RAF Sky and the Upper Surfaces in XA1005 Extra
Dark Sea Grey/ Wheel wells and undercarriage details were finished in Tamiya
XF-17 Aluminum.
 Only two
Seafang 32s were flown, serial numbers VB895 and VB 893. Trumpeter offers one
Royal Navy version, as VB 885, so the serial number needs to be modified or
replaced. I opted to replace all of the serials by examples from generic sheets
in my decal dungeon, since it would be hard to find a replacement number “9” of
the correct size, font and matching colour density. The national markings are
also wrong, in that the six roundels are of identical C1 type, each with a
yellow outer ring, a style that is only applicable to the fuselage.
Only two
Seafang 32s were flown, serial numbers VB895 and VB 893. Trumpeter offers one
Royal Navy version, as VB 885, so the serial number needs to be modified or
replaced. I opted to replace all of the serials by examples from generic sheets
in my decal dungeon, since it would be hard to find a replacement number “9” of
the correct size, font and matching colour density. The national markings are
also wrong, in that the six roundels are of identical C1 type, each with a
yellow outer ring, a style that is only applicable to the fuselage.
All
of the decals were applied using the Microscale system of Micro Set and Micro
Sol decal setting solutions and they settled down neatly onto the subtly
engraved details in the plastic mouldings. A final single coat of Future/Klear
sealed the finis, followed by two misted coats of Xtracrylix satin Varnish.
Attention now turned to the external details and fittings.
| FINAL BITS |
Each
main undercarriage unit consists of eight parts. The wheel halves are reasonably
well detailed and the legs fit neatly onto the two part main gear doors. Each
leg is provided with a two part scissors link, but these are not obvious on the
real thing so I did not fit them. The legs fit firmly into sockets in the wheel
bay and the assembly is completed by gluing the inner gear doors in place. The
inner face of the gear doors and wheel bays were painted in Tamiya XF-16 Aluminu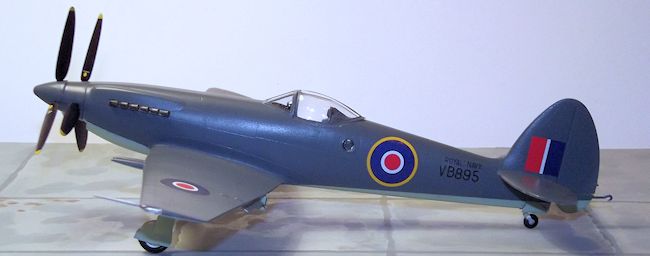 m
Silver.
m
Silver.
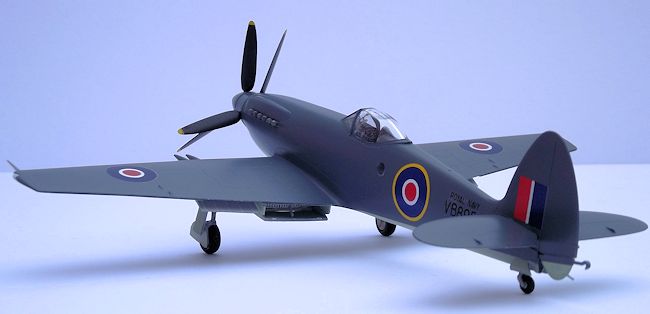
The
separate radiator doors and wing flaps were fitted in the lowered position, so
as to add some interest to what is otherwise a fairly dull airframe, lacking as
it does in unit markings or other insignia.
Finally, the matter of the contra rotating propeller assembly. Unheralded on the
box, Trumpeter has provided an engineered gimmick, with the option to have an
operating contra rotating system. The prop hubs have a clever system of gear
cogs hidden within. However they will only work if the whole system is
incorporated into the fuselage when the halves are joined. I prefer to add
propellers when an aircraft is nearly complete, so the gears and the rear
gearbox housing were omitted and I merely glued the propellers and spinners in
place.
Finally the exhaust outlets, arrester hook and tail wheel doors completed the
build.
| CONCLUSIONS |
This
is a prime example of a Trumpeter kit. Finely engineered with exquisite subtly
engraved detail that is marred by infuriating errors in the instructions and
basic errors in design. The decal sheet is poor. It is not a difficult kit to
build, but more difficult to get to a reasonable standard without resorting to
the aftermarket. Nevertheless the result is a good model of an interesting and
unusual type and Trumpeter should be congratulated on choosing such an esoteric
type. For a Spitfire nut it neatly closes off the historic line and it looks
great in my showcase. Recommended to fans of the exotic.
| REFERENCES |
Warplanes of the Second World War, Fighters Volume Two, by William Green.
Macdonald
1961.
Spitfire, the History by Eric B. Morgan and Edward Shacklady, Key Publishing.
2000
October 2014
Copyright ModelingMadness.com. All rights reserved. No reproduction in any form without express permission from the editor.
If you would like your product reviewed fairly and fairly quickly, please contact the editor or see other details in the Note to Contributors.