Monogram 1/72 HU-16B Albatross
|
KIT # |
85002010200 |
|
PRICE: |
£12.50 in 2000 |
|
DECALS: |
USAF/USCG |
|
REVIEWER: |
|
|
NOTES: |
A real oldie |
|
HISTORY |
 The SA-16B was a
development intended to deliver “significant improvements in performance,
with minimal outlay in costs”. Changes consisted of an extended wing,
with an extra 200 inches span, 18 inch extension to the fin, 12 inch
extensions to the stabiliser, and other less noticeable modifications,
were considered successful - although they did compromise the max speed
and rate of climb figures. The first aircraft (and many others) was
actually a conversion of an SA-16A, numbered 51-7200 (subject of this
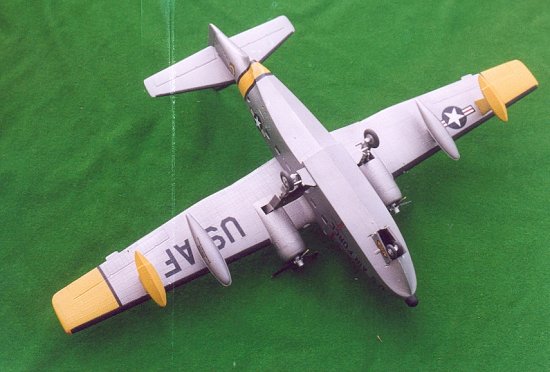
kit) – its maiden flight was 15 Jan 1956. The longer wing consisted a
parallel section immediately outboard the engines, and longer tips. This
compromised the previously straight trailing edge, and is faithfully
reproduced in the kit. 241 conversions were completed for US forces and
some new build aircraft.
The SA-16B was a
development intended to deliver “significant improvements in performance,
with minimal outlay in costs”. Changes consisted of an extended wing,
with an extra 200 inches span, 18 inch extension to the fin, 12 inch
extensions to the stabiliser, and other less noticeable modifications,
were considered successful - although they did compromise the max speed
and rate of climb figures. The first aircraft (and many others) was
actually a conversion of an SA-16A, numbered 51-7200 (subject of this
kit) – its maiden flight was 15 Jan 1956. The longer wing consisted a
parallel section immediately outboard the engines, and longer tips. This
compromised the previously straight trailing edge, and is faithfully
reproduced in the kit. 241 conversions were completed for US forces and
some new build aircraft.
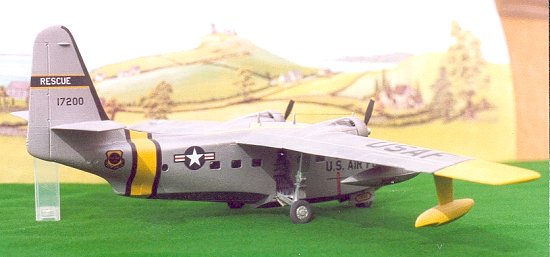
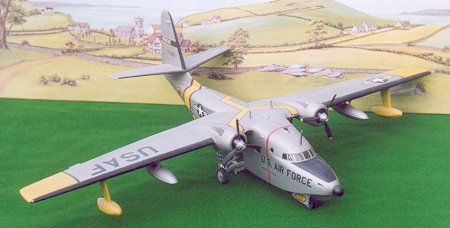
There was a Canadian version, based on the HU-16B, with more powerful engines, - of which 21 were delivered. Here visible differences consisted of bulged engine cowlings and a carburettor air-scoop (neither reproduced in the model), and square tipped props.
Another addition for any version of Albatross was the Triphibian kit. This was ice-landing equipment, consisting of a hull skid and shock struts on the floats, permitting operations from frozen ice, as well as land or water. The Canadian model incorporates the Triphibian modifications thanks to a Leading Edge conversion set.
Albatrosses served US forces until about mid-way through Vietnam – carrying out many daring rescues under fire. They also served numerous other foreign air-forces and now civil operators around the world. A total of 459 aircraft were delivered.
|
THE KIT |
My kit is dated 1999, and was bought and completed in early 2000 – but it shows evidence of a far more ancient pedigree. (Like about 1957-58. Ed) It was one of Monogram’s recent releases with a free patch.
Moulded
in dark grey, soft plastic, – the breakdown for this kit is typical for a
kit of this nature, but the instructions don’t always use part numbers.
The model is covered in oversize rivets and, with the deformed crew
figures, is reminiscent of an
 early Airfix bomber.
Interestingly it features retracting undercarriage, and contains parts
for an inflatable raft and survivors – enabling a seaborne rescue diorama
to be built.
early Airfix bomber.
Interestingly it features retracting undercarriage, and contains parts
for an inflatable raft and survivors – enabling a seaborne rescue diorama
to be built.
Instructions lead you through 21 stages of construction, with various tips, paint and decal guides along the way. Having studied these with some curiosity – I largely ignored them, preferring to follow the diagrams and paint the whole ship after construction.
The decal-sheet is a thing of beauty – with precise decals for a metal USAF version, and a white/red USCG. I selected USAF as it looked easier – but have been able to borrow another example in Canadian colours for this review from an IPMS colleague. Thanks to John Barnfield for the Canadian Albatross.
For those wanting an Albatross in their collection, this is the only kit in town – and delivers results commensurate with effort.
I was inspired to write about this under-rated model after watching a preserved example perform at the Seawings display, Southampton, England - on TV.
|
CONSTRUCTION |
As I said, the instructions for this kit are over-complicated by the fact that they pre-date liquid cement and Clearfix (both of which considerably assisted construction). The instructions also suggest removal of the rear-port door with a scalpel - for the rescue scene.
 I ignored all that, and
started with the cockpit. This consists of 2 deformed pilots sitting on
a cockpit floor – it’s horrendous! I installed decent seats – spares
from an Academy B-17E, plasticard bulkheads, instruments from a Revell
Shackelton, centre console made from a Stuka canopy, scatch-built control
columns and ceiling-mounted throttles. It is just visible through the
windscreen, (but not by photo) but gave me a great feeling of
satisfaction. Interior is painted with Inscribe Avacado, brown seats,
masking-tape harnesses and black controls.
I ignored all that, and
started with the cockpit. This consists of 2 deformed pilots sitting on
a cockpit floor – it’s horrendous! I installed decent seats – spares
from an Academy B-17E, plasticard bulkheads, instruments from a Revell
Shackelton, centre console made from a Stuka canopy, scatch-built control
columns and ceiling-mounted throttles. It is just visible through the
windscreen, (but not by photo) but gave me a great feeling of
satisfaction. Interior is painted with Inscribe Avacado, brown seats,
masking-tape harnesses and black controls.
I ignored all the fuselage windows, installed the nose undercarriage leg, and assembled the fuselage halves. These showed signs of not wanting to fit perfectly, so I selotaped the halves together tightly and left them to set overnight. Most of the joins are knife-edges which didn’t require gap-filling, but the upper forward fuselage did require treatment.
Next came the wings, consisting of upper and lower halves on each side, and a centre section over the fuselage and engines (no moving ailerons here!). These went together OK, but some work was required to fill and level the joins just outboard of the engines. At this stage you’re supposed to install the main undercarriage so that it can fold and retract. I was not very optimistic about this – just installing the upper parts.
Wing marriage to fuselage was straightforward, resulting in well concealed lower joins – but gaps across the upper fuselage. Time to treat all those gaps with liquid-paper. Sanding down afterwards reduced the rivets, so I continued for the whole airframe.
The only remaining airframe prior to painting is the tailplane – which slots into the fin without any gap.
I assembled the fuel-tanks and gathered all the remaining engine and undercarriage components prior to painting.
|
CAMOUFLAGE & MARKINGS |
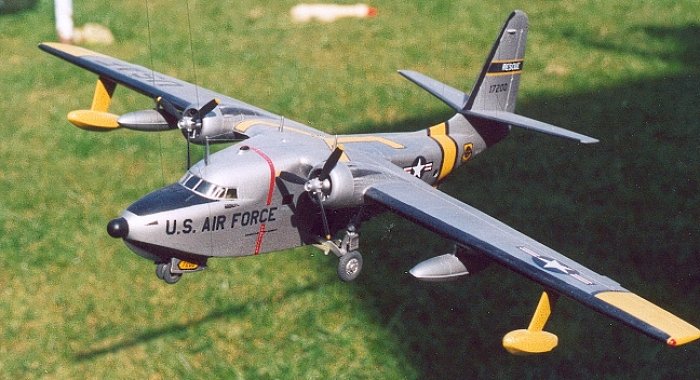
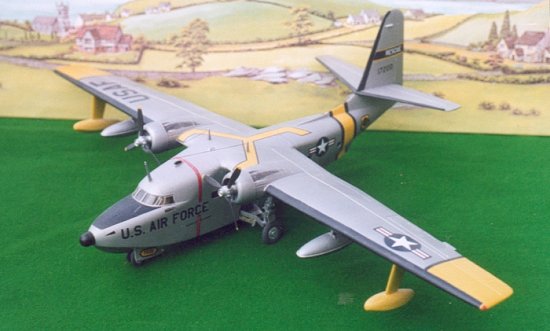
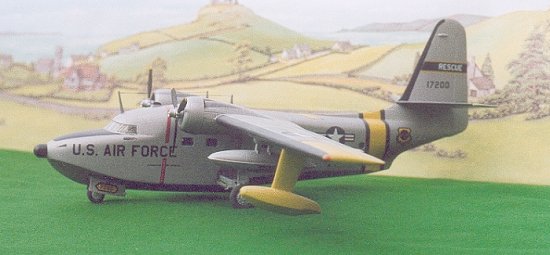
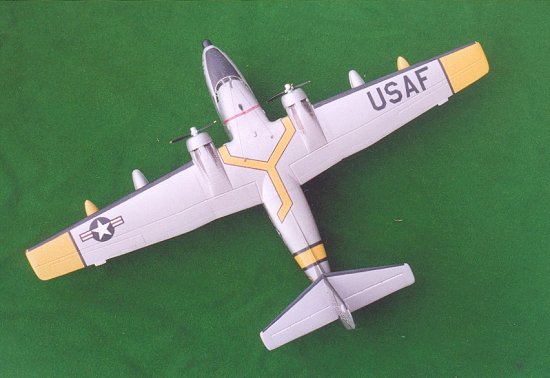 The USAF version I
selected is natural metal, with yellow wingtips. I have one picture of a
similar machine – showing a dull metal finish. So I discarded any ideas
of Humbrol 11, SNJ, Nissan Silver or kitchen-foil and bought an aerosol
called Wheel Aluminium from Halfords.
The USAF version I
selected is natural metal, with yellow wingtips. I have one picture of a
similar machine – showing a dull metal finish. So I discarded any ideas
of Humbrol 11, SNJ, Nissan Silver or kitchen-foil and bought an aerosol
called Wheel Aluminium from Halfords.
I stuffed the cockpit with damp tissue, and started spraying – the result is a dark metal colour reminiscent of an old saucepan – but representing a bird that lives around the sea.
The wingtips (and floats) were painted Humbrol 24 Yellow, with decal stripes for demarcation. All leading edges have black rubber de-icer boots.
Though these were beautifully defined, they didn’t stick very well – however my method of application over a blob of wet Klear did bond them down to the surface. The only other marking is the huge anti-dazzle panel, which follows a panel-line - so is quite easy to paint freehand.
Once all the decals were applied I gave the model an airbrush coat of acrylic matt varnish before finishing off.
|
FINAL CONSTRUCTION |
This consisted of fitting the rest of the undercarriage, windscreen, engines, radome and aerials – all straight forward but some bits are worth of comment.
 The undercarriage is all
painted Humbrol 11 Silver, with covers matching the rest of the
airframe. I wasn’t very optimistic about the moving joints – so I
installed the whole lot and fixed it with liquid cement (so did John with
his Canadian version!). Tyres were painted the darkest gray I could
find, before the wheels were fixed with a hot blade.
The undercarriage is all
painted Humbrol 11 Silver, with covers matching the rest of the
airframe. I wasn’t very optimistic about the moving joints – so I
installed the whole lot and fixed it with liquid cement (so did John with
his Canadian version!). Tyres were painted the darkest gray I could
find, before the wheels were fixed with a hot blade.
Engines were painted tyre grey – prior to spraying with the rest of the airframe. This has had the effect of highlighting the engine detail. Propellers were painted black with yellow tips and silver hubs.
I framed the windscreen with Humbrol 56 Aluminium prior to installing with Clearfix. This paint was a reasonable match to the rest of the airframe – so I used it to fill any remaining gaps. Fuselage windows were finished with Clearfix.
|
ACCURACY |
 For the purposes of
review completeness, I measure models to establish their accuracy,
multiplying my measurements by 72 and comparing with the quoted
dimensions.
For the purposes of
review completeness, I measure models to establish their accuracy,
multiplying my measurements by 72 and comparing with the quoted
dimensions.
Span 408mm x72= 29.376M Quoted 29.46M Difference -84mm
Length 264mm x72= 19.008M Quoted 19.15M Difference -142mm
Height 112mm x72= 8.064M Quoted 7.87M Difference +194mm
These figures were measured on a pile carpet – so anything within 300mm is fine by me!
Does it look like an Albatross – YES!
My only minor gripes are that the wings have a slight sag that I can’t see on photos of the real plane – we’ll put that down to full wing tanks, and the main-wheels look a little thin.
|
CONCLUSIONS |
Crude, no real detail, requiring a little work to build a good example – this kit is disappointing by current standards, but it rewards any extra effort that it put into it. Thankfully it’s fairly accurate – which is fortunate as it’s the only model we’re ever going to see of this sea wanderer.
October 2003
Copyright ModelingMadness.com. All rights reserved. No reproduction in any form without express permission from the editor.
If you would like your product reviewed fairly and fairly quickly, please contact the editor or see other details in the Note to Contributors.