Hobby Boss 1/72 F-84E Thunderjet
|
KIT: |
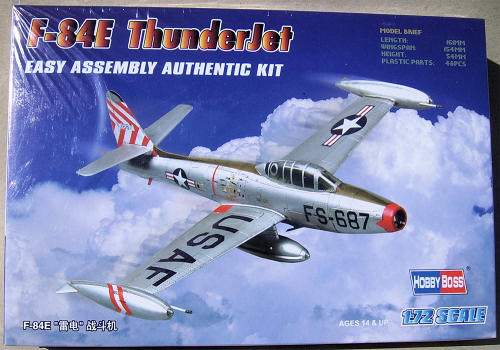
Hobby Boss 1/72 F-84E Thunderjet |
|
KIT #: |
80246 |
|
PRICE: |
AUD $12.00 in 2008 |
|
DECALS: |
2 options |
|
REVIEWER: |
Graham Mison |
|
NOTES: |
|
The
Republic F-84 was produced to meet a late WWII requirement for a
pursuit aircraft capable of reaching 600+ MPH. Like
most of the first generation of jets its service entry and performance was
restricted by the engine it was powered by, and so was superseded by research
data gained from captured German sources before it entered squadron service.
By
the time of North Korea’s invasion of the South many USAF units had taken on the
–E model with improved performance. These joined the F-80s, several piston
powered types and early Navy jets in the battle to stem the Northern aggressors
with the premier type, the F-86A, staying at home. Despite some air-to-air
successes the Thunderjets were outclassed by the communist's
new weapon, the Mig 15. This necessitated the introduction of the Sabre into the
theatre to get back air superiority. This saw the F–80s
and F–84s switch almost exclusively over to ground
attack.
TheF-84Es
were supplemented by new F-84G models, these were able
to carry more ordnance and were the first single seat Nuclear capable aircraft,
fortunately for all of us they never put that capability into play.
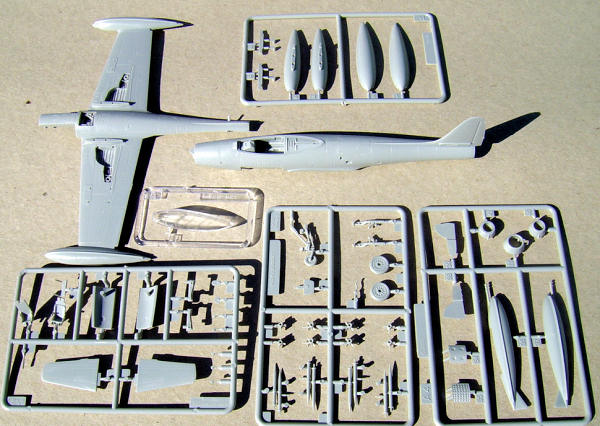
 Hobby
Boss have joined Heller, Tamiya and Academy in issuing a kit of the plank wing
Thunderjet in 1/72. The kit is one of the entry-level series that is a bit
different than your normal run of the mill injection molded kit. On opening the
box you are confronted with what seems to be a partially constructed model in a
black vacformed tray. The reason for that being the manufacturers method of
reducing the number of parts to a minimum by forming the majority of the
fuselage as one piece complete with cockpit as well as the upper and lower wing
with a section of the lower fuselage. Most major parts are joined with large
pins that make this almost a push together kit. Total parts count for this kit
is 55, high for this series, several are optional or not used.
Hobby
Boss have joined Heller, Tamiya and Academy in issuing a kit of the plank wing
Thunderjet in 1/72. The kit is one of the entry-level series that is a bit
different than your normal run of the mill injection molded kit. On opening the
box you are confronted with what seems to be a partially constructed model in a
black vacformed tray. The reason for that being the manufacturers method of
reducing the number of parts to a minimum by forming the majority of the
fuselage as one piece complete with cockpit as well as the upper and lower wing
with a section of the lower fuselage. Most major parts are joined with large
pins that make this almost a push together kit. Total parts count for this kit
is 55, high for this series, several are optional or not used.
Despite
the simplification there is a high level of detail on the parts with engraved
panel lines (and rivets) and raised detail where needed. The cockpit has an
instrument panel with raised dials, control column and choice of 2 different
seats. The main U/C legs are well detailed yet look sturdy enough to support the
weight of the finished model. These units insert into wheel wells that have good
detailing and appear deep enough. The front U/C unit is a one piece with
integrally molded wheel, not one of my favourite ways to form these things but
popular with some. The front wheel well is very deep with chunky location points
for the leg. Front doors are integral with the fuselage. Two types of speed
brake are included, one with circular holes the other with four slots. Two
engine exhaust types are also on the sprues, one slightly longer than the other.
(These last two items are undoubtedly to be Hobby Boss' bits needed to do an
F-84G. Ed)
Things
under wings consist of 4 sets of rockets and a pair of drop tanks. The wings
have part of the pylons for the tanks molded on and the holes for the rockets
are already opened up.
As
far as molding flaws etc go there are excess pieces to be removed from the front
U/C, tank pylons and the rockets and a seam that runs
the length of the upper fuselage. Most other problems will be hidden after
construction.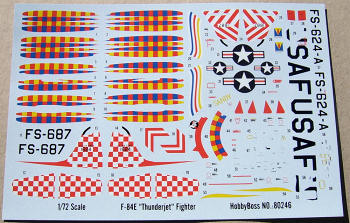
Instruction
sheet shows a 3-stage construction process with all painting details on the
reverse side. This painting and decaling guide is on the crowded side with close
inspection needed (in other words a magnifying glass for these old eyes) to see
where the smaller decals go. Paint numbers are given for Mr. Colour and Aqueous
Hobby Colour.
The
decal sheet is as big as the box and gives 2 options: F-84E Sandy from the 9th
FBS, 49th FBW
Taegu 1951. F-84E flown by Col. Laven, CO of the 86th
FBW in Germany 1951. These decals look good on the sheet and are well printed
and include plenty of stencil markings. The under wing markings will need to be
applied before the rockets, this is not mentioned in the instructions.
All
in all, this looks to be an excellent attempt at a –E model. Some will view the
way the parts are molded as a hindrance but this kit should be welcomed by
newcomers and those with many kits under their belt.
Graham Mison
July 2008
If you would like your product reviewed fairly and quickly, please
contact
me or see other details in the
Note to
Contributors.
Back to the Main Page
Back to the Previews Index Page