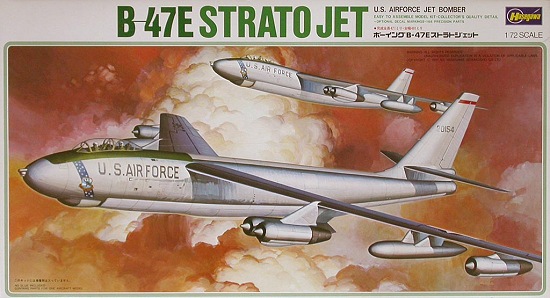
Hasegawa 1/72 B-47E Stratojet
| KIT #: | K 7 |
| PRICE: | $24.50 MSRP |
| DECALS: | One option |
| REVIEWER: | Lee Kolosna |
| NOTES: | True Details resin F-80/T-33 seats used. |
| HISTORY |
The Boeing B-47 Stratojet was the mainstay of the Strategic Air Command in the mid to late 1950s, taking over duties from the huge Convair B-36. Over 2000 were built by Boeing, Lockheed, and Douglas. While new and radical for the time, the now classic configuration of the sleek jet came about from captured German research into the benefits of swept wings at high subsonic speeds. Six J47 engines were hung in four pods under thin wings angled back at 35 degrees. A crew of three was carried, with the pilot and copilot housed underneath a fighter-style bubble canopy. The bombardier/navigator sat in the forward fuselage. Defensive armament was limited to a pair of .50 machine guns in a radar-directed tail turret. This was later upgraded to 20 mm cannons in the B-47E model. Since the wings did not allow enough space for landing gear storage, a tandem bicycle arrangement for the main gear was employed, with small outrigger wheels under the inboard engine pods for balance.
Like all early jets, the
B-47 suffered from underpowered engines that took a very long time to spool
up from idle to full thrust. It had a fast landing speed that required a
strict adherence to landing procedures. It also required the deployment of
two parachutes, the first one for drag to reduce approach speed but still
allow the engines to maintain a relatively high power setting in case a go
around was 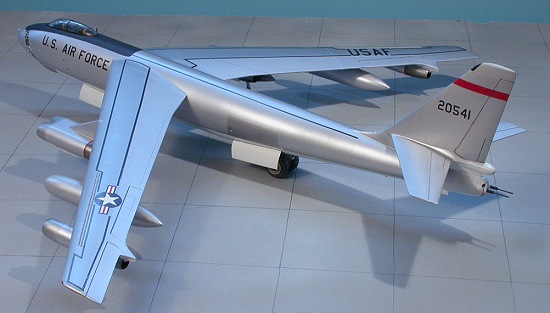 called for, and the second larger parachute that deployed to
slow the aircraft down after the actual landing itself. Many early
accidents led to a “widow maker” reputation for new jet bomber, but intense
pilot training over the years reduced accident rates to below 10% over the
life of the aircraft. To assist with takeoff in hot weather and heavy load
conditions, both internal and external JATO packs could be employed.
called for, and the second larger parachute that deployed to
slow the aircraft down after the actual landing itself. Many early
accidents led to a “widow maker” reputation for new jet bomber, but intense
pilot training over the years reduced accident rates to below 10% over the
life of the aircraft. To assist with takeoff in hot weather and heavy load
conditions, both internal and external JATO packs could be employed.
The B-47 went on to outfit 36 medium bomber wings in SAC. In addition to the bomber role, reconnaissance versions were manufactured and were employed in high altitude fly-overs of Communist China and the Soviet Union. Although the B-47 never officially engaged in combat during its service lifetime, Soviet fighters shot down a RB-47H over the Barents Sea in 1960. Two crewmen survived and were put on trial for espionage, but they were returned to the US a year later in a prisoner exchange for captured Soviet spies.
The B-47 served capably in the Air Force’s arsenal of nuclear deterrence until it was replaced by the larger B-52 in the early 1960s, with the last one being stricken from the inventory in 1967. The influence of the B-47’s design can be clearly seen in the lines of the B-52 as well as Boeing’s 707 series, and can still be discerned even today in many modern airliners.
| THE KIT |
 hey
suffer from prominent ejector pin marks. The same is true for the
inside of the landing gear and bomb bay doors. Two dozen bombs are
provided, presenting the modeler with a painting challenge. The
interior of the landing parachute compartment is totally void of detail.
Each of the six engine exhausts are featureless plugs. To my mind,
this kit looks very similar to an Airfix kit of the same vintage.
hey
suffer from prominent ejector pin marks. The same is true for the
inside of the landing gear and bomb bay doors. Two dozen bombs are
provided, presenting the modeler with a painting challenge. The
interior of the landing parachute compartment is totally void of detail.
Each of the six engine exhausts are featureless plugs. To my mind,
this kit looks very similar to an Airfix kit of the same vintage.
Hasegawa doesn't provide any evidence of the landing lights in front of the two dual engine pods. The shape of the tail turret more closely resembles the B-47B’s .50 caliber unit rather than the later 20 mm turret of the B-47E.
| CONSTRUCTION |
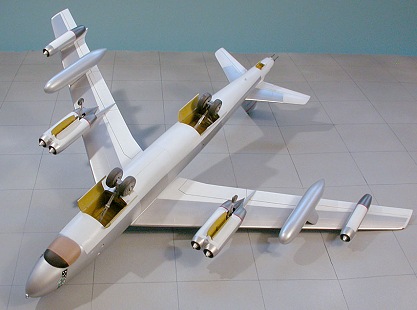
The wings were next. I added navigation lights on the tips using pieces of
clear red and green styrene. After assembling all the pod assemblies, I
checked the fit of the pylons and discovered, to no great surprise, that
fit was very poor on the end that attaches to the wing. I first glued the
outside pods to the wing and filled the large gaps, then glued the inside
pylon to the wing and again filled the large gap. Finally, the inside
double engine pod was added and that seam was dealt with using a method of
filling with putty (which I haven't used in years) and trying to smooth it
out with acetone-based nail polish remover. The reason I did this was
because the seam was rather small and I had almost no room to get a sanding
stick in to sand the seam properly. As it was, I was less than impressed
with the results and did have to do some sanding as best I could. I'll
have to think about my approach to podded engines in future
 projects.
| COLORS & MARKINGS |
Since I'm so enamored with American aircraft of the late 1940s
and 1950s, I have been working on getting a decent metallic finish using
products available to the modeler. Lately, this involves the employment of
Alclad II Lacquer. Since Alclad requires a primer, I have been using
Floquil Old Silver in this capacity with great success. My thinking on
this is that I have already made a perfectly smooth plastic surface, so why
should I have to spray a lacquer primer on the model and re-sand and polish
the whole thing all over again? I sprayed the Floquil enamel thinned with
40% lacquer thinner and let the model dry for a week. A few stray
blemishes that I missed on the first go-round were fixed and re-primed. I
polished the Old 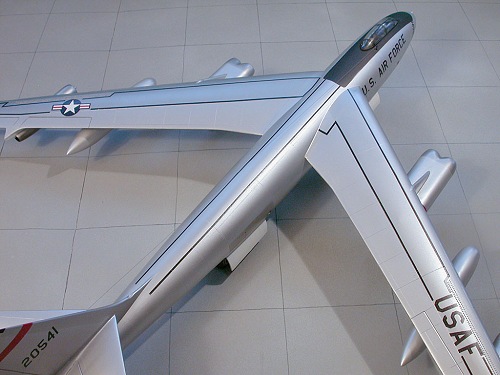 Silver coat by rubbing it with an old tee shirt, and then
sprayed Alclad, using the White Aluminum shade, which I think looks better
than Aclad’s plain Aluminum. This was misted on at first to avoid any
crazing of the enamel primer underneath. After looking at hundreds of
photos of B-47s, I determined that the front half of the wings was a
slightly darker aluminum color, so I masked them off and shot Alclad II
Duraluminum. Panels under the wings and on the side of the fuselage got
painted with Alclad II Dark Aluminum, and the engine pods got a Dark
Aluminum front and a Jet Exhaust rear. Finally, I masked off the underside
areas for gloss white and painted that with Polly Scale Reefer White. This
is a flat color, so I sprayed Future floor polish over the white areas to
gloss them up. All of this is easier to describe than actually do. The
above steps required hours of careful masking, followed by just a few
minutes of actual airbrushing. Such is the toil of the natural metal
finish.
Silver coat by rubbing it with an old tee shirt, and then
sprayed Alclad, using the White Aluminum shade, which I think looks better
than Aclad’s plain Aluminum. This was misted on at first to avoid any
crazing of the enamel primer underneath. After looking at hundreds of
photos of B-47s, I determined that the front half of the wings was a
slightly darker aluminum color, so I masked them off and shot Alclad II
Duraluminum. Panels under the wings and on the side of the fuselage got
painted with Alclad II Dark Aluminum, and the engine pods got a Dark
Aluminum front and a Jet Exhaust rear. Finally, I masked off the underside
areas for gloss white and painted that with Polly Scale Reefer White. This
is a flat color, so I sprayed Future floor polish over the white areas to
gloss them up. All of this is easier to describe than actually do. The
above steps required hours of careful masking, followed by just a few
minutes of actual airbrushing. Such is the toil of the natural metal
finish.
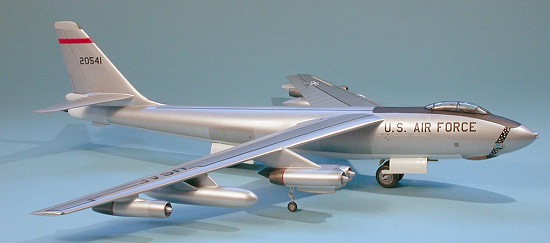
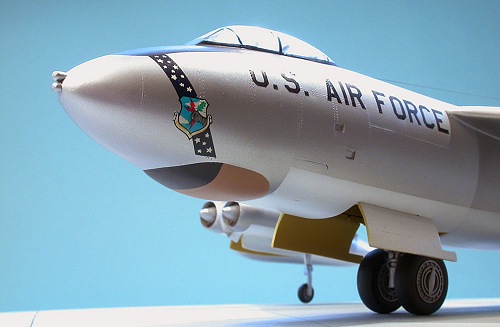
The radome area was carefully masked off and sprayed with a flat black front and a tan rear, for which I used a lightened Polly Scale FS30219 US TAC tan. The conspicuous anti-glare panel was painted with Polly Scale Steam Power Black. I used very thin strips of drafting tape that I cut on a piece of plate glass to define the rounded rectangular shape. It took several corrections to be finally satisfied with the results. The wheel wells were painted with Testors Acryl Chromate Yellow and a wash applied to dirty up the insides. The landing struts were painted with Old Silver, and the tires are Polly Scale Oily Black and weathered with a very thin light gray.
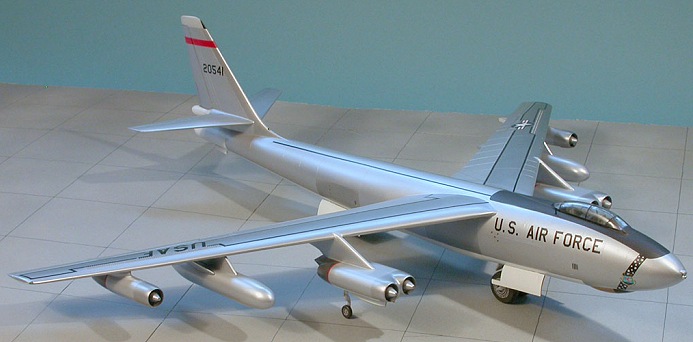
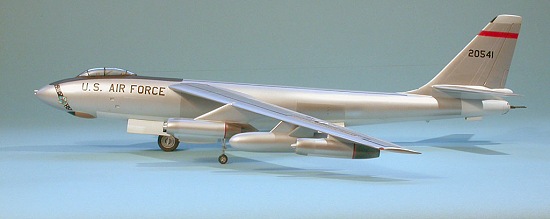
 I found a picture of a
B-47E-95-BW of the 22nd Bomb Group in the Squadron
B-47
Stratojet in Action book that I decided would be the subject of my
model. It has a red stripe on the tail, so I painted that on. Decals came
from a number of sources. I used an AeroMaster national insignia on the
top of the wing. B-47s very often didn't have fuselage or underwing
insignia, for some reason, so I only had to use one decal. I cheated a
little here, as on the real aircraft the insignia extends a bit over the
numerous vortex generators on the forward section of the wing. I figured
that there was no way that a decal could be made to snuggle down over that
landscape, so I chose a marking just slightly smaller in size so that it
would fit on the flat part of the wing only. I know it isn't completely
accurate, but it’s much less of a headache.
I found a picture of a
B-47E-95-BW of the 22nd Bomb Group in the Squadron
B-47
Stratojet in Action book that I decided would be the subject of my
model. It has a red stripe on the tail, so I painted that on. Decals came
from a number of sources. I used an AeroMaster national insignia on the
top of the wing. B-47s very often didn't have fuselage or underwing
insignia, for some reason, so I only had to use one decal. I cheated a
little here, as on the real aircraft the insignia extends a bit over the
numerous vortex generators on the forward section of the wing. I figured
that there was no way that a decal could be made to snuggle down over that
landscape, so I chose a marking just slightly smaller in size so that it
would fit on the flat part of the wing only. I know it isn't completely
accurate, but it’s much less of a headache.
| FINAL CONSTRUCTION |
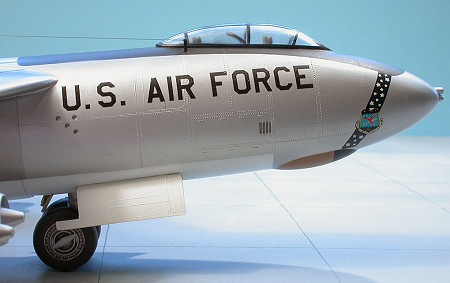 Since fit was relatively poor on the entire model, I expected
trouble attaching the landing gear and canopy. I wasn't disappointed. The
canopy was polished and glued down as best as it could on the fuselage.
Large gaps were present, so I filled the windscreen gaps with CA glue and
sanded them to fair that portion into the body of the airplane. The rest
of the canopy gaps were filled with white glue and painted flat black,
along with the canopy frames. Hasegawa etched frames of the early sliding
canopy, whereas the aircraft I modeled had the later clamshell type canopy
with an additional frame prominently down the centerline. I made an
attempt at replicating the light gray fiberglass tape that surrounds the
canopy frames using cut strips of decal, but no matter how much I tried, I
couldn't get them thin enough to look realistic. So I left them off.
Since fit was relatively poor on the entire model, I expected
trouble attaching the landing gear and canopy. I wasn't disappointed. The
canopy was polished and glued down as best as it could on the fuselage.
Large gaps were present, so I filled the windscreen gaps with CA glue and
sanded them to fair that portion into the body of the airplane. The rest
of the canopy gaps were filled with white glue and painted flat black,
along with the canopy frames. Hasegawa etched frames of the early sliding
canopy, whereas the aircraft I modeled had the later clamshell type canopy
with an additional frame prominently down the centerline. I made an
attempt at replicating the light gray fiberglass tape that surrounds the
canopy frames using cut strips of decal, but no matter how much I tried, I
couldn't get them thin enough to look realistic. So I left them off.
The main landing gear went on with a minimum of fuss and I was able to get the model balanced with all four wheels touching the ground. Complications, as expected, came when I glued on the two outrigger landing gears under the inner pods. This lifted the front landing gear an inch into the air. I guess Hasegawa engineered the kit to have less of a wing anhedral than what I induced when building my kit, so I had to cut the outriggers down significantly to get everything properly settled. My guess is that they measured an empty B-47 rather than match the angle of the wings that can be seen in period photographs.
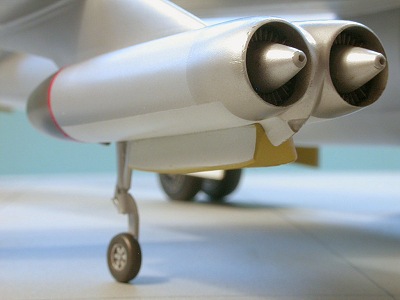
 I cut small notches out
of the front of the two inner engine pods, drilled a small hole to
represent the landing light, filled it with a tiny disc that I punched from
a sheet of Mylar, and filled the space with Micro Kristal Kleer. I
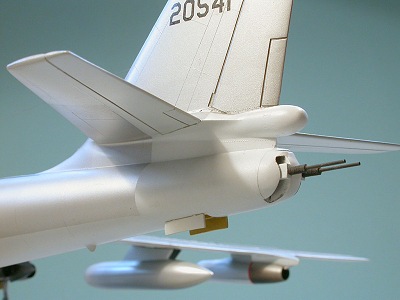
substituted stainless steel tubing for the 20 mm gun barrel kit parts and
glued them in.
I cut small notches out
of the front of the two inner engine pods, drilled a small hole to
represent the landing light, filled it with a tiny disc that I punched from
a sheet of Mylar, and filled the space with Micro Kristal Kleer. I
substituted stainless steel tubing for the 20 mm gun barrel kit parts and
glued them in.
After gluing on the landing gear doors, I finished up by adding an aerial wire that runs from the front of the vertical stabilizer to a post I fashioned from a piece of photo-etch brass and anchored next to the canopy. The unusual wheel configuration, large landing gear doors, engine pods, tail turret, and aerial wire make this model one of the more delicate ones in my collection. It’s hard to hold and move just a few feet without breaking something or other. I have a feeling it’s going to stay safely inside my house, never to travel to the outside world of contests or model club meetings.
| CONCLUSIONS |
This is a difficult kit to build. I know I sound like a broken
record sometimes about this subject, but like a lot of bomber kits on the
market, I often have wondered why I've never seen anyone build one of these
B-4t kits. Now I understand. Poor fit, non-existent cockpit detail, a
boring natural metal finish, and a generally fussy layout present
significant challenge to the modeler. But I don't care. I persevered and
ended up with a very sharp-looking model of what is, in my opinion, the
most beautiful jet bomber to ever grace the skies. If you’re up to the
considerable work, you will be rewarded with something I can guarantee will
be unique in your collection.
| REFERENCES |
Drendel, Lou, and Tom Y’Blood:
B-47 Stratojet In Action
Brown, Ben: photos of B-47 cockpit interior
Baugher, Joseph: B-47 Stratojet,
http://home.att.net/~jbaugher2/b47.html
February 2005
If you would like your product reviewed fairly and fairly quickly, please contact the editor or see other details in the Note to Contributors.