Hobby Boss 1/72 F-84E Thunderjet
| KIT #: | 80245 |
| PRICE: | $6.00 |
| DECALS: | Two options |
| REVIEWER: | Peter Burstow |
| NOTES: | Easy Assembly Kit |
| HISTORY |
The F-84 first flew in February 1946, and went through a number of versions mainly with different engines. The F-84E entered service in 1949, and was the first operationally capable version. It served, mainly in the fighter-bomber role, during the Korean war.
| THE KIT |
 The kit
comprises 48 parts, and like most of the easy assembly kits the major airframe
is just two parts, a lower fuselage with the wings and an upper fuselage half
with integral fin. There are four small frames with additional parts and a clear
sprue with a canopy. The canopy is the later style heavily framed version. The
cockpit is furnished with a seat and headrest, with two different styles of each
provided, an instrument panel and control stick.
The kit
comprises 48 parts, and like most of the easy assembly kits the major airframe
is just two parts, a lower fuselage with the wings and an upper fuselage half
with integral fin. There are four small frames with additional parts and a clear
sprue with a canopy. The canopy is the later style heavily framed version. The
cockpit is furnished with a seat and headrest, with two different styles of each
provided, an instrument panel and control stick.
Two different style
air-brakes are supplied, with the later version being marked as unused.
Under-wing stores provided are two large fuel tanks and four pairs of rockets
with separate tails. Two different tail pipes are also included, again one being
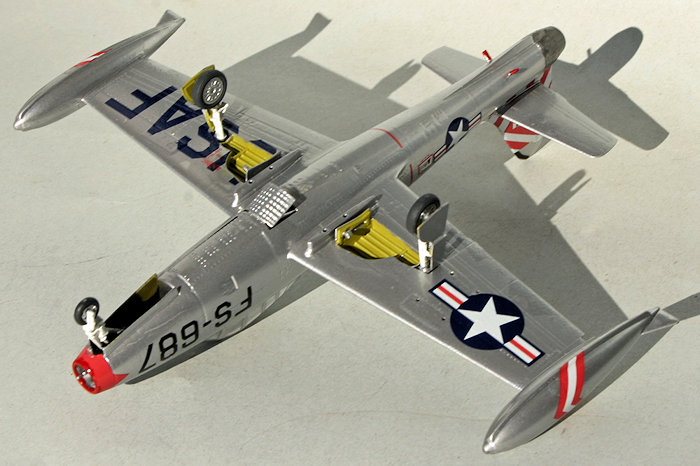
unused. The air-brake and undercarriage assemblies are designed to be built
deployed, with the nose gear doors being moulded in the open position on the
lower f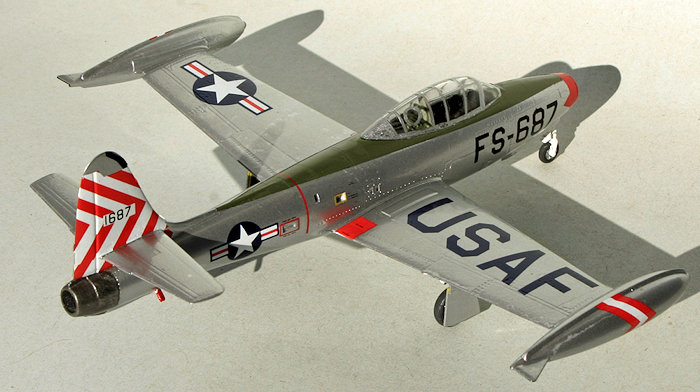 uselage.
Some minor cutting and filling would be needed to model an in-flight aircraft.
uselage.
Some minor cutting and filling would be needed to model an in-flight aircraft.
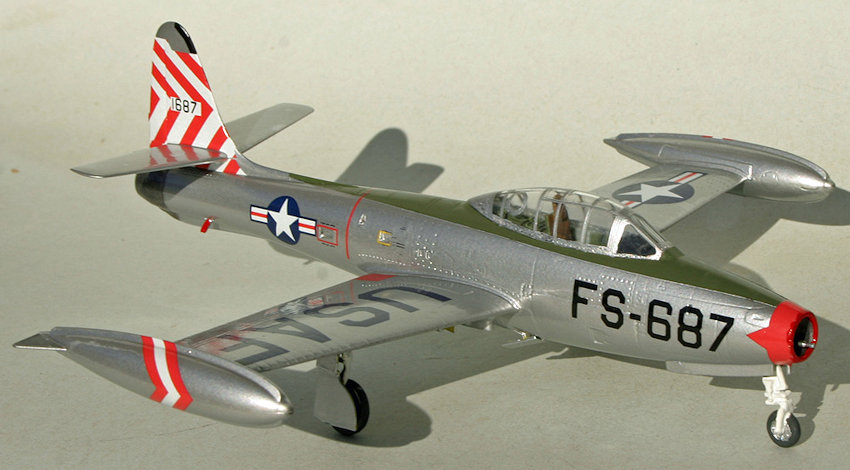
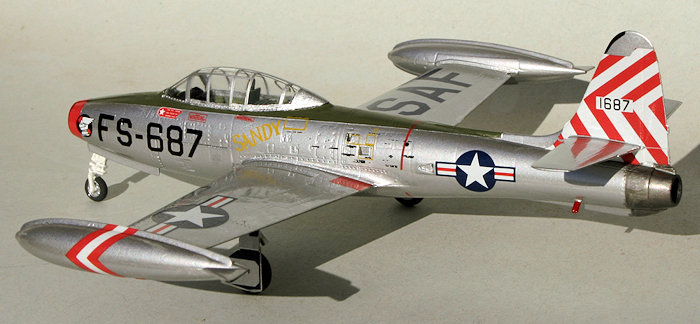
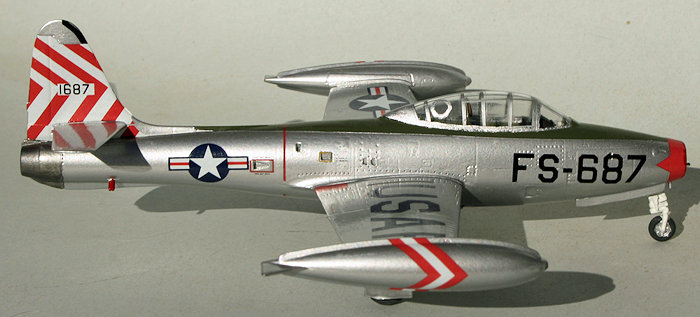
The large and very colourful decal sheet has markings for two aircraft, FS-624-A, based in Germany in 1951, and FS-687, based at Taegu, Korea, also in 1951. There are plenty of stencils for those that enjoy applying them. Many of the stencils are not very distinct, the text being just squiggles, and the profiles are not clear on the placement. The instructions have three assembly steps, a parts layout and a full page colour painting and marking guide, with Mr Hobby paint numbers and descriptive colour names being shown.
| CONSTRUCTION |
I started with the
cockpit, installing the early seat and headrest, the instrument panel and
control stick into the tub moulded into the upper fuselage half. Next step was
to pack the forward fuselage with lead, I'm not sure what weight I ended up
using but every void forward of the cockpit is full of lead and superglue. Then
I added the lower fuselage half, having to do a little carving of the forward
locating pin to
 clear the
weights. All the lead I added was just enough, and the model sits on it's nose
wheel unless tipped up.
clear the
weights. All the lead I added was just enough, and the model sits on it's nose
wheel unless tipped up.
Assembly then followed the instructions, with the only difficulty being the panels either side of the cockpit, one fitting proud of the surface and needing a little trimming, the other sitting too deep and needing packing out.
A minor amount of filling was required at the wing roots, and a little clean up of the fuselage and tip-tank seams was also needed. There was a mould seam running the length of the upper fuselage, a quick sand fixed that.
I fitted all the remaining parts except for the canopy, wheels and under-wing stores, the model then being ready for painting.
| COLORS & MARKINGS |
Both versions were natural metal aircraft, with an olive drab anti-glare panel. Just to be different, and to make masking easier, I first painted the top of the fuselage olive, did some detail painting of the cockpit then masked the anti-glare panel and cockpit.
 I then
primed the model with several thin coats of gloss black enamel, just enough to
get a nice glossy finish, cover up any sanding marks and subdue the slightly
heavy details. When the primer was dry it then got a cover of White Knight brand
aluminium gloss enamel. This gives a very high gloss finish.
I then
primed the model with several thin coats of gloss black enamel, just enough to
get a nice glossy finish, cover up any sanding marks and subdue the slightly
heavy details. When the primer was dry it then got a cover of White Knight brand
aluminium gloss enamel. This gives a very high gloss finish.
The model was then left several days for the paint to harden enough for handling. Then some detail painting was done in the cockpit. The wheel wells and air-brake cavities were painted with acrylic yellow-green, the fuel dump pipes gloss red, and the u/c legs gloss white. I painted the tail-pipe with Mr. Metal colour dark iron. I fitted the cockpit canopy at this time.
The gloss finish was fine
for applying decals so I didn't give the model a gloss coat of floor polish. I
chose the Korean based aircraft, mainly as the markings were a little more
subdued, the yellow, blue and red chequerboard markings of the German based
plane were too garish for my taste. The decals worked fine, b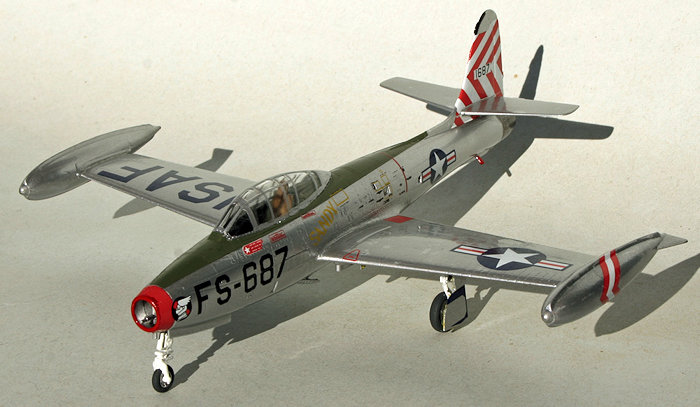 ut
did have a lot of carrier film, which interfered with the placement. I used Mr
Mark Setter and Softer to help them conform with the panel lines. I fitted only
some of the larger stencils. I used Xtradecal stripes for the cockpit framing,
with a little touching up with Tamiya gloss chrome-silver. I then gave the model
an overall coat of floor polish to protect the decals and hide the edges.
ut
did have a lot of carrier film, which interfered with the placement. I used Mr
Mark Setter and Softer to help them conform with the panel lines. I fitted only
some of the larger stencils. I used Xtradecal stripes for the cockpit framing,
with a little touching up with Tamiya gloss chrome-silver. I then gave the model
an overall coat of floor polish to protect the decals and hide the edges.
Not much to do now, just fitting the main wheels, which I had painted on the frame, and painting the nose-wheel. I like my models clean, so didn't add the stores or do any weathering.
| CONCLUSIONS |
A quick, easy and very enjoyable build of a first generation jet aircraft. The kit lived up to it's 'easy assembly' tag, the whole construction process only taking a few hours in several sessions. I spent a lot more time waiting for paint to dry. Recommended for all.
| REFERENCES |
https://en.wikipedia.org/wiki/Republic_F-84_Thunderjet
Larry Davis and David Menard, F-84 Thunderjet in action, Squadron/Signal, Carrollton, 1983.
Kit Instructions.
February 2016
Copyright ModelingMadness.com
If you would like your product reviewed fairly and fairly quickly, please contact the editor or see other details in the Note to Contributors.