It’s hard, in an era when the F-22 and B-2 are already
well into their service lives, to think of a plane like the
Delta Dagger as “modern”. But in its day, and despite its flaws,
it was a remarkably modern project, a very ambitious effort that
was probably beyond the analogue capabilities of its time. It
was more than just America’s first supersonic all weather
interceptor. It was the first really decent try at a
sophisticated supersonic interceptor solution, with integrated
ground control and automatic vectoring combined with a (then)
powerful radar attack system and proper guided weapons.
Most modelers tend to focus on the exterior of planes,
and in this case the wings (not unlike Sabres, there’s wings and
there’s wings). The first lot of F-102s produced had upward
turning wingtips; the
 second lot had downward turning wingtips.
For whatever reason these were called “Case X” for the upward
tips and “Case XX” for the downward. (Editor's note: These later
wings were not retrofitted to earlier planes and most units had
a mixture of the two.)Before I knew much about
the F-102 I knew about the wings from modelers' comments. But
the reason I find this plane interesting is its MG-10 fire
control system (an upgrade from the original MG-2).
second lot had downward turning wingtips.
For whatever reason these were called “Case X” for the upward
tips and “Case XX” for the downward. (Editor's note: These later
wings were not retrofitted to earlier planes and most units had
a mixture of the two.)Before I knew much about
the F-102 I knew about the wings from modelers' comments. But
the reason I find this plane interesting is its MG-10 fire
control system (an upgrade from the original MG-2).
If you look at the video clip linked from youtube in the
references section below, you get a fascinating insight into how
it works. Persevere with the animation at the beginning because
later it has real cockpit footage showing the way the radar
scope displayed information to the pilot, and showing some of
the switches and knobs he had to operate to fly a semi-automated
intercept. While hardly a video game style interface – it looks
more like a tweaked-up Pong screen – it must have been pretty
advanced in the 1950s when as a general rule people still looked
forward to the day when a computer could fit on a single table.
Imagine having it in a plane flying Mach 1.2 at 56,000 feet
before humans had even launched a satellite.
Yes, it didn’t always work that well, and yes the plane
itself left a lot to be desired (it couldn’t even go supersonic
in its prototype state until the fuselage was redesigned, and
didn't really come into its own until redesigned as the F-106).
Yes, those Falcon missiles were, shall we say, primitive.
But it had many of the elements of the most modern
fighters – an integrated attack system that worked with data
from outside sources, and even an internal weapons bay with
fold-out launchers just like the F-22. For the 102, that was
mainly to ensure the fuselage was clean enough to go supersonic,
rather than
 for stealth like on the F-22. But despite being a
half century apart, are they really so conceptually different?
It came into service just 15 years after the Mustang, yet it is
closer in DNA to the jets of today. And a thousand of them were
built.
for stealth like on the F-22. But despite being a
half century apart, are they really so conceptually different?
It came into service just 15 years after the Mustang, yet it is
closer in DNA to the jets of today. And a thousand of them were
built.
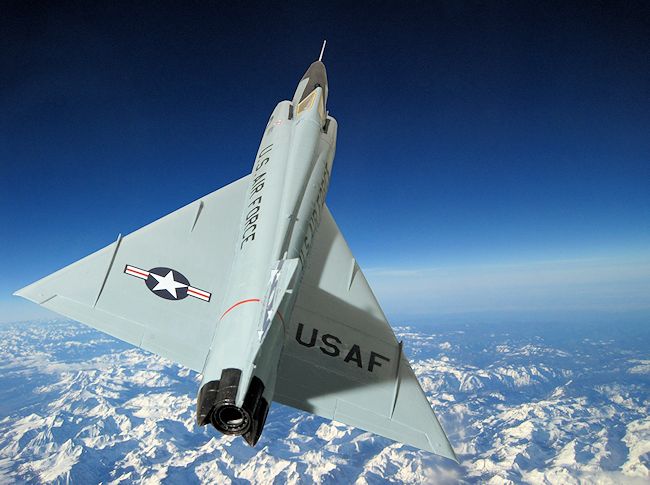
This particular boxing of the Meng F-102 is the
downturned “Case XX” wing variant. If you wanted, you could make
a Turkish or Greek aircraft from this kit, assuming you had the
decals. They flew these planes for a while in the 1970s (and
that eternal source of accurate, unquestionable, objective fact,
the internet, claims in some corners that the two air forces’
102s dog-fought each other. I’ll leave it to the pimply,
hormonal Turkish and Greek teenage boyz to fight that out in a
youtube comments thread and tell us whose air force is best and
whose dad could beat whose dad in a fight, bring it on man, f-
yeah). The kit offers three American aircraft, just as the Case
X boxing did. In this case, a SEA camo version used in Vietnam
and two Air Defence Command grey ones, the first from California
and the other from Minnesota. Typical of the F-102 they have
nice colourful tails. Meng also did a boxing with one set of
markings for the plane flown by former US President George W
Bush, as he completed his ANG duties stateside during the
Vietnam War.
Fundekals has quite a range of F-102 decals which you
can peruse at their website, as does Draw Decals, and presumably
others too, but to be honest unless you’re really into 102s or
you want to make a specific unit’s plane, the kit decals are a
nice set of colourful alternatives from which most people will
be able to see something they like.
 ing, with fairly subtle engraved
lines, and beautifully clear windows as the earlier release (really, these
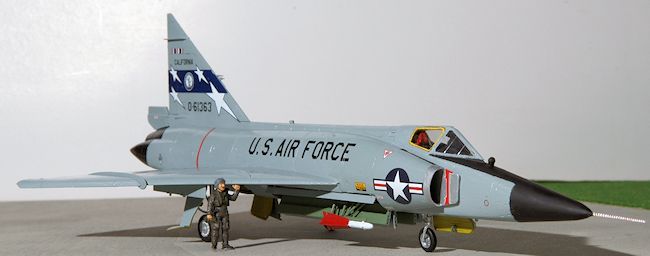
are phenomenally clear). You get six each of two kinds of Falcon missiles (ie
12 in total) – heatseekers and radar homing. There are a pair of underwing
fuel tanks. The cockpit is pretty simple, but typical of what you can
normally expect in a modern 1/72 kit – three piece ejection seat, control
stick, instrument panel and a tub to put it all in, which (like the panel)
has surface detail on the side panels. Everything is crisply moulded. You
can pose the weapons bay open or closed, you can have missile launch rails
in or out, and you can do the tail-end air brakes open or shut. As noted
above you get three decal options: a SEA camo version from the 509th Fighter
Interceptor Squadron flown out of Thailand in the Vietnam War (1969), and
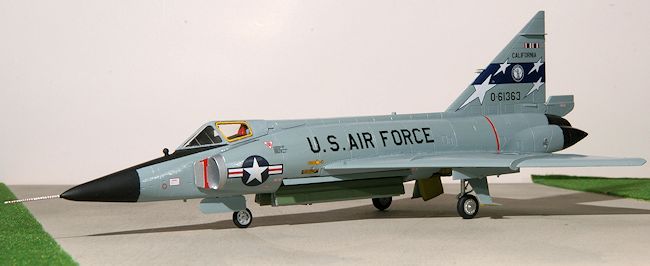
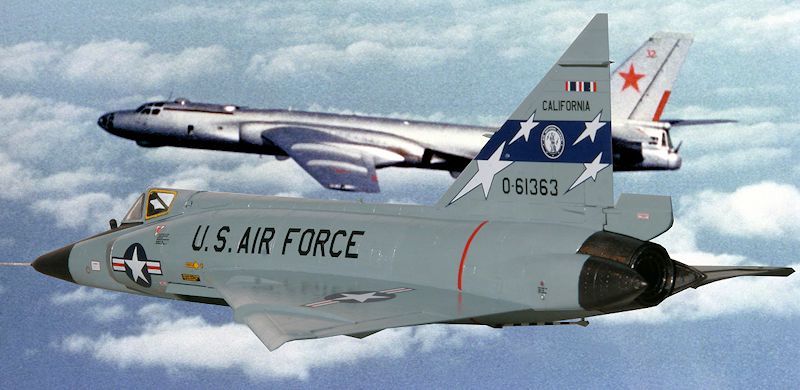
two ADC grey planes from US-based units. The Californian one (196th FIS) has
a great tail with a blue and white star design (built here) and the
Minnesota one (179th FIS) has the bright orange-red tail and wing tips.
ing, with fairly subtle engraved
lines, and beautifully clear windows as the earlier release (really, these
are phenomenally clear). You get six each of two kinds of Falcon missiles (ie
12 in total) – heatseekers and radar homing. There are a pair of underwing
fuel tanks. The cockpit is pretty simple, but typical of what you can
normally expect in a modern 1/72 kit – three piece ejection seat, control
stick, instrument panel and a tub to put it all in, which (like the panel)
has surface detail on the side panels. Everything is crisply moulded. You
can pose the weapons bay open or closed, you can have missile launch rails
in or out, and you can do the tail-end air brakes open or shut. As noted
above you get three decal options: a SEA camo version from the 509th Fighter
Interceptor Squadron flown out of Thailand in the Vietnam War (1969), and
two ADC grey planes from US-based units. The Californian one (196th FIS) has
a great tail with a blue and white star design (built here) and the
Minnesota one (179th FIS) has the bright orange-red tail and wing tips.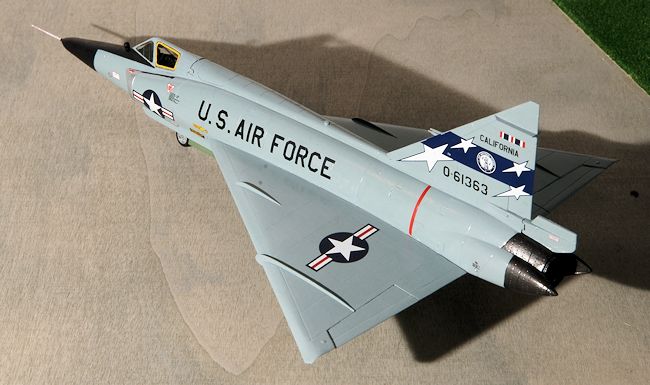 off the sprues actually so rather than cut off all 12 I
just got six - three of each kind. I think a typically loadout was a mix of
heatseeker and radar homing missiles anyway.
off the sprues actually so rather than cut off all 12 I
just got six - three of each kind. I think a typically loadout was a mix of
heatseeker and radar homing missiles anyway. bit of light sanding on some of the
other seams, but eventually the plane was ready for paint. See below for
that.
bit of light sanding on some of the
other seams, but eventually the plane was ready for paint. See below for
that.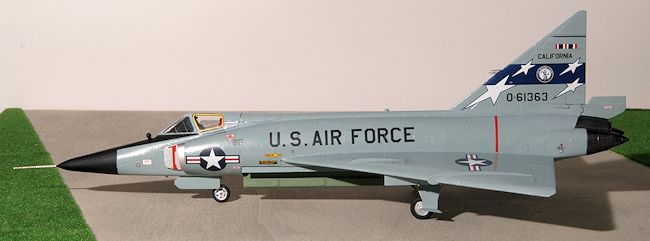 plane could be almost a blue grey or almost a pale, gull grey.
In the end I decided on Mr Color 73. It matches at least some photos,
including of others' models here on MM, and people "out there" on the
internet suggested it too. The instructions, by the way, don't help much.
They just tell you to use an 80:20 mix of white and black.
plane could be almost a blue grey or almost a pale, gull grey.
In the end I decided on Mr Color 73. It matches at least some photos,
including of others' models here on MM, and people "out there" on the
internet suggested it too. The instructions, by the way, don't help much.
They just tell you to use an 80:20 mix of white and black.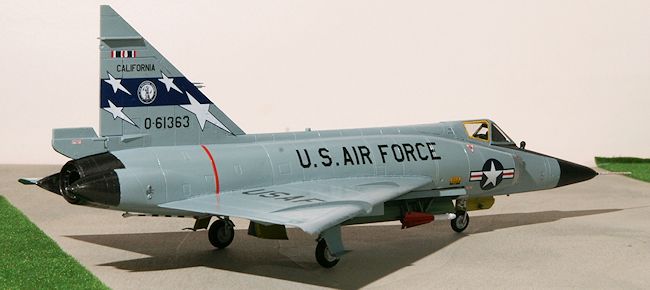 see from the picture link in references below.