|
KIT: |
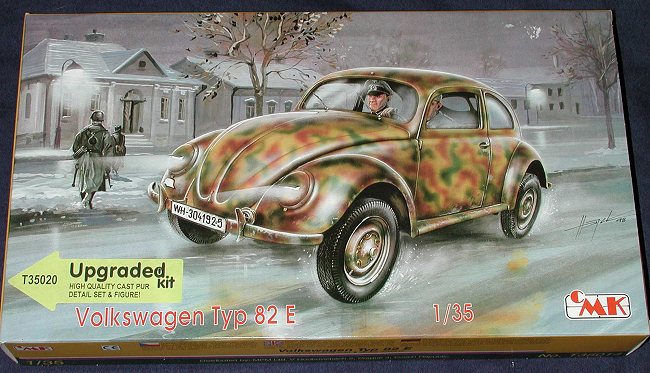
CMK 1/35 VW type 82E 'Upgrade' |
|
KIT # |
T35020 |
|
PRICE: |
$14.98 |
|
DECALS: |
Two vehicles |
|
REVIEW & |
Roger Jackson |
|
NOTES: |
includes resin upgrades |
|
HISTORY |

The Volkswagen Type 82E was an evolutionary extension of Dr. Ferdinand Porsche’s original "German People’s Car" which made its initial appearance to the German motoring public in May of 1938. This military version was created three years later by marrying the two-wheel drive Kübel chassis with the familiar ‘Beetle’ coachwork, providing sedan-like creature comforts to company-grade officers and entry-level bureaucrats (field-grade and above apparently rated the larger Opel and Mercedes phaetons).
Initially designated the Type 92, the vehicle offered closed-carriage seating for four, a 985cc air-cooled, four-cylinder engine of ‘boxer’ configuration, a four-speed un-synchronized gearbox, and mechanical brakes. Though spartan by contemporary civilian automotive standards, it undoubtedly afforded more luxury that the original Kübel or Schwimmwagen.
Equipped with the Kübel’s larger tires and wheels and more robust suspension, the Type 82E acquitted itself quite well in all but the most demanding of off-road situations. In a demonstration of the vehicle’s stamina, a pair of Type 82Es were driven in convoy from Berlin to Istanbul, where they were embarked on a ship bound for Trapezut (now called Trabzon), Turkey via the Black Sea. From there, they were driven overland through Iran to Kabul, Afghanistan, to serve as staff transportation at the German Embassy.
 The Type 82E was not designed for front-line use under battle conditions—more
as utilitarian transportation for Staff Officers and NCOs in rear-echelon
positions or home-front duties (very much like today’s M-1008/9 CUCV series of
vehicles in current U.S. Army service). Wartime production figures indicate
approximately 564 units were built through 1944, plus a small number of cabrios
(convertibles).
The Type 82E was not designed for front-line use under battle conditions—more
as utilitarian transportation for Staff Officers and NCOs in rear-echelon
positions or home-front duties (very much like today’s M-1008/9 CUCV series of
vehicles in current U.S. Army service). Wartime production figures indicate
approximately 564 units were built through 1944, plus a small number of cabrios
(convertibles).
Most of the Type 82Es were eventually turned over to SS units where they were modified with a folding map table under the dashboard on the passenger side and gun racks to carry MP38/40 Maschinenpistoles and StG44 Sturmgewehrs. Few, if any, saw actual combat in this configuration (re-designated as the Type 92 SS). Most were used for demonstration purposes and propaganda photographs.
Production halted at war’s end but resumed shortly thereafter. By the end of 1945 an additional 669 Type 92/82E Beetles had been built, with the bulk of the production going to the Allied Armies of Occupation (principally the British and the French). The remaining specimens were furnished to provisional German police forces and political functionaries. The last off-road Beetle left the Wolfsburg plant on 29 January, 1946.
The Beetle would, of course, soldier on in civilian guise long after that. Providing economical and affordable transportation to the masses, it would find its way across ‘the pond’ to endear itself to America’s counter-culture denizens of the ‘60s. In a final turnabout, the ubiquitous Beetle’s sheetmetal would be supplanted by a sleek new body designed in Italy to become the Karman Ghia…a ‘poor man’s sportscar’. Increasingly stringent Federal emissions standards and speciously onerous safety regulations would conspire to kill Dr. Porsche’s "people’s car" in the United States. By the mid ‘70s sales had been discontinued…the Beetle was gone.
|
THE KIT |
For a comprehensive overview of this model and other variants in CMK’s line of wartime Volkswagens I would direct the reader to comments and observations from the Editor of Modeling Madness.
|
CONSTRUCTION |
As I had no previous experience with this kit I followed the assembly steps sequentially listed in the multi-lingual instruction pamphlet. To give the tires a little more definition at the rim bead I scored around the wheels several times with an X-Acto knife. The tread design did not look appropriate for the variant (I assume a proper set of Kübelwagen tires would be a nice addition to this model, but I had none), but I cleaned them up anyway and used them.
Bumper installation is indicated in steps three and four but I would recommend delaying that until after the body is mated to the fender/chassis assembly. Seams at the front of the boot and rear of the bonnet can be better addressed without the bumpers in place. A small notch in the front bumper bracket serves as a mounting point for the horn—be sure to install the bumper with the notch correctly positioned on the driver’s side and facing up.
 After the interior components had been assembled and painted I test-fitted
the body. Parts 11 and 40 (the dashboard and rear firewall, respectively)
prevented the coachwork from fully seating to the floorpan. After shaving the
top edges of these parts the body dropped into position with little effort.
After the interior components had been assembled and painted I test-fitted
the body. Parts 11 and 40 (the dashboard and rear firewall, respectively)
prevented the coachwork from fully seating to the floorpan. After shaving the
top edges of these parts the body dropped into position with little effort.
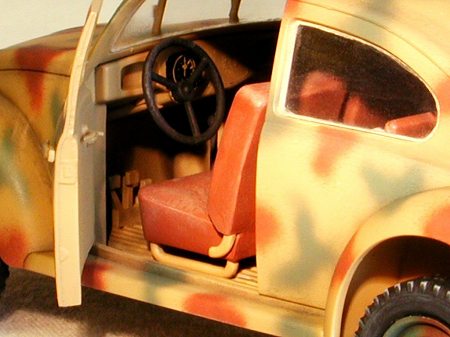
Attaching the windows proved to be a royal pain in the alpha, as the kit’s parts are too thick and the panes are slightly under-sized for the kit’s openings. After cementing the rear quarter glass into place, I found that the body would no longer drop into position as the upper rear corners of the back seat chafed against the insides of the windows. After removing some plastic from the seatback’s corners an acceptable fit was achieved.
To utilize the resin door I first had to perform a little plastic surgery. In true ‘Lizzie Borden’ fashion I did a slice-and-dice on the driver’s side door by scoring around the reveal with an X-Acto knife. To maintain the structural integrity of the body, I left the kit’s doorsill intact and dispensed with the resin replacement. After punching out the plastic door I cleaned up the jamb and studied the hinges. With the door removed and the body installed on the chassis, it was possible to see into the trunk area around the outside of the interior kick panel. I cut a blanking baffle made from a scrap piece of the original Mattel vacuform plastic and attached it to the side of the footwell with CA.
 Anticipating problems attaching the door, I wisely left the body’s door
hinges intact. This left enough structure to install a couple of .013" pins
made from guitar string there to act as supports for the resin door. I removed
the molded-on interior door handle and window crank from the right side interior
panel and attached the resin replacements with CA.. This part was then glued to
the floorpan. I cut the left side interior panel at the doorline and glued the
rear portion of this piece to the floorpan as well.
Anticipating problems attaching the door, I wisely left the body’s door
hinges intact. This left enough structure to install a couple of .013" pins
made from guitar string there to act as supports for the resin door. I removed
the molded-on interior door handle and window crank from the right side interior
panel and attached the resin replacements with CA.. This part was then glued to
the floorpan. I cut the left side interior panel at the doorline and glued the
rear portion of this piece to the floorpan as well.
At this point it was time to mount the body but I had a couple of things to do yet. The kit’s ‘VDO’ instrument cluster is very poorly depicted so I scrounged through my decals and found a 1/32nd scale P-47 instrument panel decal. Though it was at least 25 years old, I sectioned off a large gauge and applied it to the Volkwagen’s dashboard without incident. A red cross decal from an old Roco Minitank accessory sheet was applied to the first-aid kit (located on the rear interior sidewall behind the driver’s seat).
The body was installed to the fenders/chassis with minimal effort. I wrapped some masking tape around the model at mid-section and used CA at the front of the trunk lid and at the bottom edge of the hood. Small gaps around the fenders were filled with CA as well, and after cleaning up the seams I filled the rear of the driver’s side door jamb (the ‘B’ pillar, between the exterior sheet metal and the interior sidewall), then sanded the jamb flat.
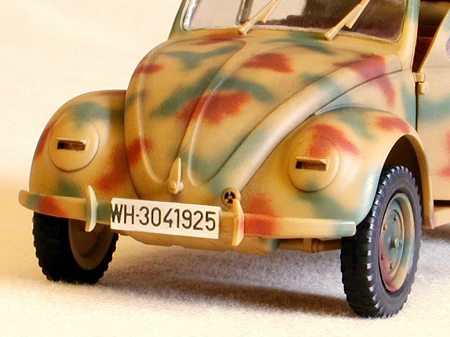
 Prior to installing the rear bumper I cut off the anemically-molded exhaust
pipe at the rear underside of the chassis and built a new one out of 1/16"
K & S aluminum tubing. The bumpers were then installed, along with the
license plate light, taillights, and horn. I used a pair of MV lenses on the
backside of the kit’s ‘blackout’ headlight bezels and attached the bezels
with Testor’s liquid cement. After adding the exterior door, trunk and hood
handles I returned to the resin door.
Prior to installing the rear bumper I cut off the anemically-molded exhaust
pipe at the rear underside of the chassis and built a new one out of 1/16"
K & S aluminum tubing. The bumpers were then installed, along with the
license plate light, taillights, and horn. I used a pair of MV lenses on the
backside of the kit’s ‘blackout’ headlight bezels and attached the bezels
with Testor’s liquid cement. After adding the exterior door, trunk and hood
handles I returned to the resin door.
The kit’s driver side window was an impossible fit to the resin door’s window jamb due to the thickness of the pane. After hypothesizing my way through several different scenarios, I ended up carving a channel all the way around the inside of the window jamb, cutting a slightly oversized window out of clear microfiche (remember those?) material, then flexing and teasing the new window into position. It looked and fit better than the kit-supplied glass—I wish I’d done them all this way.
After attaching the inner handle and window crank to the driver’s door, I sanded the few mold parting lines off of the coachwork and rolled my little liebling into the paint shop.
|
PAINT & DECALS |
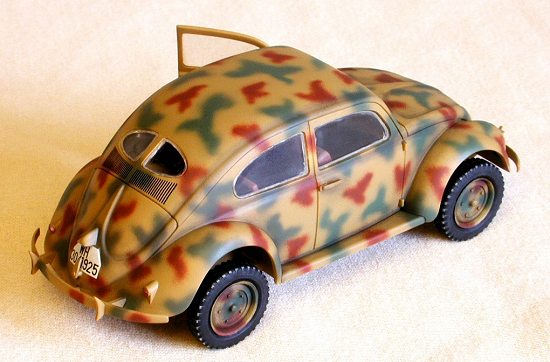
After masking the windows and lights, I stuffed Kleenex into the driver side door opening and sprayed the dunkelgelb overall using Modelmaster enamel. The green and brown mottling was shot freehand after studying photos of German equipment to get a feel for the pattern. Modelmaster apparently does not make the tarnbraun specified in the painting guide so I substituted a brown of my own design.
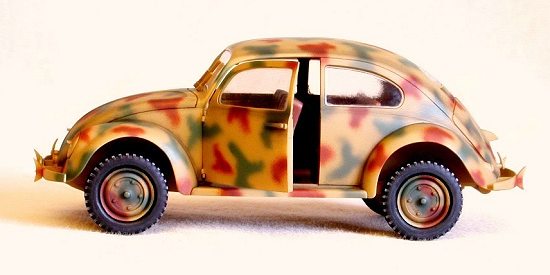 Weathering consisted of powdered graphite dusted into all the recesses with a
small brush. After sealing with a heavy coat of Testor’s Dullcote I used
Liquitex black tempera as a wash and ran it into the convection vents at the
rear of the body and on the bumper-mounted horn.
Weathering consisted of powdered graphite dusted into all the recesses with a
small brush. After sealing with a heavy coat of Testor’s Dullcote I used
Liquitex black tempera as a wash and ran it into the convection vents at the
rear of the body and on the bumper-mounted horn.
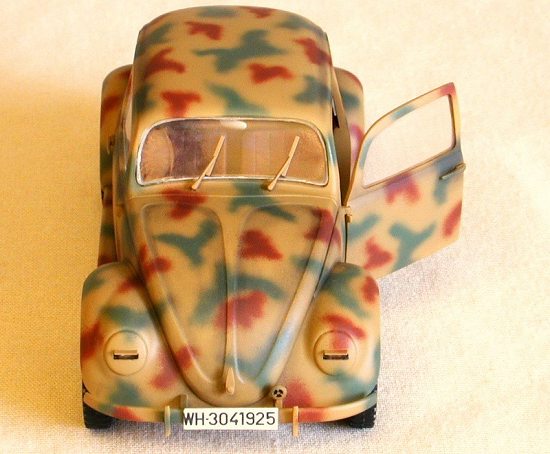
The Propagteam decals were applied to the license plate areas with little problem though I had dispensed with the customary Glosscote primer. Solvaset, diluted 50/50 with water, was used to stick them permanently in position. When dry, I again sprayed a heavy coat of flat lacquer to seal the decals.
The masking was removed from the windows, lights, and the interior then I painted and attached the wheels with liquid cement. I used a pair of engineer’s calipers to transfer the center-to-center dimension of the door mounting pins to the hinge side of the driver door. After marking the locations I drilled a couple of holes with a #79 drill bit and slid the door into position. After painting and installing the windshield wipers with white glue the Beetle was done.
|
THE FIGURE |
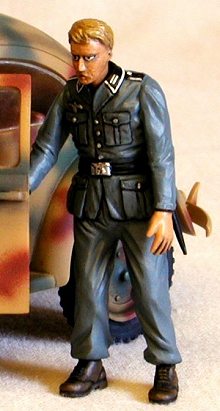 The resin figure (a hauptmann—captain, judging by the painting
guide) is a bit over-engineered, featuring separate hands, arms, feet, and head.
The overall quality of the casting is average, maybe a little below (roughly
equivalent to Verlinden’s more mediocre efforts) and after separating the
parts from their runners and removing some casting flash, I washed them with
warm water and Dawn dish detergent.
The resin figure (a hauptmann—captain, judging by the painting
guide) is a bit over-engineered, featuring separate hands, arms, feet, and head.
The overall quality of the casting is average, maybe a little below (roughly
equivalent to Verlinden’s more mediocre efforts) and after separating the
parts from their runners and removing some casting flash, I washed them with
warm water and Dawn dish detergent.
After air-drying them thoroughly I assembled the parts with CA. Curiously enough, the figure is sans headgear and, save for a dagger, unarmed. Actually, I would assume a German officer wouldn’t be without a pistol as it is generally regarded as an integral part of his uniform. A Walther, Radom, or P-08 with the correct holster would’ve made more sense than the dagger.
I used Testor’s Modelmaster enamels exclusively for painting, with a home-brewed gray consisting of FS 36118 and olivgrün for the woolen uniform. Decals were used for the eyeballs, rank insignia, and piping around the collar and epaulets, and when complete I used Testor’s Dullcote to permanently seal the figure.
|
CONCLUSIONS |
This kit is about as OT from my modeling interests as it could be, and I’m
sure there are experten who would take me to task regarding this, that,
or the other as concerns this model… Relax, I’m sure I committed a faux
pas or two. I shan’t bore anyone with the sordid details of how
 I was
hoodwinked by forces greater than myself into building and reviewing this model
for a certain Editor (who, for reasons of National Security, shall
remain nameless). Suffice it to say I was shanghaied and hornswoggled by the
dark side of The Force…
I was
hoodwinked by forces greater than myself into building and reviewing this model
for a certain Editor (who, for reasons of National Security, shall
remain nameless). Suffice it to say I was shanghaied and hornswoggled by the
dark side of The Force…
CMK has done a respectable job of bringing to modelers many of the rarer and more off-beat vehicles of the Wehrmacht and this Volkswagen is no exception. Though many details have been simplified, the kit builds into a pretty fair representation of the prototype. Intermediate to advanced-level modelers will doubtless find room for real super-detailing exercises, while beginners should be able to complete the basic kit in a weekend or two.
On the downside, the oversimplification of the moldings will require purchasing the CMK resin detail sets, with the attendant additional costs, to produce a truly accurate replica. The tires are pretty poor and if one has a spare set of Kübelwagen wheels handy, they’d be well-served by using them on this model. The windows beg for replacement as well, Those with an amply-stocked spares box might consider adding the gun rack and some weapons as well (Mauser 98Ks, Schmeisser MP38/40s, StG44s, etc.).
Presumably, a civilian Beetle could be assembled from this kit, but it would be a bit of a stretch to do a Super Beetle. Still, it is possible to build this as a mid to late ‘60s Volkswagen, though the modeler would have to scratch-build an 8-track player, an ashtray (with the requisite roach clip), and locate scale-sized "Keep On Truckin" and "Sock It To Me" bumper stickers. Testors does manufacture some day-glo colors appropriate for the period though, so "Do your own thing".
|
REFERENCE |
Volkswagens Of The Wehrmacht – Hans-Georg Mayer-Stein; Schiffer Publishing Ltd.
Ó June 2001 by Roger M. Jackson
First Time North American Rights To Scott Van Aken and ‘Modeling Madness’
Thanks to  for providing the review
kit.
for providing the review
kit.
If you would like your product reviewed fairly and quickly by a site that averages over 2,800 visits a day, please contact me or see other details in the Note to Contributors.