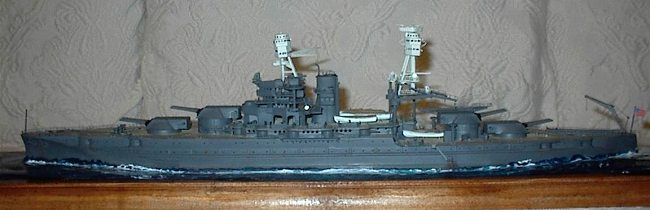
Banner Models 1/350 USS Arizona
|
KIT # |
` |
|
PRICE: |
$27.00 |
|
DECALS: |
See review |
|
REVIEW & |
|
|
NOTES: |
Gold Models PE set used` |
|
HISTORY |
Of the 2,400 American servicemen killed at Pearl Harbor on December 7, 1941—almost exactly half perished when the battleship USS Arizona blew up and sank from a direct hit in one of her magazines. Last year in July, I visited Pearl Harbor and took two trips out to the beautiful memorial that now rests over the hulk of the fallen ship. There are few places that can match the emotional power, reverence, and serenity of this sacred place—I can equate it to the Vietnam Memorial, Arlington National Cemetery, Gettysburg, and just a few other like places. As I had always heard, you can see drops of oil floating to the surface. One visit was at low tide, and the barbette of turret 3 juts strikingly out of the water, rusting yet strong. Seeing the 1,177 names of the ship’s company who perished carved in marble at the far end of the memorial is a sight every American should see in their lifetime…See the Reference section below for some great websites to learn more about the ship’s operational life, layout, and demise.
|
THE KIT |
 When this kit was announced, I was excited but at the same time, I was
sobered by early reports. At a price of just under $30.00- I was skeptical of
build quality, fit, and detail. Gold Medal Models announced a new brass detail
set specifically for this kit at a cost of $40.00. So for well under $100.00, a
modeler has a great opportunity to build a ship in 1/350 scale where previously
the only option was a mega-bucks and rare resin kit.
When this kit was announced, I was excited but at the same time, I was
sobered by early reports. At a price of just under $30.00- I was skeptical of
build quality, fit, and detail. Gold Medal Models announced a new brass detail
set specifically for this kit at a cost of $40.00. So for well under $100.00, a
modeler has a great opportunity to build a ship in 1/350 scale where previously
the only option was a mega-bucks and rare resin kit.
The kit has 212 parts in grey plastic. It is easy to see that the old Revell 1/426 scale kit was used heavily in the design of this kit. The hull is split into lower and upper halves for waterline display and there are 3 drop in sections for the decks. Detail on most parts is sparse and over-simplified but some of the parts show fairly nice detail. The GMM set replaces many of the chunky parts and is simply fantastic. Cranes, catapults, gun tubs, railings etc. are all provided and the addition of these parts makes the kit infinitely better.
|
CONSTRUCTION |
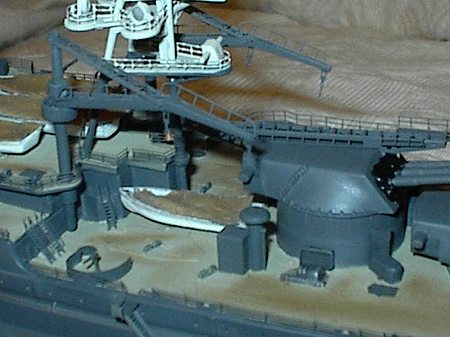
Being quite used to the "fall together" quality of ship kits from Tamiya, I was worried about certain areas of assembly, especially the spindly looking fighting top supports. I should have done more work to clean up the kit’s seams etc. but I felt I would do more damage than good. I confined my surgery to cutting off all molded in staircases and gun tubs. I also used all the brass replacement parts with no problems. I wanted to take full advantage of the exquisitely cast brass ladders, gun tubs, cranes, catapults, and railings to make the model look sharp and to draw the viewer’s eye away from my mistakes!
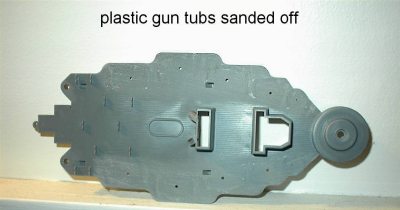 I used model putty to replicate the blast bags around each 14-inch gun. The
thick plastic gun tubs were cut off and sanded. The turret 3 aircraft catapult
was a one-piece affair in the kit but the brass replacement consisted of around
8 pieces. The aircraft cranes needed to be a mix of plastic and brass and was a
difficult chore to get them to straighten up and dry properly.
I used model putty to replicate the blast bags around each 14-inch gun. The
thick plastic gun tubs were cut off and sanded. The turret 3 aircraft catapult
was a one-piece affair in the kit but the brass replacement consisted of around
8 pieces. The aircraft cranes needed to be a mix of plastic and brass and was a
difficult chore to get them to straighten up and dry properly.
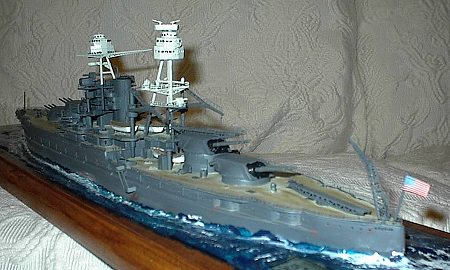
Most of the kit went together moderately well. I would caution anyone to dry fit more than normal to ensure parts sit flush and properly. My only problem was as I suspected with the supports holding up the fighting tops. Assembling them without making a mess was tough and the hardest part was achieving the proper angle for the fighting top in relation to the supports. As it turns out, the maintop when attached to the superstructure is angled too far forward and the foretop somehow got twisted slightly to the left. I tried to correct them but once again the modeling angel on my shoulder stepped in and said- "bend that part again and you are going to screw this whole thing up!"
|
PAINTING |
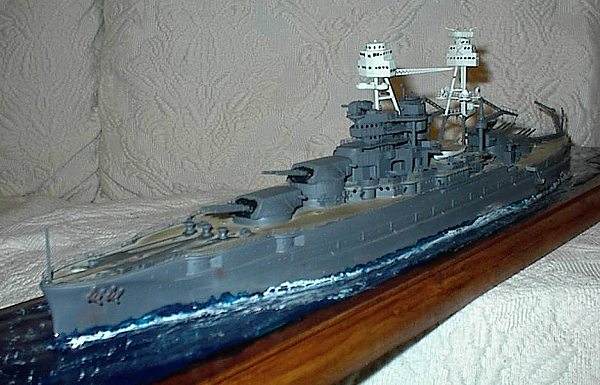
 I wanted to build the ship as she appeared just before the attack. This calls
for Measure 1 --which is a dark grey on all surfaces except the deck up to the
funnel top. Above that --which means the fighting tops, the color is light grey.
I used Tamiya Dark Grey lightened with a few drops of flat white and Testors
Camo Grey for the fighting tops.
I wanted to build the ship as she appeared just before the attack. This calls
for Measure 1 --which is a dark grey on all surfaces except the deck up to the
funnel top. Above that --which means the fighting tops, the color is light grey.
I used Tamiya Dark Grey lightened with a few drops of flat white and Testors
Camo Grey for the fighting tops.
For the deck, I used Tamiya Deck Tan to replicate the teak deck. I mix a batch of light earthy colored chalk pastel dust (lots of yellow, tan, and a little brown) onto a piece of cardboard and use an old stiff brush to smudge the pastels over all areas where the deck is wood. This creates subtle variations on the monotone deck tan color. Reddish brown pastel dust and a colored pencil were used to simulate running rust on the anchors, ladders, and certain portholes. A light black wash was applied in certain spots to accentuate detail such as the funnel top, life rafts and deck fixtures.
|
CONCLUSIONS |
For the price, you can’t complain. But the other side of the coin is: for the price, you just know there is going to be lots of work involved to correct some chunky plastic parts, hide seams, and correct any inaccuracies if you so choose. My cautions would be to dryfit like mad and spend a lot of time cleaning seams. The sandwich style pieces that make up the superstructure need attention to look right. I’m happy to add a 1/350 Arizona to my collection alongside the Tamiya Missouri, New Jersey, and Prince of Wales. I’m not that pleased with my effort however. The mast supports should have been given more careful attention and the fighting tops as well. At the least, I earned a few more scars and lessons to remember for the next project!
|
REFERENCES |
http://www.warships1.com/USbb38_Penn.htm
If you would like your product reviewed fairly and quickly, please contact me or see other details in the Note to Contributors.