Revell-Monogram 1/32 Colonial Viper
| KIT #: | 85-6442 |
| PRICE: | $24.95 MSRP49 |
| DECALS: | Several options |
| REVIEWER: | Dan Lee |
| NOTES: | Newer kit which includes cockpit |
| HISTORY |
“There are those who believe that life here
began out there, far across the universe with tribes of humans who may have been
the forefathers of the Egyptians or the Toltecs or the Mayans. Some believe
there may yet be brothers of man who even now fight to survive, somewhere beyond
the heavens.”
-opening narration by Patrick MacNee (also
voice of Imperious Leader)
 The
original Battlestar Galactica was part of a wave of Science Fiction (much of it
bad) that came from the explosive popularity of 1977’s Star Wars.
It was conceived as a SF retelling of the Mormon trek to
The
original Battlestar Galactica was part of a wave of Science Fiction (much of it
bad) that came from the explosive popularity of 1977’s Star Wars.
It was conceived as a SF retelling of the Mormon trek to
The series started off with a bang and then
slowly died as the writers cobbled together increasingly awful plots based on
westerns, war movies and disaster(!) films while battling ABC’s continuing
demands to cut costs on what was then the most expensive TV show in history
which explains why so many of the “dogfight” sequences were recycled from the
pilot and why fewer and fewer Cylons were encountered.
The less said about the later Galactica 80 series, the better.
Despite this, the show was a cult hit of sorts,
but not as big as other SF like Star Trek and it’s rival, Star Wars.
It would eventually reborn to greater acclaim (and disappointment) in
SciFi Channel’s Battlestar Galactica 2004 Reboot.
One of the main highlights of the 1978/1979 TV
show 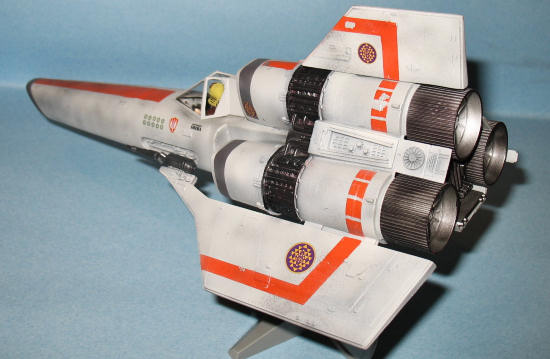 was
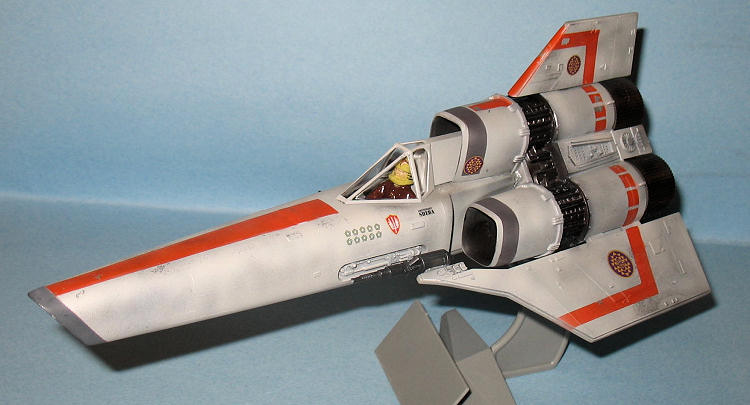
Battlestar Galactica’s main offensive/defensive weapon, the Colonial Viper.
These unique single seated, tri engined fighters were armed with a pair
of laser cannons. Agile and fast,
these Vipers provided the primary protection and strike force for the ragtag
fleet that carried the survivors of the 12 Colonies in a search for a planet
called Earth. They flew rings
around the wobbly eyed and inept Cylons who were led by the equal parts
malevolent, cowardly and incompetent human traitor, Baltar.
was
Battlestar Galactica’s main offensive/defensive weapon, the Colonial Viper.
These unique single seated, tri engined fighters were armed with a pair
of laser cannons. Agile and fast,
these Vipers provided the primary protection and strike force for the ragtag
fleet that carried the survivors of the 12 Colonies in a search for a planet
called Earth. They flew rings
around the wobbly eyed and inept Cylons who were led by the equal parts
malevolent, cowardly and incompetent human traitor, Baltar.
On a personal note, I was a fan of the series
growing up. What 8 year old boy
doesn’t like watching humans fight robots and blowing stuff up?
I admit that I also bought the
| THE KIT |
The preview of the new kit is here.
| CONSTRUCTION |
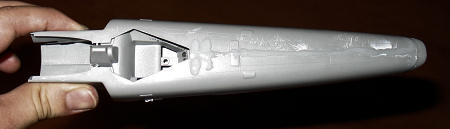
It is a fairly simple kit, but it does require
a bit of work. I began with the
engine section of the kit. It took
a lot of careful work to glue everything together as the parts were slightly
warped. I had to cut pieces of 40
thou thick plastic card and glue them with CA
 glue in
the interior to hold various pieces in place.
glue in
the interior to hold various pieces in place.
Once that was done,
I had to glue the tail parts and wings.
There were a few seams that needed to be fixed thanks to the poor fit of
the parts. CA glue was used to fill
them in and then it was sanded down using 400 grit sandpaper and then polished
with increasing grades of micromesh cloths.
The cockpit was then painted Tamiya XF-19 Sky
Gray. Once it was dry, the interior
details were hand painted with a 0 brush and the display decal was added.
I did not add the pilot at the time because the pilot figure needed some
work. I had inadvertently broken
the support for the cockpit when I was dry fitting the parts so I added a 3/8”
box cut from some styrene 3/8” box conduit to the bottom of the fuselage as
support. I then glued the cockpit
into one half of the fuselage before gluing the nose fuselage together.
The nose part was added at the same time.
 The
Viper’s forward section does not have the best fit and there are plenty of gaps.
I filled them with CA glue, let it air dry for about 30 minutes and then
sanded them down. I tried to be
careful with the detail, but it didn’t really matter as most of it was sanded
away. One thing to watch out for is
the poor fit of the nose piece. I
discovered that it is also a bit over sized in relation to the rest of the
fuselage so I had to add an extra bead of CA glue on the underside of the
fuselage to flatten the lip.
The
Viper’s forward section does not have the best fit and there are plenty of gaps.
I filled them with CA glue, let it air dry for about 30 minutes and then
sanded them down. I tried to be
careful with the detail, but it didn’t really matter as most of it was sanded
away. One thing to watch out for is
the poor fit of the nose piece. I
discovered that it is also a bit over sized in relation to the rest of the
fuselage so I had to add an extra bead of CA glue on the underside of the
fuselage to flatten the lip.
I did not attach the engine section to the fuselage at the time to make it easier to paint.
| COLORS & MARKINGS |
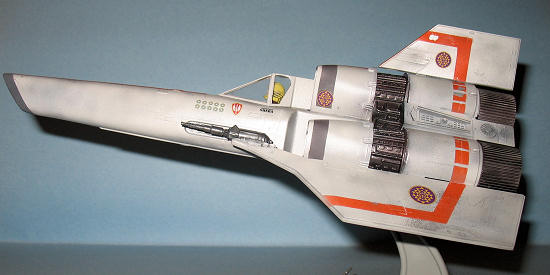
Painting
The engine section, tail and fuselage were
masked and the forward edges of both the engine section and fuselage were spray
painted TS-30 Old Silver. I let
that dry for a couple of days before I sprayed on red steel on the area on the
indented section between the intakes as well as the intakes
The rest of the model was preshaded with flat black.
Next I sprayed on two light coats
 of Gunze
Sanyo FS36440 Light Gull Grey for a dirty look.
I let this cure for a couple of days.
of Gunze
Sanyo FS36440 Light Gull Grey for a dirty look.
I let this cure for a couple of days.
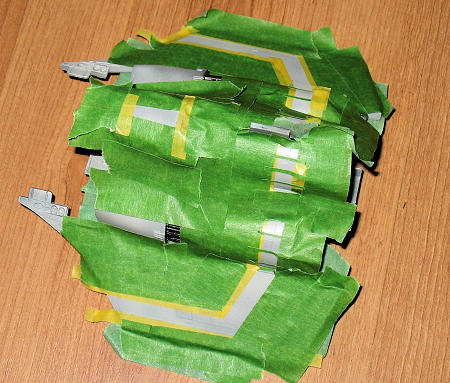
I wanted a well worn chipped paint look to my
Viper, but I knew I couldn’t get that if I used the kit decals for markings so I
opted to paint the markings on. It
took a lot of careful measuring using drafting dividers to get everything lined
up. I then took tape and carefully
masked off each marking. I
airbrushed the exposed areas with Model Master Acryl International
I repeated the same process with the fuselage
except I also had to paint the lip of the nose with XF-24 Dark Grey.
The canopy was masked, painted with XF-19 Sky
Gray for the interior color and Lt Gull Grey for the exterior.
I then sprayed a very fine mist of Talon Acrylic Aluminum to give it a
worn look.
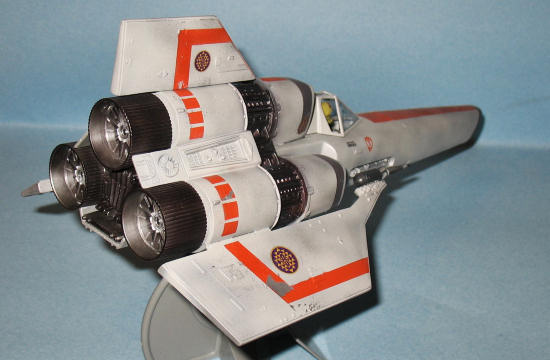
The laser cannons were painted Gunmetal while
the engine exhausts were painted in combination of metallic grey, gun metal and
burnt iron.
Decals
I opted not to use a gloss coat (the Light Gull
Gray I used was semi gloss) as I used the Lt Sheba markings, the Silver Spar
decals on the fuselage and the Galactica Badges.
The decals reacted well with MicroSet solution.
The reason why I did this was because Lt
| FINAL CONSTRUCTION |
 I glued
the fuselage to the engine section, but I also had to add to 20 thou shims to
improve the strength of the join.
I glued
the fuselage to the engine section, but I also had to add to 20 thou shims to
improve the strength of the join.
The pilot was hand painted to represent the old
school Colonial Warrior. The actual
figure is male, but I did not modify the figure to look more feminine as you
can’t really tell with the cockpit closed.
I also didn’t have the patience or skills to sculpt breasts and redo the
jacket--if pressed I’ll just say that a male pilot was assigned to fly Lt
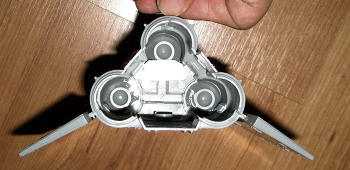
The clear engine inserts were added to the
engine exhausts and glue in place with Tamiya thin cement.
The whole assembly was added to the model and glued in place.
Finally, the “rudder” and guns were glued on
using CA glue. Be careful as the
mating surfaces aren’t the best.
I made the stand and stuck the model on it as the final act of construction.
| CONCLUSIONS |
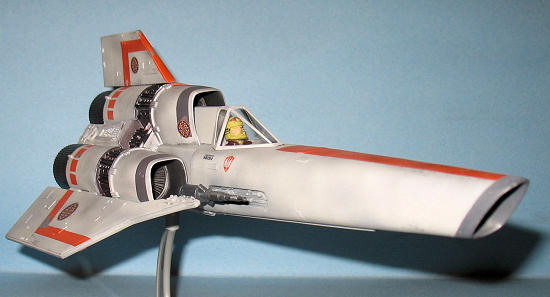 I had fun
building this blast from the past.
All it took was a little bit of extra effort to make a model I am happy with.
It is not a Tamiya/Hasegawa slammer, but I highly recommend it to those
who are interested in the subject or want to do a quick weekend project.
I had fun
building this blast from the past.
All it took was a little bit of extra effort to make a model I am happy with.
It is not a Tamiya/Hasegawa slammer, but I highly recommend it to those
who are interested in the subject or want to do a quick weekend project.
January 2009
If you would like your product reviewed fairly and quickly, please contact me or see other details in the Note to Contributors.