
AMT 1/200 CSM & LEM
| KIT #: | ? |
| PRICE: | ? |
| DECALS: | None Supplied |
| REVIEWER: | Mark Hiott |
| NOTES: |
Part of the Man In Space kit set |
| HISTORY |
 The Apollo
Program was the US space flight effort which landed the first humans on Earth's
Moon.Conceived during the Eisenhower administration and conducted by the NASA,
Apollo began in earnest after President John F. Kennedy's 1961 address to
Congress declaring his belief in a national goal of "landing a man on the Moon"
by the end of the decade.
The Apollo
Program was the US space flight effort which landed the first humans on Earth's
Moon.Conceived during the Eisenhower administration and conducted by the NASA,
Apollo began in earnest after President John F. Kennedy's 1961 address to
Congress declaring his belief in a national goal of "landing a man on the Moon"
by the end of the decade.
 This goal was
first accomplished during the Apollo 11 mission on July 20, 1969 when astronauts
Neil Armstrong and Buzz Aldrin landed, while Michael Collins remained in lunar
orbit. Five subsequent Apollo missions also landed astronauts on the Moon, the
last in December 1972. In these six Apollo spaceflights, 12 men walked on the
Moon. These are the only times humans have landed on another celestial body.
This goal was
first accomplished during the Apollo 11 mission on July 20, 1969 when astronauts
Neil Armstrong and Buzz Aldrin landed, while Michael Collins remained in lunar
orbit. Five subsequent Apollo missions also landed astronauts on the Moon, the
last in December 1972. In these six Apollo spaceflights, 12 men walked on the
Moon. These are the only times humans have landed on another celestial body.
The Apollo program ran from 1961 until 1975, and was America's third orbital spaceflight program (following Mercury and Gemini). It used the Apollo spacecraft and Saturn launch vehicles, which were also used for the Skylab Program in 1973–74, and a joint US-Soviet mission in 1975. These subsequent programs are thus often considered part of the Apollo program.
| THE KIT |
Left over parts
from my
| CONSTRUCTION |
I
built the CSM/LM as the instructions showed. There are not a lot of parts and
the build is rather straight forward.
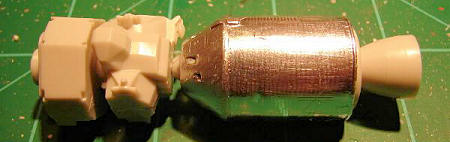
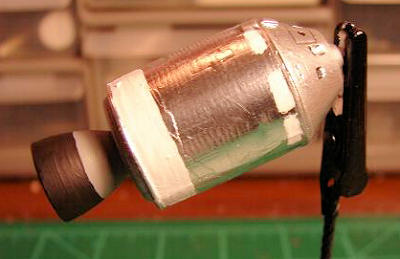
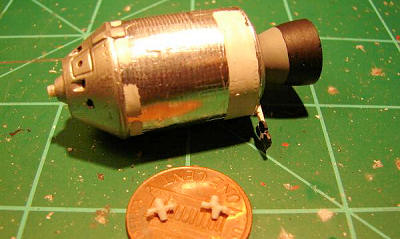 After gluing the CSM and LM bodies together, I removed any visible seams.
Painting was done as the build progressed, as doing so afterwards is next to
impossible. Once everything was dry, I attached the CM to the SM and added the
engine bell. I decided to add the radar, as this is a rather prominent feature
of the CSM. I punched out four discs and mounted them to a piece of plastic rod.
Not perfect, but good enough in this small a scale.
After gluing the CSM and LM bodies together, I removed any visible seams.
Painting was done as the build progressed, as doing so afterwards is next to
impossible. Once everything was dry, I attached the CM to the SM and added the
engine bell. I decided to add the radar, as this is a rather prominent feature
of the CSM. I punched out four discs and mounted them to a piece of plastic rod.
Not perfect, but good enough in this small a scale.
 After attaching the halves, the LM legs were attached to the decent stage and
the two stages attached together. I made a small porch from plastic sheet and a
ladder from a spare 1/350 ship rail set. That's about it for the LM.
After attaching the halves, the LM legs were attached to the decent stage and
the two stages attached together. I made a small porch from plastic sheet and a
ladder from a spare 1/350 ship rail set. That's about it for the LM.
I went down to
the local
| COLORS & MARKINGS |
 I
applied Bare Metal Foil to the SM section and painted radiator areas flat white.
The Command Module was painted silver. The LM was painted the appropriate colors
of black, gold and silver. Good research will be needed here to make sure that
the CSM/LM colors are applied correctly.
I
applied Bare Metal Foil to the SM section and painted radiator areas flat white.
The Command Module was painted silver. The LM was painted the appropriate colors
of black, gold and silver. Good research will be needed here to make sure that
the CSM/LM colors are applied correctly.
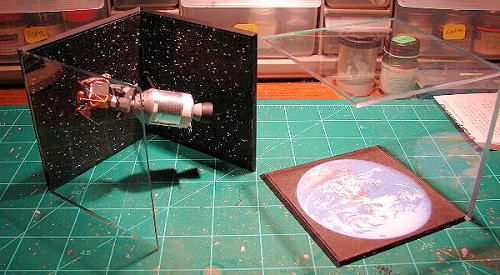
| CONCLUSIONS |
A
neat little build to make use of the extra parts in the MiS kit. Quick, easy to
build, cheap and a nice conversation piece.
| REFERENCES |
Space in Miniature #6 Apollo CSM & #7 Apollo LM
If you would like your product reviewed fairly and fairly quickly, please contact the editor or see other details in the Note to Contributors.