| KIT #: | 0201305 |
| PRICE: | $35.00 |
| DECALS: | One option |
| REVIEWER: | Dan Lee |
| NOTES: |
| KIT #: | 0201305 |
| PRICE: | $35.00 |
| DECALS: | One option |
| REVIEWER: | Dan Lee |
| NOTES: |
| HISTORY |
 Boba Fett is one of the
most popular Star Wars characters. At the time of the original trilogy no one
knew anything about him, but what the fans mostly knew about him was that he was
one bad mother (shut your mouth) of a bounty hunter encased in an armored suit.
And then he died like a punk because of a faulty rocket pack inadvertently
caused by a blind Han Solo in Return of the Jedi. When the prequels happened, we
discovered that Boba, son of Jango, was a whiney brat of a clone with daddy
issues who would grow up looking to avenge himself on the man (who in another
time and galaxy played Shaft) that chopped off the head of his dad. So much for
backstory.
Boba Fett is one of the
most popular Star Wars characters. At the time of the original trilogy no one
knew anything about him, but what the fans mostly knew about him was that he was
one bad mother (shut your mouth) of a bounty hunter encased in an armored suit.
And then he died like a punk because of a faulty rocket pack inadvertently
caused by a blind Han Solo in Return of the Jedi. When the prequels happened, we
discovered that Boba, son of Jango, was a whiney brat of a clone with daddy
issues who would grow up looking to avenge himself on the man (who in another
time and galaxy played Shaft) that chopped off the head of his dad. So much for
backstory.
Boba Fett was originally played by British actor Jeremy Bulloch. He based his portrayal on Clint Eastwood’s famous “Man With No Name” character thanks to having very few lines. He believed that “the less you do with Boba Fett, the stronger he becomes.” Unfortunately, George Lucas did not listen to Jeremy. When Jeremy read how Boba died in Return of the Jedi, he became very upset. Who wouldn’t?
If you want to read more about Boba then you can find his Star Wars extended universe bio on Wookiepedia.
| THE KIT |
Unless you happen to live
in Asia, you may have an issue getting one because the legal rights holders
(Disney aka the Mouse aka The Empire) has put a stop to 3rd party resellers like
Hobby Link Japan selling Bandai kits outside of the licensing agreement zone as
of Sept 2015, but can be found elsewhere.
 The kit consists of around 141 parts
(some duplicates are provided) on eight sprues of varying colors including one
multicolor sprue. The detail on the parts is very good and the parts themselves
are free of flash. Only some minor sanding is required (boy, was I wrong.)
The kit consists of around 141 parts
(some duplicates are provided) on eight sprues of varying colors including one
multicolor sprue. The detail on the parts is very good and the parts themselves
are free of flash. Only some minor sanding is required (boy, was I wrong.)
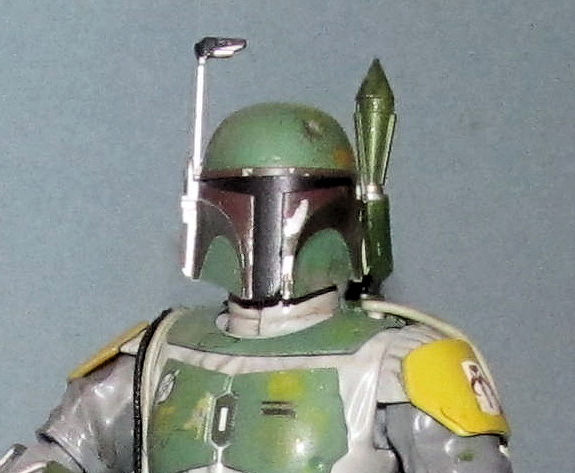
The sprue colors are based on the actual colors of his armored suit from the Empire Strikes Back so that it won’t require much painting for those non modeller fans. However, you can paint/weather/detail it to make the figure colors pop out which is what I did .
Like the other Bandai Star Wars kits, this figure is designed to reduce the amount of scraping/sanding/filling/swearing required to make the kit. Based on what I’ve seen in the instructions, some of the seams are hidden behind armor plate and or actual seam lines. Very clever of Bandai and it shows how much thought/design was put into this model.
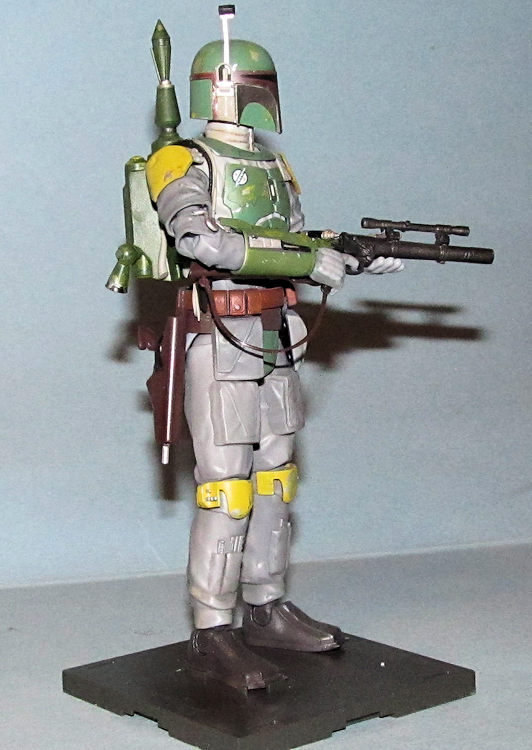
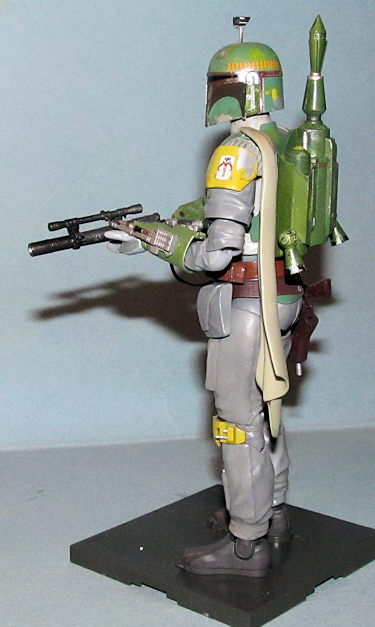
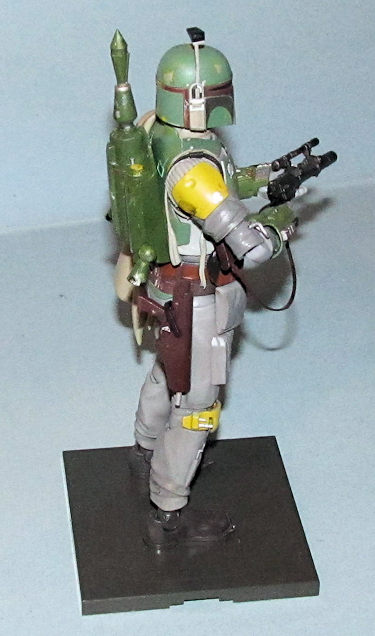
It includes all of Boba’s matching accessories including cape, jet pack, rocket launcher, flame thrower and blasters. The blaster rifle design is from Empire and not the finned barrel version that was chopped in half during his final battle in Return of the Jedi. Boba Fett comes with some markings consisting of waterslide decals (for advanced modellers) and stickers (for kids or adults who can’t be bothered.) Your choice of what to use.
The instruction booklet is in Japanese (not surprising as this kit is strictly for the Japanese/Asian market.) The problem is that Boba’s colors aren’t exactly common and require mixing of paint which is difficult unless you can read Japanese. As for me, I am going to paint it based on colors that are close enough.
| CONSTRUCTION |
 The model has a lot of polycaps to insert. I followed
the instructions for the various body parts without too much trouble. Once I
glued everything in place, I added Aves Apoxie Sculpt modelling epoxy into the
seams instead of using CA glue. I wanted to try Apoxie Sculpt modelling clay and
paste and see how it would work as filler and for non standard flat or contoured
surfaces such as figures. I had an easier time with the paste than I did with
the modelling clay. The model sat in the box for a few months as I had some
personal issues I had to deal with.
The model has a lot of polycaps to insert. I followed
the instructions for the various body parts without too much trouble. Once I
glued everything in place, I added Aves Apoxie Sculpt modelling epoxy into the
seams instead of using CA glue. I wanted to try Apoxie Sculpt modelling clay and
paste and see how it would work as filler and for non standard flat or contoured
surfaces such as figures. I had an easier time with the paste than I did with
the modelling clay. The model sat in the box for a few months as I had some
personal issues I had to deal with.
Once those issues were dealt with and I had time/energy to build models, I pulled out the box and proceeded to wet sand the various limbs and torso using 600 grit wet/dry sandpaper. This task proved to be more tedious than I thought as those irregular contours on the limbs needed a lot of shaping and careful sanding.
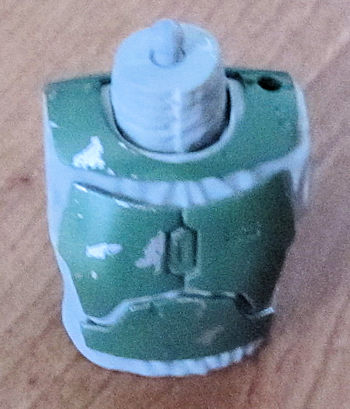
The jetpack also had many seams that needed filling and sanding. One step I did deviate from the instructions was that I didn't attach the antenna (actually two antenna on a single piece) to the jetpack as they would be in the way of sanding off the prominent seams. I first filled the rocket pack seams with CA glue and then sanded them smooth. The bottom and sides were done using sandpaper, but the rocket launcher seams had to be cleaned up using a small piece of sandpaper glued to a popsicle stick as there was no other way to take care of those seams.
Lastly, I glued the blaster rifle together. Sanding and filling the blaster rifle proved to be a pain in butt due to the scope being in the way so I ended up gluing cut pieces of thin plastic strip onto the seams I couldn't fill before I painted it. I did something similar to the blaster pistol as I covered up the seams with plastic strip.
| COLORS & MARKINGS |
 The first thing I did was
spray the various armor and helmet pieces with TS-30 Polished Silver to provide
a durable metal base after which I could spray on the various colors and then
chip the upper layers of paint using a toothpick for small scratches and chips
or the use of regular masking tape to lift off larger sections.
The first thing I did was
spray the various armor and helmet pieces with TS-30 Polished Silver to provide
a durable metal base after which I could spray on the various colors and then
chip the upper layers of paint using a toothpick for small scratches and chips
or the use of regular masking tape to lift off larger sections.
Here are the colors I used as they were handy and for the most part the colors fit:
Torso Tunic and Shoulder Pads: Tamiya XF-80 Royal Light Grey
Jumpsuit (Arms, Legs, Waist): Tamiya XF-54 Dark Sea Grey
Helmet and Chest Green: Gunze JSDF Green H-319
Jet Pack and Gauntlets: Tamiya XF-5 Flat Green
Boots: Tamiya XF-84 Dark Iron
Helmet Burgundy, Holster, Lower Belt, Rifle Stock and Blaster Pistol: Tamiya XF-9 Hull Red
Upper Belt: Model Master Acrylic Burnt Sienna (brush)
Knee and Shoulder Armor: Xtracrylix RLM04
Fuel Tank tips: Tamiya XF-3 Flat Yellow (brush)
Primer Color: XF-80 or Tamiya XF-3 Flat Yellow
Dark Color of Gloves: Tamiya XF-22 German Grey (Tamiya's too dark version of RLM02)
Antennas and various minor bits: TS-30 Polished Silver or (brush) X-11 Chrome Silver
 Blaster Rifle: mix of
Tamiya XF-56 Metallic Grey and Tamiya XF-84 Burnt Iron
Blaster Rifle: mix of
Tamiya XF-56 Metallic Grey and Tamiya XF-84 Burnt Iron
Helmet Antenna/Sight(?): Flat Black
Cape + Lanyards: Gunze H85 Sail Color
The rocket pack nozzles and the blaster pistol were hand painted assorted colors based on movie photos.
Initially I tried to spray on a primer coat before I sprayed on the actual colors to provide depth to the paint, but this didn't work so I ended up dry brushing flat yellow or light grey onto the paint to to emulate scratches that exposed the primer coat and not the underlying metal. Once this was done, I added a wash using Tamiya's Panel Line Accent Color (Brown). Once dry, I sprayed on a couple of thin coats of Future to provide a gloss surface for the decals.
Bandai's decals are pretty good but I only added the decals I could not paint myself such as the various emblems on Boba's uniform/armor. I used MicroSet and MicroSol to settle the decals into the surface details.
I used the Panel Line Accent Color one more time for final details plus some drybrushing of gunmetal in various areas and when that was cured, I sprayed on Tamiya Flat Coat for the final coat.
I put Boba Fett together after painting, but before
the chipping process, the gloss coat, decals, etc. The jetpack antennas were cut
off and gently inserted into their respective holes. Finally, I added the hands,
blaster and set the pose of Boba Fett.
| CONCLUSIONS |
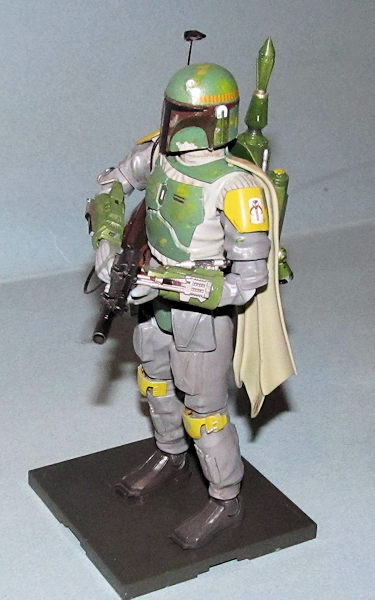
The Bandai Boba Fett is a fun kit which you can build straight out of the box without any painting or weathering or without glue for that matter OR one you can really go to town on if you want to put the effort to paint and weather it. It can be both (rather fragile) toy and display model (I swear I only played with the Boba Fett figure a couple of times!) The choices are up to you. Definitely a kit designed for modellers of all skill levels.
5 September 2016
Copyright ModelingMadness.com
If you would like your product reviewed fairly and fairly quickly, please contact the editor or see other details in the Note to Contributors.