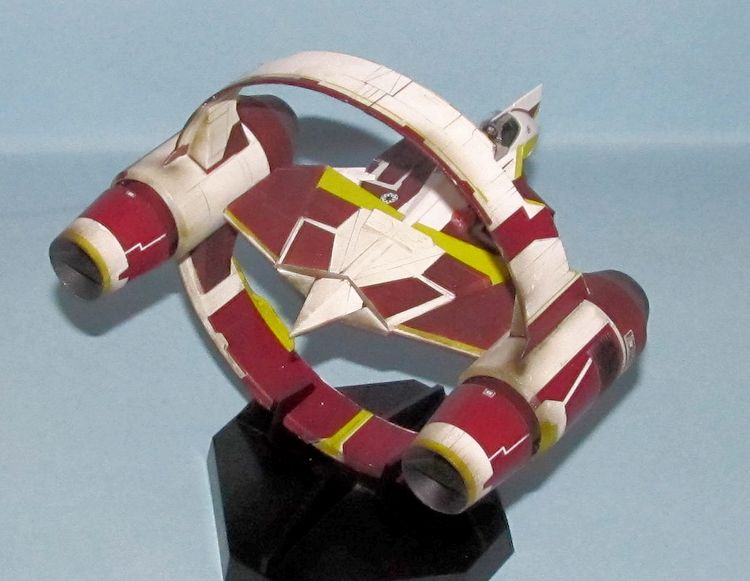
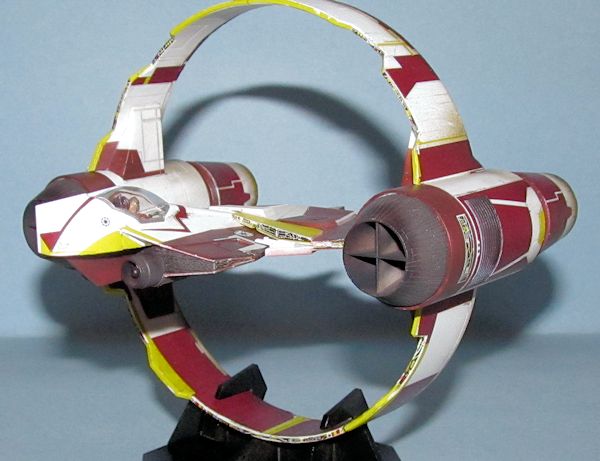
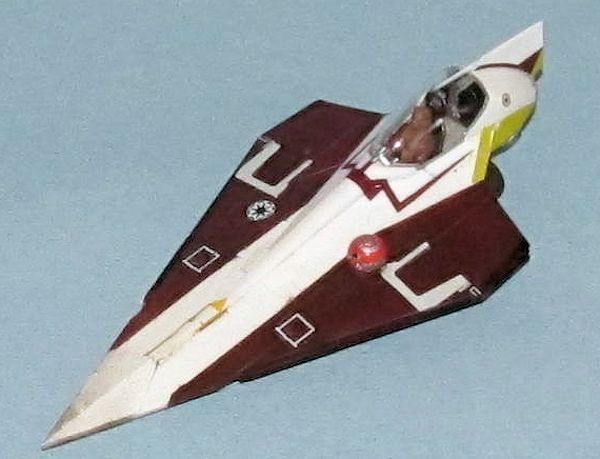
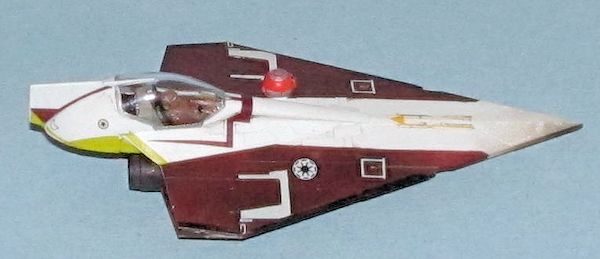
Fine Molds 1/72 Jedi Starfighter
| KIT #: | SW-3 |
| PRICE: | $44.98 SRP |
| DECALS: | One option |
| REVIEWER: | Dan Lee |
| NOTES: | There were issues with the instructions |
| HISTORY |
Attack of the Clones was the 2nd movie of the visually stunning but
otherwise disappointing Star Wars Prequel Trilogy.
It made a lot of money, but its weak story and the
wooden acting didn’t help erase the awfulness that was the Phantom Menace.
 One
thing that didn’t disappoint was the space ship designs.
Among the more notable designs was the Jedi Starfighter
that were supposed to be the forerunners of the X-Wings and TIE Fighters of the
earlier Star Wars series.
One
thing that didn’t disappoint was the space ship designs.
Among the more notable designs was the Jedi Starfighter
that were supposed to be the forerunners of the X-Wings and TIE Fighters of the
earlier Star Wars series.
From Wookipeedia:
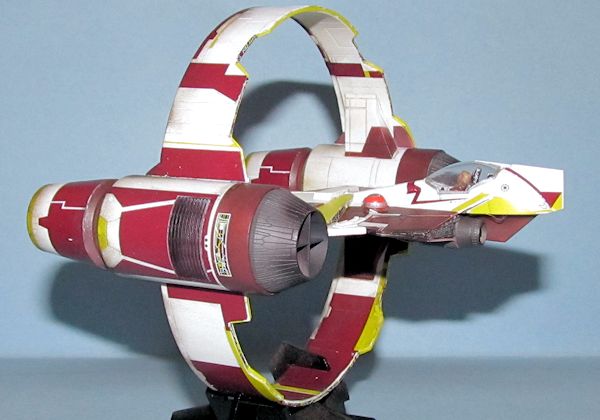
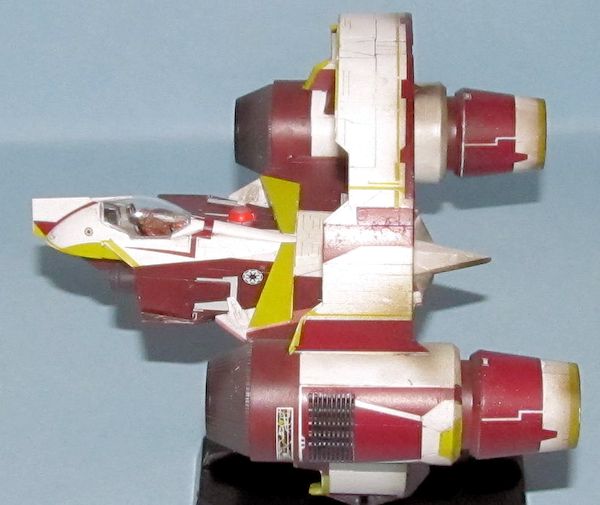
Delta-7 Aethersprite-class light interceptor
The Delta-7 appeared to be an evolutionary descendant
from the ancient Aurek-class starfighter: it was a small, sleek interceptor used
by the Jedi Knights for reconnaissance missions. However, the starfighter was
fitted with two twin-barrel laser cannons allowing the pilot to fight when
necessary. As part of the Republic's Judicial Department, the starfighters owned
by the Jedi Order were colored in the red and white hues that represented the
diplomatic immunity that the Jedi enjoyed, similar to Republic Cruisers.
However, some would be painted in other colors as the Clone Wars progressed.
It was designed by engineer Walex Blissex, who would
later design the Alpha-3 Nimbus-class V-wing starfighter and work on the Rebel
Alliance's RZ-1 A-wing interceptor with Jan Dodonna. Due to limitations in
technology at the time of its creation, the starfighter's size did not allow for
a built-in hyperdrive, and instead had to rely on other spacecraft or an
external hyperdrive docking ring for faster-than-light travel. (However, at the
time of its creation, there were also some prototype Delta-7 Aethersprites
constructed that
 had
experimental hyperdrive engines built-in. In addition to this, the standard
factory-model Aethersprite could be modified and/or tweaked to have a built-in
hyperdrive engine). The Aethersprite also had very powerful sublight engines,
driving it to a maximum acceleration of 5,000 G.
had
experimental hyperdrive engines built-in. In addition to this, the standard
factory-model Aethersprite could be modified and/or tweaked to have a built-in
hyperdrive engine). The Aethersprite also had very powerful sublight engines,
driving it to a maximum acceleration of 5,000 G.
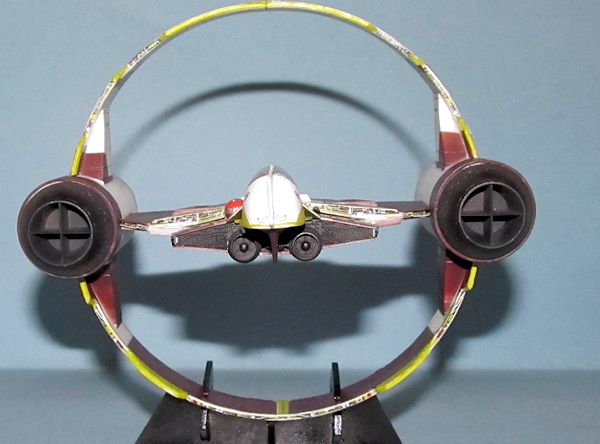
Syluire-31 Hyperdrive Ring
The Syluire-31 was designed for the Kuat Systems Engineering Delta-7 Aethersprite-class light interceptor, though it was also used to transport Delta-7Bs, and Delta-12 Skysprites. Two large hyperdrive engines were mounted on opposite sides of the ring, which split across the middle with a socket that connected the fighter to the ring. The engines were fitted with Class 1.0 hyperdrives, with an operational range of 150,000 light years.
| THE KIT |
See Scott’s preview of the kit to see what comes in the box.
| CONSTRUCTION |
I’ll say this right off the bat.
It is not as easy as Fine Mold’s other kits.
This is probably the most frustrating of all their Star
Wars kits I have ever built because of the instructions and the decals.
FYI I used Tamiya Clear glue to glue everything
together.
 Most of my
Star Wars models are in flight ones and this one was no exception so I did not
use any of the landing gear pieces.
Most of my
Star Wars models are in flight ones and this one was no exception so I did not
use any of the landing gear pieces.
One thing I have to say is that you don’t entirely follow the instructions. If you assemble everything together and the decal you will find yourself in a very bad place. I assembled each sub assembly first according to instructions: upper hyperdrive ring, lower hyperdrive ring, starboard ring engine, port ring engine, both hyperdrive intakes, cockpit, upper fighter hull, lower fighter hull and fighter engines. However, I did not assemble them together as I had a lot of masking/painting to do. The only areas I had to sand and fill were the seams down the middle of the hyperdrive engine housings and that was pretty much it.
| COLORS & MARKINGS |
After many years of headaches with decals on complex surfaces and
curves, I opted to paint as many of the surfaces as I could.
I ended up ditching most of the decals on the fighter
and 1/3 of the decals on the hyperdrive-ring because it was easier to do.
Fortunately, FM is aware that many modelers would rather
paint instead of using the decals and provides many of the non-surface color
markings separately.
 First thing
I did was spray all the exterior areas (but not the engine sections) flat white
and then gloss white while the interior of the fighter was was sprayed Sky Grey.
First thing
I did was spray all the exterior areas (but not the engine sections) flat white
and then gloss white while the interior of the fighter was was sprayed Sky Grey.
Once the painted hyperdrive engine housings were dry then I masked off
the cooling (?) grills and then sprayed them flat black.
The interior of the intakes were sprayed flat black and
I didn’t mask the white areas of the intakes because that area was going to be
weathered so I didn’t mind the overspray.
Next I sprayed the hyperdrive ring engine nozzles and
fighter engines Tamiya Burnt Iron.
A few days later I masked off the non-hull red areas of the fighter with
Tamiya tape and then sprayed these areas with Tamiya Hull red which is close to
the maroon used in the decals.
I did the same for the hyperdrive engine sections and
the outside rear of the intakes (at least the areas I wasn’t going to cover with
decals) at a later date.
I thought about doing the same for the hyperdrive
rings, but they were a lot more work and I figured I could use the decals
instead.
The cockpit decals were mostly hand painted, the tiny
interior parts and decals were added and it was glued in place while Obi-Wan
Kenobi was hand painted with various colors.
 The astromech
droid head was painted Tamiya X-7 gloss red.
The astromech
droid head was painted Tamiya X-7 gloss red.
Certain areas on the fighter were masked off and
sprayed lightened interior green (which was used as a substitute for lime
green.)
Decals
Once all the decals done, I cleaned off the dried
decal solution.
Weathering and Final Coat
The model was assembled first before weathering (see FINAL
CONSTRUCTION.)
I was painting something else and used leftover paint
(OD and flat black) to weather the exterior to make it look like the Jedi
Starfighter had done some interstellar traveling.
I sprayed at low pressure and with low paint flow while
I kept most of the weathering on the leading edge surfaces.
Once it was dry, I did a watercolor wash to highlight details.
The excess was wiped off a day later using moist Q-tips.
I used some of my remaining Vallejo Flat Coat (two
light coats) to seal everything in.
| FINAL CONSTRUCTION |
I attached the hyperdrive sub assemblies first and glued them together.
The only part of the ring that had issues was when the
ring would not fit very well to the starboard engine housing.
I had to shave down the
 ring pieces
and then add a couple of shims of 5 thou plastic card to remove the gaps.
ring pieces
and then add a couple of shims of 5 thou plastic card to remove the gaps.
The fighter went together very quickly and I had to paint the black
markings along the leading edge of the fighter as I had some issues with the
decals.
I masked off and painted half of them and then carefully hand painted
the rest (because it was less of a pain then masking and airbrushing.)
The canopy was masked, the frame painted silver and then a portion of it
was painted flat white.
It was glued to the starfighter with Elmers White glue.
The stand was glued and assembled together.
It was painted gloss black and when it was dry, it was
decaled.
| CONCLUSIONS |
This was the most difficult to build Fine Molds Star Wars kit.
If you build, paint and then decal in subsections and
then glue it together then you won’t have many issues.
However, the instructions do not make that clear and you
can run into serious trouble otherwise with an otherwise fine kit.
The Jedi Starfighter is not exactly for beginners. FYI, all the other FM kits I have built are much easier to build.
March 2013
Thanks to for the review kit. You can find this one at your favorite hobby shop or on-line retailer.
If you would like your product reviewed fairly and fairly quickly, please contact the editor or see other details in the Note to Contributors.