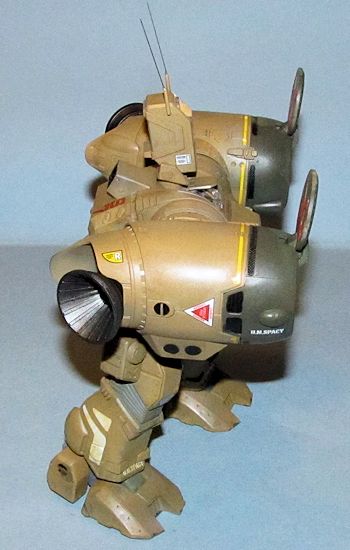
Wave 1/72 SDR-04 Mk.XII Destroid Phalanx
| KIT #: | MC-73 |
| PRICE: | 7040 yen |
| DECALS: | Several options |
| REVIEWER: | Dan Lee |
| NOTES: |
| HISTORY |
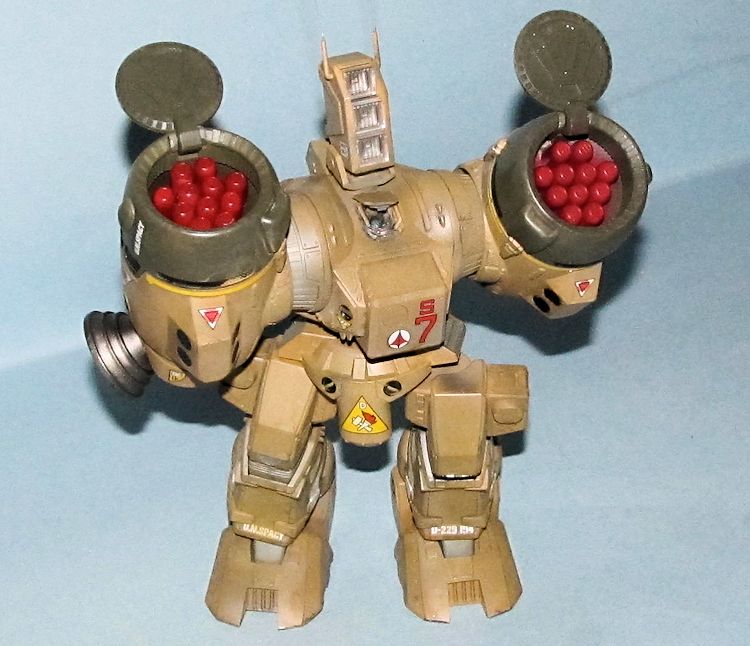
In the Macross universe, the Destroid Phalanx Mech was part of the defensive
force of the SDF-1.
It’s main
firepower was based on two SAM launchers carrying 11 SAMs each.
It could fire them in single, multiple or all of them in fire blossom
mode (which is a now TV trope.)
 In the Macross series, Phalanxes didn’t have a long combat life as they were
usually destroyed in devastating manner by Zentraadi forces in other words, the
Red Shirts of Macross.
The Phalanx
looks like a couple of Long Range Fire Support Battlemechs from the BattleTech
World which is not surprising as the folks at FASA licensed several designs from
Harmony Gold.
The relationship
between them later turned acrimonious leading to several prominent mechs being
removed from the BattleTech universe altogether or mentioned but without any
drawings.
In the Macross series, Phalanxes didn’t have a long combat life as they were
usually destroyed in devastating manner by Zentraadi forces in other words, the
Red Shirts of Macross.
The Phalanx
looks like a couple of Long Range Fire Support Battlemechs from the BattleTech
World which is not surprising as the folks at FASA licensed several designs from
Harmony Gold.
The relationship
between them later turned acrimonious leading to several prominent mechs being
removed from the BattleTech universe altogether or mentioned but without any
drawings.
Info from Macross Wiki
This space close-in defense Destroid type was hurriedly developed during SDF-1 Macross's year-long maiden voyage. Searchlight pivots 90 degrees up or down. A model equipped with gatling guns in the head and other variations exists but the large majority of the Phalanx were equipped with missiles. This unit specialized in close defense and space operations is designed to be a simple structure depending on a thermonuclear power system and simplification of the targeting and delivery system of the guided armaments. As a result, this system could be mass-produced even inside Macross and substituted for the Defender's deployment because of the complexity of that system. A disadvantage is said when the drive is shorter when using the thermonuclear propulsion nozzles. Because it used the MBR-04's ambulatory system, the hip and leg structure is common with the Tomahawk and Defender. The upper body is newly manufactured neglecting silliness, with a simple core structure equipped with weapons, a search device, and propulsion system. Combat operation capability decreased substantially when it exhausted it missiles.
| THE KIT |
 This kit from WAVE is one of the more expensive 1/72 scale kits I’ve seen, but I
can see why as it is quite detailed and the parts look very well done as well as
the fact that this is a limited run kit mainly for the Japanese market where it
seems limited run is still designed with Tamiya like precision and eye popping
cost.
This kit from WAVE is one of the more expensive 1/72 scale kits I’ve seen, but I
can see why as it is quite detailed and the parts look very well done as well as
the fact that this is a limited run kit mainly for the Japanese market where it
seems limited run is still designed with Tamiya like precision and eye popping
cost.
The parts come on several sprues of tan plastic, several sprues of similar
material to used in Tamiya polycaps for the limb joints and one sprue of clear.
There is minimal flash and the parts have very good detail.
| CONSTRUCTION |
I followed the instructions to assemble the various sub assemblies (including the interior) together with the exception of those parts that were to be a different color to make painting less of a headache. There are some seams on the arms and legs that needed to be sanded and filled. I waited for a week (or ten thanks to my new job) for the glue to cure to eliminate those annoying phantom seams. A little bit of CA glue and the Tamiya equivalent of Mr Surfacer was used as filler. The scratches were removed using micromesh sanding pads and polishing cloths.
| COLORS & MARKINGS |
Painting
I painted the sub assemblies with Tamiya dark grey and flat black in the same
manner that armor modelers do with vehicles.
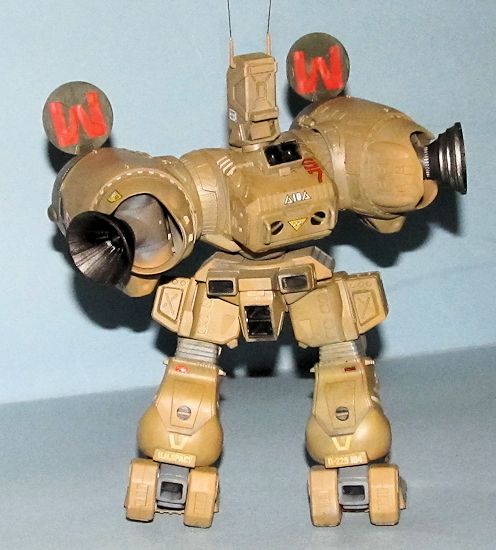
Once it was dry I masked off the various leg joints and sprayed on two
thin coats of Tamiya Desert Yellow which was the base color for most of the
parts.
 The interior of the search light filled head was painted silver and the missile
bay doors were painted RAF Dark Green.
The warheads of the missiles were painted white then gloss red as per
instructions.
The interior of the search light filled head was painted silver and the missile
bay doors were painted RAF Dark Green.
The warheads of the missiles were painted white then gloss red as per
instructions.
Once the paint was dry, the various parts were sprayed with Tamiya gloss for the
decals.
Decals
I used the markings for the Mech on the box.
The kit decals were of excellent quality and only really needed MicroSol
and MicroSet to make them settle down onto the detail.
Once dry, the model was wiped down with a wet cloth to remove the excess
decal solution.
Weathering and Final Coat
I had assembled the model at this point, minus the clear parts, when I started
the weathering.
I used a watercolor
mix of Burnt Sienna and Black for the panel lines and pinwashes.
The excess was wiped away using wetted Q-tips.
I decided to spray some thinned (2:1 thinner to paint ratio) Panzer Yellow for some post shading and dirt effects. Once done, I sprayed everything with Vallejo Flat Varnish.
| FINAL CONSTRUCTION |
 Considering that all the major sub assemblies were attached using polycaps,
final assembly was a breeze.
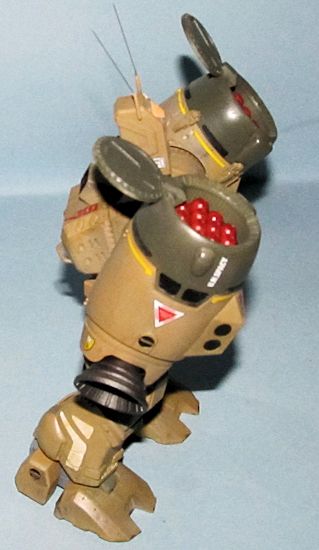
The
most fiddly steps of assembly were adding the missiles to the missile bays and
the missile bays to the arms.
Considering that all the major sub assemblies were attached using polycaps,
final assembly was a breeze.
The
most fiddly steps of assembly were adding the missiles to the missile bays and
the missile bays to the arms.
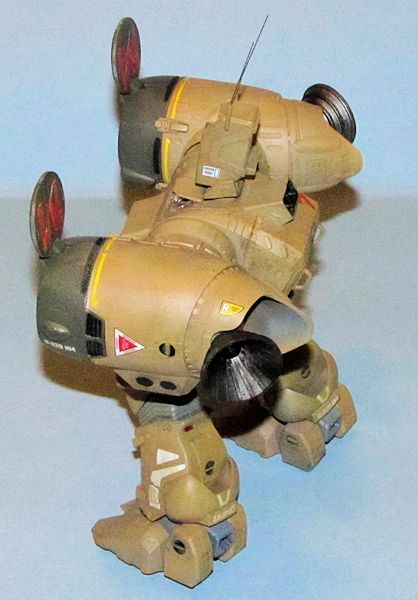
I had broken off both aerials removing them from the sprues so I replaced them
with thin steel wire (glued on with CA glue.)
| CONCLUSIONS |
The WAVE Destroid Phalanx makes a very nice model.
Everything came together fairly quickly and the paint job was not
complicated.
Recommended for
beginners to advanced modelers with the caveat based on the price of the model
that you should be a fan of Macross or really want one (I am both.)
I have to admit this is the first thing I bought with my first paycheck
from my new job.
February 2014 If you would like your product reviewed fairly and
fairly quickly, please
contact
the editor
or see other details in the
Note to
Contributors.