| KIT #: | 0206320 |
| PRICE: | 2592¥ MSRP |
| DECALS: | One option |
| REVIEWER: | Dan Lee |
| NOTES: |
| HISTORY |
The A-Wing fighter has only been
seen in one Star Wars movie. It was a single seat fighter that actually looked
like the letter it represented unlike the B-wing. Not many fans realized until
the X-Wing series of video games came along that it was the hot rod of Rebel
fighters. It's main drawback was weak shields and weaponry compared to its
counterparts, but it was the fastest Rebel fighter in the game and could o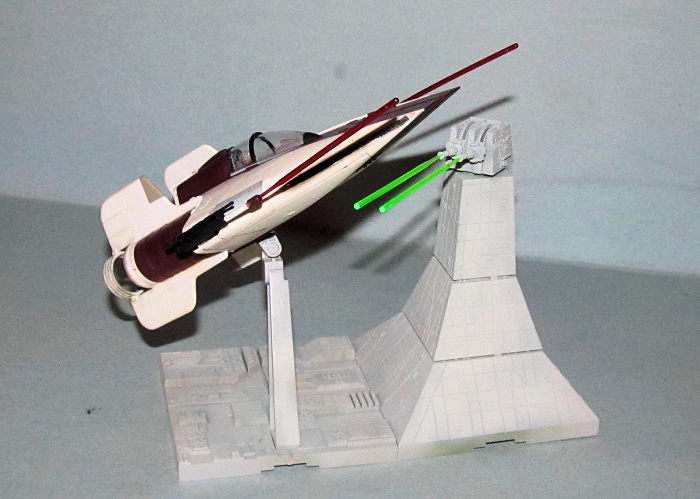 ut
race almost anything including most missiles. It carried weak shields, a
hyperdrive, a mere two lasers and two missile launchers with six concussion
missiles each.
ut
race almost anything including most missiles. It carried weak shields, a
hyperdrive, a mere two lasers and two missile launchers with six concussion
missiles each.
History from Wookieepedia:
During the Galactic Civil War, A-wings were used by the Alliance in early battles against Imperial forces and soon proved themselves to be capable fighters. Thanks to this track record, the Alliance obtained a number of A-wings and modified them, removing their heavy weapons and shields, in order to make them fast enough to combat the newer generations of Imperial TIE fighters. The resulting modified A-wings used by the rebels were faster than even the TIE/IN interceptor. These modified A-wings were deployed by the Alliance Fleet at the Battle of Endor. There, under Lando Calrissian's command, Green Squadron flew against the Second Death Star. Once Han Solo's strike team brought down the Death Star's shield generator, two A-wing pilots flew into the Death Star, but broke off to draw TIE fighters away from Calrissian. Green Leader Arvel Crynyd was hit by fire and crashed into the bridge of the Super Star Destroyer Executor, resulting in its destruction.
| THE KIT |
 The
Bandai A-Wing kit is pretty simple and straight forward. The kit consists of
five fairly small sprues of parts. The first sprue is a multicolored plastic
sprue including all the clear parts, the burgundy parts and the white plastic
landing gear. The 2nd sprue contains all the off white hull parts.
The 3rd sprue contains all the black plastic parts including the
laser cannon. The 4th sprue contains the stand and the Death Star
Laser Turret Tower in light grey. Finally the 5th sprue contains just
the two red clear laser blasts. The parts are well done and virtually free of
flaws. The detail is really well done especially considering the scale (1/72.)
All you need is a sprue cutter and a knife to trim away the excess sprue nubs
and mold marks.
The
Bandai A-Wing kit is pretty simple and straight forward. The kit consists of
five fairly small sprues of parts. The first sprue is a multicolored plastic
sprue including all the clear parts, the burgundy parts and the white plastic
landing gear. The 2nd sprue contains all the off white hull parts.
The 3rd sprue contains all the black plastic parts including the
laser cannon. The 4th sprue contains the stand and the Death Star
Laser Turret Tower in light grey. Finally the 5th sprue contains just
the two red clear laser blasts. The parts are well done and virtually free of
flaws. The detail is really well done especially considering the scale (1/72.)
All you need is a sprue cutter and a knife to trim away the excess sprue nubs
and mold marks.
The kit comes with two canopies, one standard one with the framing on the canopy and one with a separate canopy frame in black. Both parts are very clear with no flaws. There is an option for separate landing gear and has all the extra parts provided if one choose to build it with landing gear down.
| CONSTRUCTION |
 I started
off by removing all the parts of the sprues and then cleaning off the mold marks
and sprue nubs. The black plastic cockpit was assembled and the interior was
painted in neutral grey with various details dry brushed with silver. Meanwhile
the console was also painted neutral grey and when it was dry, the various
console instrument details were painted red and yellow with a “0” brush based on
the decals as I opted not to use the decals or stickers.
I started
off by removing all the parts of the sprues and then cleaning off the mold marks
and sprue nubs. The black plastic cockpit was assembled and the interior was
painted in neutral grey with various details dry brushed with silver. Meanwhile
the console was also painted neutral grey and when it was dry, the various
console instrument details were painted red and yellow with a “0” brush based on
the decals as I opted not to use the decals or stickers.
Next, the 1/48, er, 1/72 scale pilot (if the pilot was 1/72
scale then the pilot was Roger Murdoch aka Kareem Abdul Jabbar sized!) was brush
painted using MM Acrylic bright green for most of the uniform, flat white for
certain portions of the uniform , neutral grey (helmet), RLM66 (chest pack),
pale flesh tones and small areas of the helmet were painted red using a
toothpick as they were fine details (decals and stickers are provided by I chose
neither.) I used a thin burnt umber wash to highlight facial features. The pilot
and console were glued into the cockpit then the cockpit was glued into the
bottom half of the A-wing fuselage.
I did not assemble anything on the A-Wing else except those parts that were the
same color in preparation for painting.
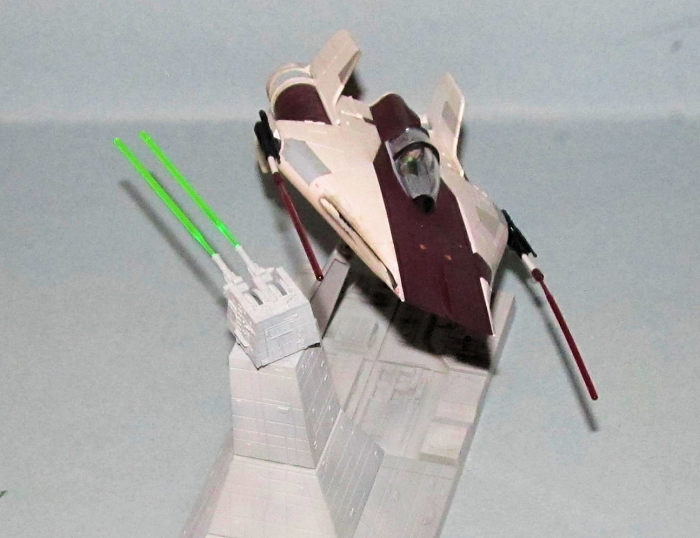
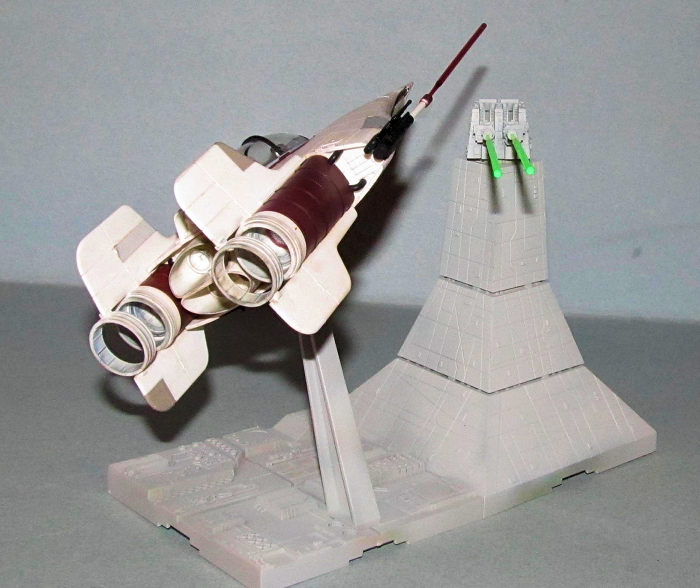
The stand and Death Star Laser Turret were assembled and glued together. The fit of the parts was so good that I didn't need filler for anything (a very rare occurrence for me.)
| COLORS & MARKINGS |
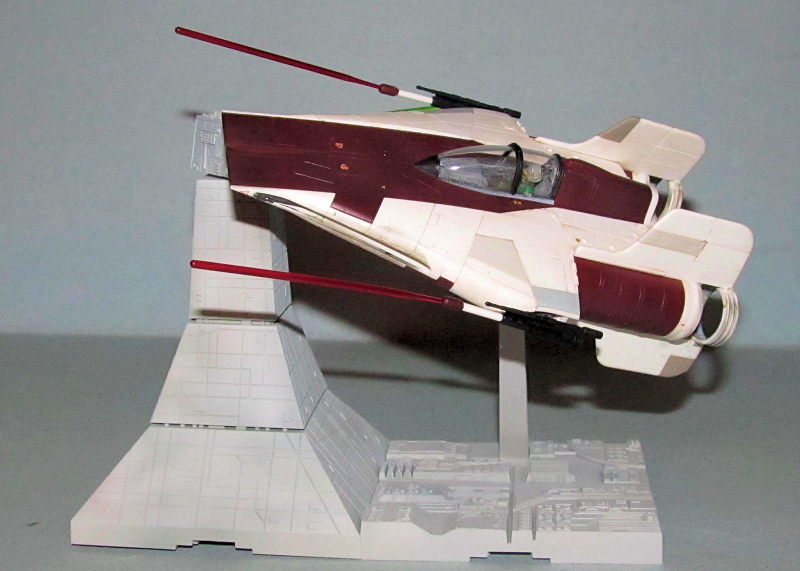
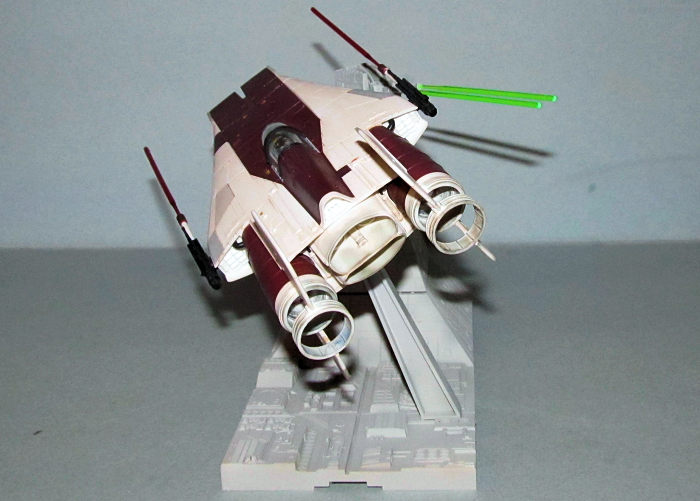
The A-Wing is colored off white and burgundy. I didn't have off white or burgundy available so I just sprayed the off white parts Tamiya flat white and the burgundy parts Tamiya Hull Red which were close enough for me. I painted the engine face inserts bright red to show that engines were running.
The blasters were painted flat
black while certain details were masked by tape and painted with an a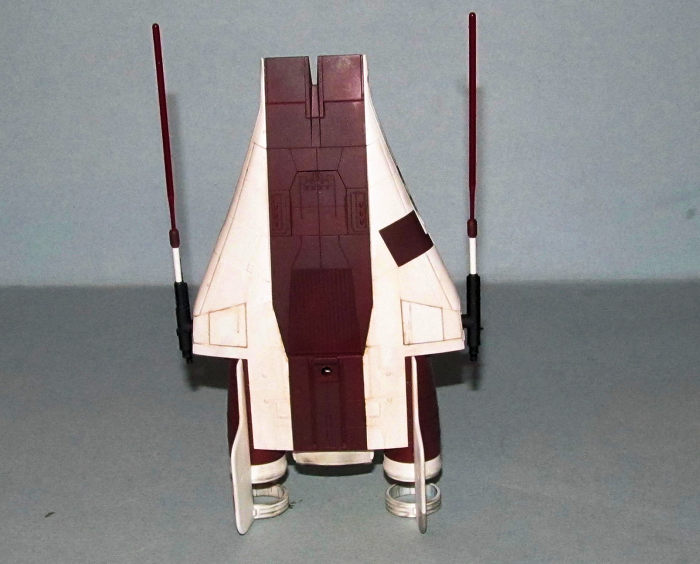 irbrush
or hand painted. The only parts that showed its plastic original color was a
length of the blaster barrel (the muzzles were still painted burgundy instead of
using decals.)
irbrush
or hand painted. The only parts that showed its plastic original color was a
length of the blaster barrel (the muzzles were still painted burgundy instead of
using decals.)
A builder has two options with the canopy, a one piece clear piece with the frame needing to be masked and painted or a two piece option that has the canopy frame as a separate piece. I opted for the two piece canopy as I wanted a quicker build. This meant that the canopy frame was painted gloss black.
The stand and turret were preshaded with whatever remaining paint I had in the airbrush. When the paint was dry I sprayed on MM Acrylic Camouflage Grey FS36622 which seems to be my go to grey for Imperial Grey these days.
When the A-Wing was glued together, I masked off the canopy and sprayed on a gloss coat for the decals. When it was dry, I used all the decals except the interior decal, but I should have painted certain areas instead as the decals wrinkled on the edges. I ended up using Solvaset to take down the worst of it. Otherwise there were no other issues.
I used a black and raw umber watercolor wash to dirty up the A-Wing to a Rebel Alliance “standard.” When it was dry I removed the excess with damp Q-Tips before moving on to the next step. Next I used the Tamiya weathering set to dirty up the interior of the engine nozzles and leading edges.
It turned out that I forgot to paint the missile launchers flat black. I brush painted the interiors of the launchers very carefully so as not to ruin the decent paint job. Lastly I masked off the canopy again and sprayed on Tamiya flat coat to seal everything up.
| CONSTRUCTION CONTINUES |
 I
glued the A-Wing bits together. I really didn't need the glue as the fit was
really good, but I used it just to secure everything. I only used a dab of
filler for a couple of panel lines and that was pretty much it.
I
glued the A-Wing bits together. I really didn't need the glue as the fit was
really good, but I used it just to secure everything. I only used a dab of
filler for a couple of panel lines and that was pretty much it.
The canopy proved to be a bit more stubborn to add. I nearly cracked it as I gently squeezed it onto the A-Wing. One has to make sure that all the sprue nubs are sanded down otherwise it won't fit well as I found out to my dismay. This was the only issue I had with the kit.
After the gloss coat and other steps done above, I attached the blasters, red/green laser blasts to the A-wing and laser turret. BTW, the green laser blasts came from an earlier TIE Fighter kit build. Finally, I attached the A-Wing to the stand.
| CONCLUSIONS |
The Bandai A-wing was completed over a three day holiday weekend. Easy and straight forward kit. A masterpiece by Bandai's designers. I have never built a kit that went together, was painted without issues or more than one minor hiccup (till the next kit blows my mind.)
I recommend it with an all thumbs up as it can be built by a modeller of any skill level to a high standard.
Thanks to for the preview kit. You can find this kit at your favorite hobby shop or on-line retailer.
If you would like your product reviewed fairly and fairly quickly, please contact the editor or see other details in the Note to Contributors.
Back to the Main Page Back to the Review Index Page Back to the Previews Index Page