Revell 1/40-1/48 Plo-Koon Jedi Starfighter
| KIT #: | 06689 |
| PRICE: | $20.00 or so |
| DECALS: | None required |
| REVIEWER: | Donald Zhou |
| NOTES: | Pre-painted snap kit |
| HISTORY |
The Delta-7 Aethersprite
Starfighter was designed by Walex Blissex and was in service just before the
start of the Clone Wars. It was colloquially known as the “Jedi Starfighter”
mainly due to the fact it was heavily used throughout the Clone Wars by various
Jedis, including Anakin Skywalker, Obi-Wan Kenobi and Plo Koon. There were
various different iterations, including one with more powerful weaponry,
different droid s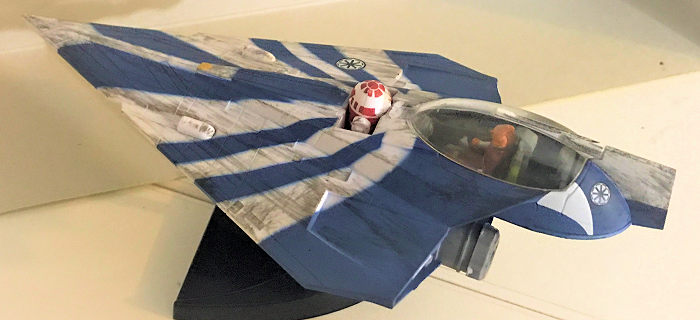 lot
etc.
lot
etc.
The craft was originally designed as a replacement for the Delta-6 Sprite fighter. Like its predecessor, which was in service at the time of Invasion of Naboo, The Delta-7 was triangular in shape but slightly larger, carrying a more powerful engine and a slot for a droid co-pilot. This slot is usually located to the pilot’s left on the starboard wing, but some, like the Plo-Koon version, can be located directly in front and below the pilot. It was equipped with a standard two laser cannons mounted on the wings, in front of the pilot and seismic charges, among other weapons . Since the craft was so small and due to the technology limitation of the time, it did not contain a hyperdrive. Rather, it requires support from a larger ship, such as the Venator class destroyer or a hyperdrive ring in order to go to light speed.
| THE KIT |
As I’ve said in my A-1H
“toilet bomber” review, I bought this kit alongside my Brengun 1/32 Skyraider
“Paper Tiger II” decal set in order to make the toilet bomber because the site
will not ship across the pond unless the price is over $50. This kit depicts Plo-Koon,
although Revel at one time or the other had released ALL th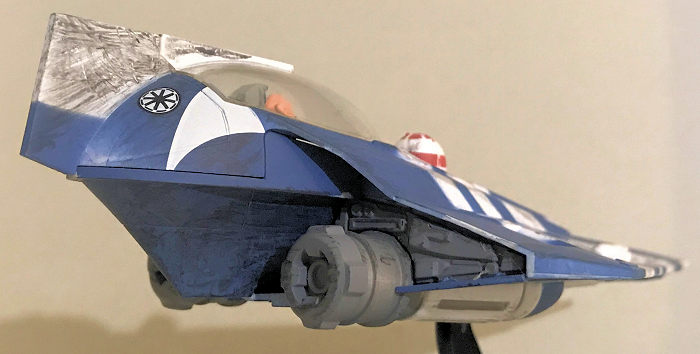 e
jedi in the same kit with different painting….Even if the details are wrong,
like Obi-Wan’s fighter had the droid socket on the side. The kit is the
simplicity of simple, its part of Revel’s “Easy-Build” line. There are only some
30 parts, everything snap fits and the kit itself is prepainted. Again, I once
thought of dumping the kit on eBay but decided it would be a great kit to get my
oldest started. That came several weeks ago, when my church held a modeling
building seminar and I decided my oldest can build this kit as his second kit,
after building up Dory and Nemo that is. The kit has the option of either
putting it on the stand, using the closed landing pad doors or on the ground,
with the doors open and the pads inserted. I decided to put it on the stand.
e
jedi in the same kit with different painting….Even if the details are wrong,
like Obi-Wan’s fighter had the droid socket on the side. The kit is the
simplicity of simple, its part of Revel’s “Easy-Build” line. There are only some
30 parts, everything snap fits and the kit itself is prepainted. Again, I once
thought of dumping the kit on eBay but decided it would be a great kit to get my
oldest started. That came several weeks ago, when my church held a modeling
building seminar and I decided my oldest can build this kit as his second kit,
after building up Dory and Nemo that is. The kit has the option of either
putting it on the stand, using the closed landing pad doors or on the ground,
with the doors open and the pads inserted. I decided to put it on the stand.
| CONSTRUCTION |
This will be short to say
the least! With less than 30 parts and everything snaps fit, the construction
was easy, hence why I let my son build most of it. He snaps the parts off of the
tree, I trim it and he sand it. S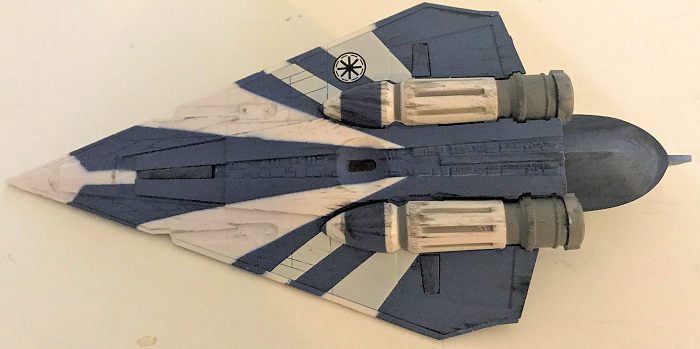 ome
parts though, the snap was not going to go so I cemented them But it’s only two
spots and most of the kit was snapped on.
ome
parts though, the snap was not going to go so I cemented them But it’s only two
spots and most of the kit was snapped on.
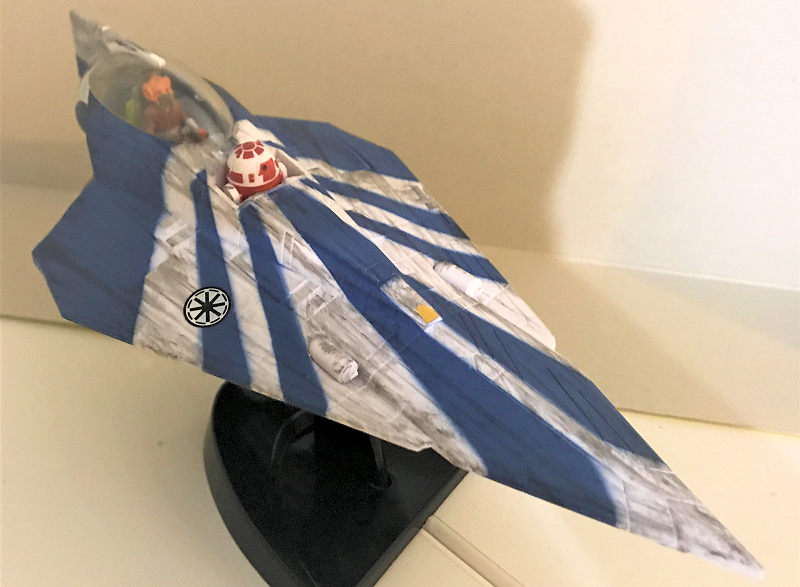
The kit contains a rudimentary cockpit, with a Plo-Koon figure. Now, the canopy can be opened or closed if you read the instructions carefully but I elected to cement this shut with the figure inside simply because I KNOW my son eventually will snap the canopy right off if left operable. The other piece of figure is a small R2 unit that you can snap in front of Plo-Koon in the droid slot/socket. My son really like this little guy but I keep it in his slot cause again, he will lose it if you leave him to his own devices. The only really nasty part of the kit that you need to watch for is the back end slot. This piece goes onto the top of the rear end piece. Be sure it is snapped on tight or else you will not be able snap on the bottom hull piece. This is basically the only nasty spot. The rest snap on without a fuss and the fit is tight. I didn’t use any filler on this kit.
| COLORS & MARKINGS |
None!
Again, the kit is prepainted so no fuss. But however, as may have guessed, the
part where the sprue connects to the parts, the paint there will be removed once
you snip them off the tree and trim and sand them clean. I kept the sanding part
to a minimum so no extra paints will be removed. But however, there are s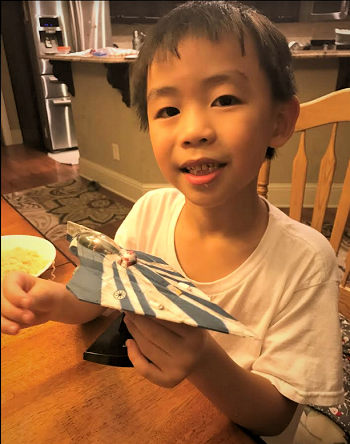 everal
pure white spot that can be seen on the finish model. I may go back and spot
them with paint later. But my son was really happy when was done.
everal
pure white spot that can be seen on the finish model. I may go back and spot
them with paint later. But my son was really happy when was done.
Final construction just involve assembling the black display stand, insert the landing pads doors and then snapping the model onto the stand…..Easy, Peesy, Cheesy, EASY! Model complete!
| CONCLUSIONS |
I guess this is just me relaxing after the PUNISHING Trumpeter 1/16 King Tiger that took almost two years of slog to build! And to share this with my son is a bonus I’ll never forget! The minute the model was complete, the smile on his face made the extra money that I had to pay to ship my Skyraider decals across the pond all the more worth it! This is a great kit if you are Star Wars fan or trying to get something simple started, of course, if you got a kid and want to teach him this hobby, then this is a great kit to teach him with! It is simple, easy to understand and no fuss and the fit is great (provided you trim it clean) and will light up their faces like a Christmas tree! Not mention, they are also cheap, less than $20 so you can definitely get a few of these kits and not feel the pain the wallet! Besides, during that model seminar, I was able to scam four models, a Hasegawa 1/48 Spitfire MK V, A Dragon 1/48 FW-190D-9, a Tamiya 1/35 M16 MGMC, and a Dragon 1/35 M2 Half-Track off of my friend the host off of him for free! So good deal for my kid and good deal for me! LOL!
31 October 2017
Copyright ModelingMadness.com.
If you would like your product reviewed fairly and fairly quickly, please contact the editor or see other details in the Note to Contributors.
Back to the Main Page Back to the Review Index Page Back to the Previews Index Page