
Revell/Dragon 1/700 HMS Illustrious
| KIT #: | 5035 |
| PRICE: | $ |
| DECALS: | One option |
| REVIEWER: | Frank Spahr |
| NOTES: | Everything by WEM: PE set # 742, resin correction set PRO 7026, resin deck vehicles PRO 7043, resin Sea Harrier AS 7005, resin Sea King AS 7002 |
| HISTORY |
Two of the most important postwar classes of RN ships are currently being phased
out, the type 42 destroyer and the Invincible class aircraft carrier. Only one
of each is still in service at the time of writing (January, 2013). Type 42 was
the most numerous RN destroyer for several decades, and despite issues the class
had with sea-keeping and stability, rendered sterling
service all around the world. Two Type 42 (HMS Sheffield and Coventry) were lost
in the Falklands war of 1982. It was decided to replace these war losses
 and the
two type 21 sunk by an improved type 42, the batch 3 of the class. These ships
were lengthened considerably ahead of the bridge to improve sea-keeping
qualities. HMS Manchester has been decommissioned in 2011 and is currently
awaiting disposal.
and the
two type 21 sunk by an improved type 42, the batch 3 of the class. These ships
were lengthened considerably ahead of the bridge to improve sea-keeping
qualities. HMS Manchester has been decommissioned in 2011 and is currently
awaiting disposal.
The „Harrier carrier“ of the Invincible class was designed in the wake of the
1966 momentous decision of phasing out fixed wing naval aviation from the RN.
Originally, it was designed as a helicopter-carrying cruiser to patrol the sea
areas Soviet submarines would have to pass to reach the open Atlantic. ASW
helicopters should locate and destroy the submarines. The threat of Soviet
long-range maritime surveillance aircraft caused the inclusion of the recently
developed Sea Harrier fighter into the cruisers´ air
group. A lot of care was taken originally not to refer to the ships as aircraft
carriers, but in the event it was accepted they were carriers to all intents and
purposes, so they received the requisite „R“ pennants. A novelty developed
during construction of the lead ship was the „ski-jump“, a ramp added to the
fore end of the flight deck, which enabled the Harrier to take off after a short
run with much more payload than possible in a vertical take-off.
 The country´s dire financial situation almost put an end to the Invincible
class, and had it not be for the outbreak of the Falklands War in 1982 and the
excellent service HMS Invincible rendered, she would have been sold to
Australia. In the event, three units of the class were built and progressively
upgraded, serving from around 1980 until 2005 when Invincible was the first to
decommission. The ship´s air
group and their deck space had been enlarged during
their service by removing the Sea Dart missile system. CIWS systems had been
introduced immediately after the Falklands War, same as a AEW conversion of the
Sea King effectively remedying the loss of this capacity.
The country´s dire financial situation almost put an end to the Invincible
class, and had it not be for the outbreak of the Falklands War in 1982 and the
excellent service HMS Invincible rendered, she would have been sold to
Australia. In the event, three units of the class were built and progressively
upgraded, serving from around 1980 until 2005 when Invincible was the first to
decommission. The ship´s air
group and their deck space had been enlarged during
their service by removing the Sea Dart missile system. CIWS systems had been
introduced immediately after the Falklands War, same as a AEW conversion of the
Sea King effectively remedying the loss of this capacity.
With the new defence cuts of 2010, the remaining Harriers were decommissioned,
same as Ark Royal. Only Illustrious remains in service as a helicopter
carrier and is due for decommissioning in 2014.
| THE KIT |
 So
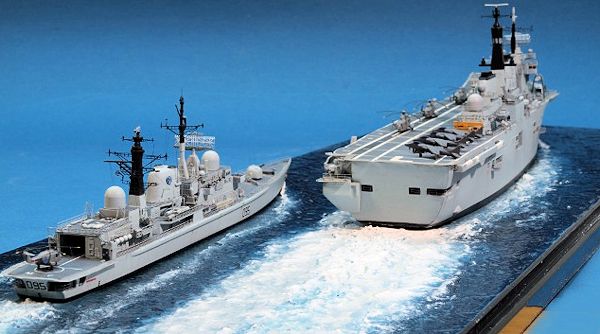
building two of my stock of 1:700 kits on a common base made perfect sense to
me, even more so as I had received the 1:350 scale Airfix kit of Illustrious and
had a faint inkling I wouldn´t build the smaller version once the large one was
completed. I had aquired the Illustrious kit (a Dragon/Pit-Road kit in a Revell
box) for a song at a swap meet, and it showed it needed some upgrading. The
Manchester kit gave me that pleading last-puppy-in-the-shop look one day at my
LHS, so I made a shopping list for aftermarket and bought the lot at the WEM
booth at Telford one year.
So
building two of my stock of 1:700 kits on a common base made perfect sense to
me, even more so as I had received the 1:350 scale Airfix kit of Illustrious and
had a faint inkling I wouldn´t build the smaller version once the large one was
completed. I had aquired the Illustrious kit (a Dragon/Pit-Road kit in a Revell
box) for a song at a swap meet, and it showed it needed some upgrading. The
Manchester kit gave me that pleading last-puppy-in-the-shop look one day at my
LHS, so I made a shopping list for aftermarket and bought the lot at the WEM
booth at Telford one year.
| CONSTRUCTION |
Making the base
With the hulls provisionally screwed to the base, grey paint was misted over
them from my airbrush to mark the hull perimeters. With the models again
removed, I was able to sculpt the raised areas of the seascape, using generic
plastic putty from the hardware supermarket. Spatulas for artist´s oils and a
wire brush were used for the purpose. It´s always very helpful to consult images
of the real ships when creating a seascape. With the putty done and cured, I
applied white wall paint in a stippling motion using a large flat paintbrush.
That blends the surface in and creates a slightly irregular surface similar to
real water. The
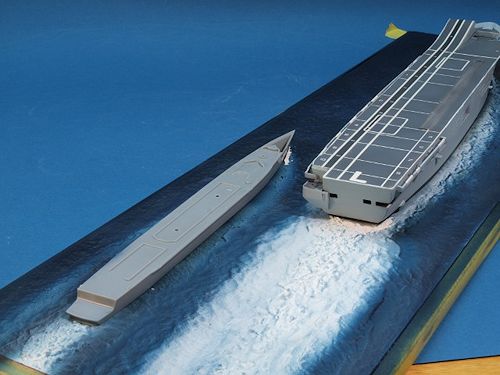 effect can be varied with amount of paint, pressure, frequency
and direction of stippling. That dried, I used green and dark blue acrylic model
paint in my airbrush to achieve the correct colour for my seascape. As a rule
the water nearer the hull will be lighter and with a greenish hue – using an
airbrush makes blending between the various shades easy.
effect can be varied with amount of paint, pressure, frequency
and direction of stippling. That dried, I used green and dark blue acrylic model
paint in my airbrush to achieve the correct colour for my seascape. As a rule
the water nearer the hull will be lighter and with a greenish hue – using an
airbrush makes blending between the various shades easy.
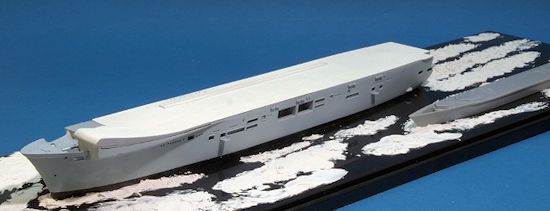
This surface, once completely painted, will need several weeks to cure so most
of the included moisture can evaporate. The next step is to seal the surface
with several layers of solvent-based clear gloss spray from a rattle can to
achieve the appropriate degree of gloss. If this layer is applied too early,
evaporating moisture will cause bubbles in the surface.
Another caveat: Even though this surface may seem dry to the touch, it
takes several weeks to fully cure. So do not leave your models on it for any
longer spell, or they will be glued to it.
Once the models were completed, they were screwed to the base, and any remaining
gaps between the hulls and the seacape filled with clear gloss acrylic gel. That
cured, final accentuating was done using white artist´s oil paint.
Building the kits
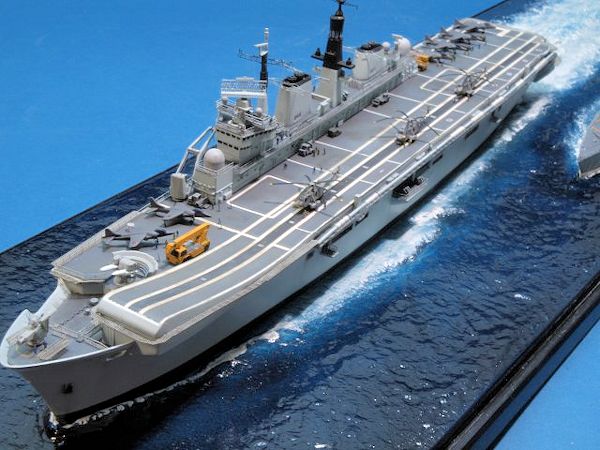
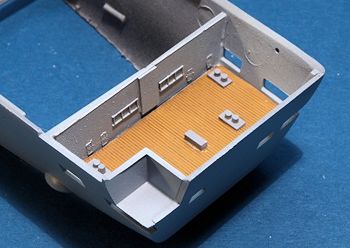 Illustrious is depicted in this kit as she appeared during the 1990s, prior to
losing the Sea Dart and having her deck extended. Sadly, the kit has heavy
raised flight deck markings. These were removed. The hull needed some filling
and sanding. A quarterdeck was scratchbuilt
using styrene stock, even though it is hardly visible on the completed
model. The hull complete, the flight deck was added and cleaned up. It was then
painted white. The flight deck markings were then masked off using AIZU
ultra-fine masking tape and custom cut pieces of kip #308 tape. Now the flight
deck was sprayed and the decals added.
Illustrious is depicted in this kit as she appeared during the 1990s, prior to
losing the Sea Dart and having her deck extended. Sadly, the kit has heavy
raised flight deck markings. These were removed. The hull needed some filling
and sanding. A quarterdeck was scratchbuilt
using styrene stock, even though it is hardly visible on the completed
model. The hull complete, the flight deck was added and cleaned up. It was then
painted white. The flight deck markings were then masked off using AIZU
ultra-fine masking tape and custom cut pieces of kip #308 tape. Now the flight
deck was sprayed and the decals added.
Using the resin correction
set and
the plethora of PE by WEM made this build quite involved, and needed a fair
amount of concentration in order to select the right parts for the 1990ies fit.
But mostly, things fit well and the build proceeded smoothly. Breaking down
things into a number of subassemblies helped, too. The model was painted using
approximations of RN shades using various manufacturers of acrylic paints, such
as (sadly now defunct) JPS and Vallejo. Once complete, subassemblies were added
working from center to periphery, in order to minimize the risk of inadvertently
destroying something.
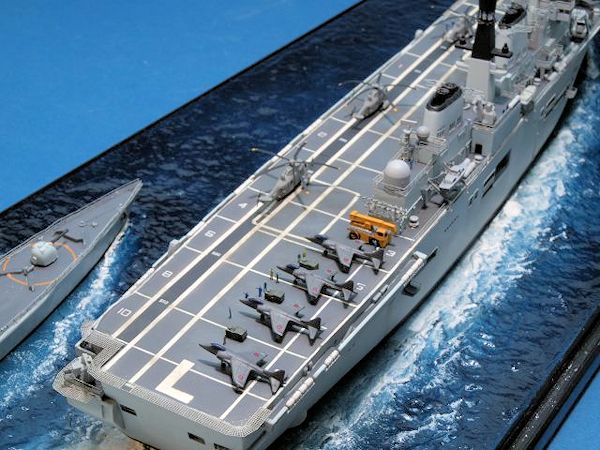
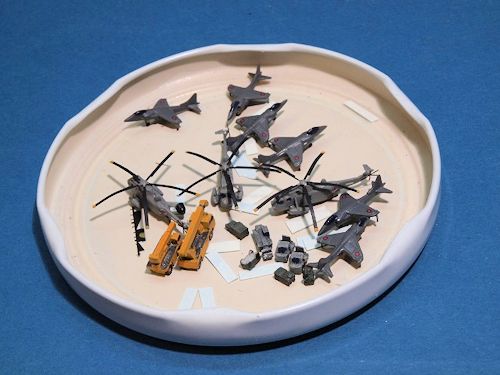 The air
group from the kit was on the lacking side, so
resin aircraft from WEM were added. These were cleaned up, PE was added, they
were painted and decaled. The flight
deck was
weathered using artist´s oils and pastel chalks prior to gluing the aircraft and
the resin deck vehicles from WEM to it. PE figures from Lion Roar were also
added. What little rigging there is was added from UNI Caenis ultra-fine
flyfishing thread. The hull was weathered very sparingly and below the anchors,
as reference images showed very little evidence of weathering. Finally a flat
coat of Vallejo ModelAir matt varnish was used to seal and blend in the model.
The air
group from the kit was on the lacking side, so
resin aircraft from WEM were added. These were cleaned up, PE was added, they
were painted and decaled. The flight
deck was
weathered using artist´s oils and pastel chalks prior to gluing the aircraft and
the resin deck vehicles from WEM to it. PE figures from Lion Roar were also
added. What little rigging there is was added from UNI Caenis ultra-fine
flyfishing thread. The hull was weathered very sparingly and below the anchors,
as reference images showed very little evidence of weathering. Finally a flat
coat of Vallejo ModelAir matt varnish was used to seal and blend in the model.
HMS Manchester was built almost like an afterthought, as quite some structures
were similar, and things went smoothly and rather fast. I applied the decals
with the ship´s crest to PE discs to imitate the way the crests are mounted to
the funnels. Once the ship was manned and rigged, it was also flatcoated and
mounted to the base.
| CONCLUSIONS |
This was an interesting project with an outcome I find pleasing. Despite the
work involved, I enjoyed it a lot.
March 2013
If you would like your product reviewed fairly and fairly quickly, please contact the editor or see other details in the Note to Contributors.