Kombrig 1/700 HMS Renown (1897)
| KIT #: | 70092 |
| PRICE: | 50.00 Euros |
| DECALS: | None |
| REVIEWER: | Frank Spahr |
| NOTES: |
PE by WEM used: HMS Tiger, PE 757 @ 13€, PE 4001
Railings and awning stanchions 1:400 @ 17€, optional Flyhawk
70062 1:700 WW II RN Railing @ 10€ Machined
brass barrels by BMK, # 04700RN25232
8€.
No decals. Building time @ 100 hours, modeling skills and experience
with resin and PE required |
| HISTORY |
Admiral Sir John „Jackie“ Fisher is one of the best-known, colourful and
controversial characters in British naval history. His preference for fast and
heavily armed ships had a serious influence on Britain´s fleet, for better or
worse. A good part of Robert K. Massie´s book „Dreadnought“ describes Fisher´s
life and his role in building the ship that named an entire era in naval
armament.
 Later
on Fisher initiated the development of the battlecruiser, and – during his final
short stint in the Admiralty – the ill-fated „large light cruisers“ of the
Courageous class, which went down in history as „Fisher´s follies“. His
overwhelming personality and the extreme pressure he exerted to reach his aims
are legendary. I can but recommend to read on Fisher to get an impression of his
time and of the way naval policy was developed back then.
Later
on Fisher initiated the development of the battlecruiser, and – during his final
short stint in the Admiralty – the ill-fated „large light cruisers“ of the
Courageous class, which went down in history as „Fisher´s follies“. His
overwhelming personality and the extreme pressure he exerted to reach his aims
are legendary. I can but recommend to read on Fisher to get an impression of his
time and of the way naval policy was developed back then.
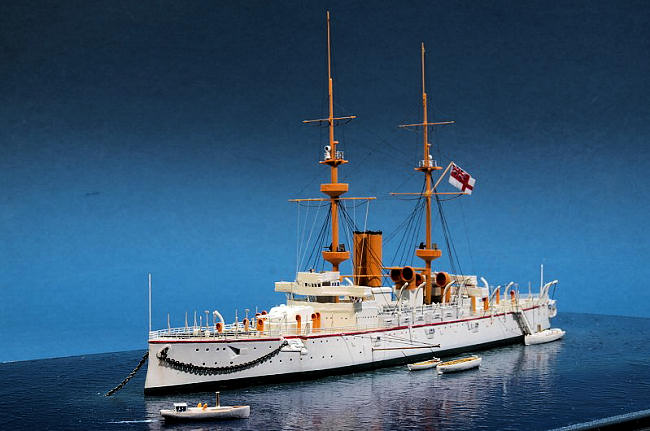
Before his time in the Admiralty Fisher spent several years on foreign stations, with HMS Renown his favorite flagship. She was built in 1897 as a second rate battleship, in that she was smaller and less heavily armed than first rates. Nonetheless she was fast for her time, and Fisher preferred her for her speed and the good accommodation she gave. Fisher had her masts heightened so he could let her fly especially large flags, and he even had the protective blast plates removed from her quarterdeck, as they proved an obstacle for the ladies´ shoes during the dances held there. She also had a good range, and after her time on active duty was converted to accommodate members of the royal family on trips abroad – hence her nickname the „Battleship Yacht“. For this purpose, most of her secondary armament was removed to gain space for cabins, and she was painted in an attractive white and buff scheme. This lasted from 1902 to 1909, when she was reduced to a training and accommodation ship. She was broken up in 1914.
| THE KIT |
 Being
partial to pre-dreadnoughts, I was happy to see a kit of this attractive vessel
by Kombrig. Like many of the older offerings of this Russian company it consists
of excellently molded and cast resin parts, but lacks any dedicated PE parts and
has only very basic instructions. The packing is way below the quality of the
beautiful resin, and I was lucky to find all the parts intact.
Being
partial to pre-dreadnoughts, I was happy to see a kit of this attractive vessel
by Kombrig. Like many of the older offerings of this Russian company it consists
of excellently molded and cast resin parts, but lacks any dedicated PE parts and
has only very basic instructions. The packing is way below the quality of the
beautiful resin, and I was lucky to find all the parts intact.
The best references on this
vessel are included in the sadly long out of print volume by R.A. Burt:
British Battleships 1889-1904. I was lucky to be
provided with scans by the most helpful and gentlemanly Jim Baumann. Upon
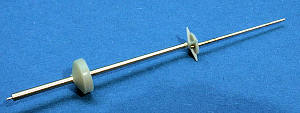
contacting Burkhardt Masch of BMK, I was provided with prototypes of machined
brass barrels for the rather peculiar main artillery – pretty short 10 in guns.
These barrels are available at BMK´s webshop. In lieu of dedicated PE I used the
ever helpful fret by WEM for the battlecruiser HMS Tiger. Even though they are
out of scale at 1:400, I have found the awning stanchions included in WEM´s PE
set of extrafine railings very useful for my 1:700 models.
| CONSTRUCTION |
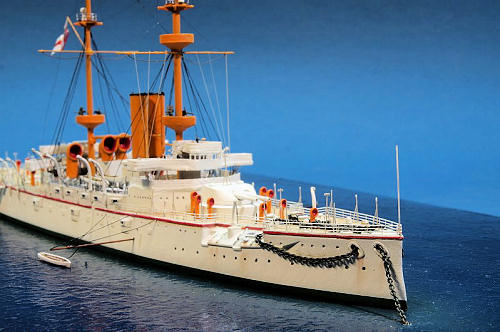
I was
immediately sure I wanted to display Renown in a very peaceful scene, anchored
somewhere in the Med as a Royal yacht, with deployed boats. I selected the most
colourful scheme with green boot topping, white hull, buff funnels and a red
cheat line at deck level. To show all this to advantage, the hull was raised
with one millimetre of plastic sheet to display more of the boot topping. After
seriously underestimating the height of the masts, I had to buy a fresh display
box which was prepared as follows:
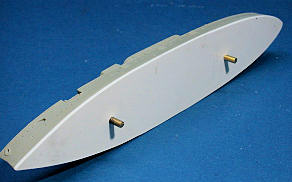 All my
ship models are mounted on an adjustable vise during building and screwed to the
display box after completion. For this purpose, metal screws with the top cut
off are glued into holes drilled into the hull. Holes are also drilled through
the display box in appropriate places. The perimeter of the hull was marked on
the base by lightly spraying acrylic paint while the hull was fixed on the base.
With the hull removed, the surrounding area of the base was then painted with
wall paint, using a large brush and a stippling motion. This results in a
slightly irregular surface structure. The thickness of the paint and the
intensity of the stippling determine the surface texture. That cured, the base
was sprayed in various green and blue shades using model
All my
ship models are mounted on an adjustable vise during building and screwed to the
display box after completion. For this purpose, metal screws with the top cut
off are glued into holes drilled into the hull. Holes are also drilled through
the display box in appropriate places. The perimeter of the hull was marked on
the base by lightly spraying acrylic paint while the hull was fixed on the base.
With the hull removed, the surrounding area of the base was then painted with
wall paint, using a large brush and a stippling motion. This results in a
slightly irregular surface structure. The thickness of the paint and the
intensity of the stippling determine the surface texture. That cured, the base
was sprayed in various green and blue shades using model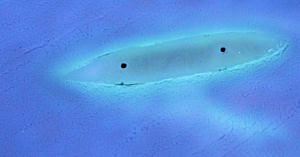 ing
acrylics, with the area close to the hull lighter and greener than that further
away. This is one the most fun parts of the project, and also involves looking
at quite some reference images to get the feeling for the shades needed.
That fully cured, the base received several coats of a solvent-based
clear gloss coat, until it reflected the light similar to the
ing
acrylics, with the area close to the hull lighter and greener than that further
away. This is one the most fun parts of the project, and also involves looking
at quite some reference images to get the feeling for the shades needed.
That fully cured, the base received several coats of a solvent-based
clear gloss coat, until it reflected the light similar to the
 way
water does. This needs some good curing time before the leaving the model on the
base, as the surface will remain sticky for weeks even though the coat looks
fully cured.
way
water does. This needs some good curing time before the leaving the model on the
base, as the surface will remain sticky for weeks even though the coat looks
fully cured.
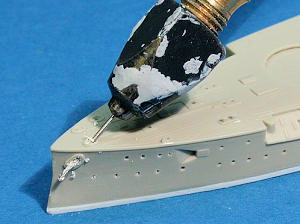
Parallel
to that, I continued work on the hull. All the scuttles were drilled a bit
deeper, and the hawsepipes were drilled out, too. The casemates for the
secondary guns were covered with pieces of PE railing to hint at windows.
Finally, holes for boat booms were drilled both on port and starboard using
Burt´s plans as references.
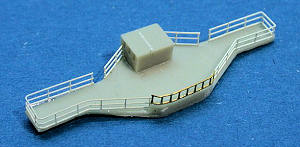 The
various superstructure parts were now removed fro the resin wafers, cleaned up
and the cast-on bulwarks removed where the ship had had canvas dodgers on her
railings. After attaching and painting the railings, they were coated with white
glue painted an appropriate shade from the outside to simulate the canvas
dodgers. The stern walk was also redone, a most unnerving yet ultimately
rewarding work. Its base was redone from t
The
various superstructure parts were now removed fro the resin wafers, cleaned up
and the cast-on bulwarks removed where the ship had had canvas dodgers on her
railings. After attaching and painting the railings, they were coated with white
glue painted an appropriate shade from the outside to simulate the canvas
dodgers. The stern walk was also redone, a most unnerving yet ultimately
rewarding work. Its base was redone from t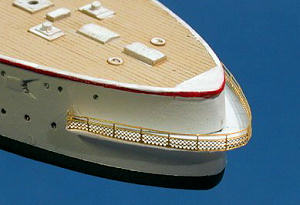 hin
plastic sheet, for the intricate railing I used the superb yet terminally fiddly
PE by Flyhawk. The slightest inadvertent touch will bend it – you are warned.
WEM´s PE railings for HMS Tiger are less intricate, yet far more
hin
plastic sheet, for the intricate railing I used the superb yet terminally fiddly
PE by Flyhawk. The slightest inadvertent touch will bend it – you are warned.
WEM´s PE railings for HMS Tiger are less intricate, yet far more
 forgiving
to work with. The funnels were detailed with steam pipes made from wire and PE
funnel grills. BMK´s beautiful brass barrels were easily applied
to the turrets. I also used BMK tapered brass for the
masts. These parts are far more sturdy than resin
or plastic and ease rigging a lot. Yards, gaffs and boat cranes were made from
thin brass wir
forgiving
to work with. The funnels were detailed with steam pipes made from wire and PE
funnel grills. BMK´s beautiful brass barrels were easily applied
to the turrets. I also used BMK tapered brass for the
masts. These parts are far more sturdy than resin
or plastic and ease rigging a lot. Yards, gaffs and boat cranes were made from
thin brass wir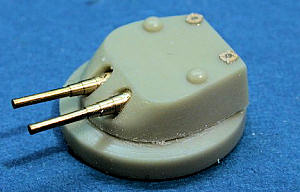 e.
e.
The
numerous ship´s boats are very nicely molded and cast. They were painted while
still on the resin sprue. A dark wash made from Humbrol thinner and artist´s
oils enhanced details.
| COLORS & MARKINGS |
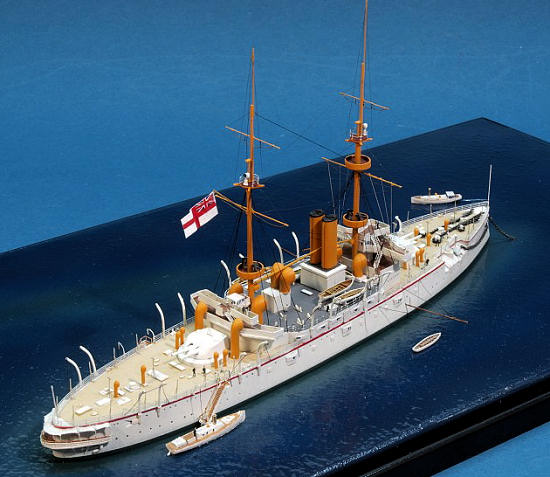
 Renown
as a Royal yacht was the epitome of „spit and polish“. I was not required to
weather her for a change, but I would have to paint her as cleanly as I could.
So after priming the hull with enamels, I sprayed her with white acrylics. The
boot topping and the deck had to be masked, whilst the red line was
hand-painted. The deck was sprayed in a light tan and received a light brown
wash to lightly hint at the engraved lines. The original deck would be
holystoned on a daily basis with the aim of getting it as light and uniform as
possible, so any fashionable accentuating of individual planks or caulking, let
alone the application of a wooden deck were entirely out of the question. The
boat deck was sprayed grey, whilst the upper and platform decks were sprayed a
reddish brown to hint at their linoleum coat. For the buff of the funnels and
the masts, I used a rich yellow by Lifecolor, applied after a white coat to make
the shade as rich as possible.
Renown
as a Royal yacht was the epitome of „spit and polish“. I was not required to
weather her for a change, but I would have to paint her as cleanly as I could.
So after priming the hull with enamels, I sprayed her with white acrylics. The
boot topping and the deck had to be masked, whilst the red line was
hand-painted. The deck was sprayed in a light tan and received a light brown
wash to lightly hint at the engraved lines. The original deck would be
holystoned on a daily basis with the aim of getting it as light and uniform as
possible, so any fashionable accentuating of individual planks or caulking, let
alone the application of a wooden deck were entirely out of the question. The
boat deck was sprayed grey, whilst the upper and platform decks were sprayed a
reddish brown to hint at their linoleum coat. For the buff of the funnels and
the masts, I used a rich yellow by Lifecolor, applied after a white coat to make
the shade as rich as possible.
| FINAL CONSTRUCTION |
After
mating all these subassemblies I started applying the railings. These were
prepainted on the fret using my airbrush and glued to the model using CA glue.
The WEM awning stanchions were shortened appropriately and glued to the deck. I
omitted the awnings to show more deck details. For the crew, some of my stock of
Lion Roar PE persons were painted and glued to the
 model.
Applying a bit more paint or slight drops of white glue will give them a more
three-dimensional appearance. For the anchor chains, I sued the smallest chain
available at Saemann , a supplier of PE materials and modeling tools. They are
too large, but I preferred them over the etched chains. They were drybrushed in
grey to make reduce the contrast between the white hull and the black chain,
making them somewhat less conspicuous. The only weathering applied was some
slight streaking below the hawsepipes. I sued artist´s oils for that. Renown was
rigged using three materials: The tan signal lines were made from stretched tan
sprue, glued with liquid plastic glue. The larger stays were made from
model.
Applying a bit more paint or slight drops of white glue will give them a more
three-dimensional appearance. For the anchor chains, I sued the smallest chain
available at Saemann , a supplier of PE materials and modeling tools. They are
too large, but I preferred them over the etched chains. They were drybrushed in
grey to make reduce the contrast between the white hull and the black chain,
making them somewhat less conspicuous. The only weathering applied was some
slight streaking below the hawsepipes. I sued artist´s oils for that. Renown was
rigged using three materials: The tan signal lines were made from stretched tan
sprue, glued with liquid plastic glue. The larger stays were made from
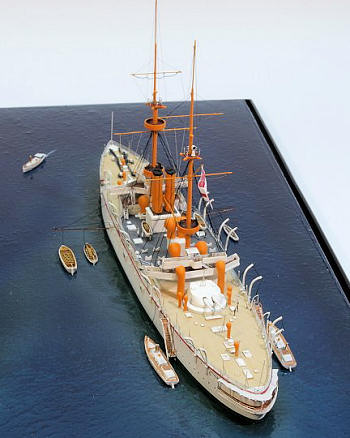
Now I was
able to mount the model on the base. After it was screwed to the base, any
remaining gaps were filled using clear acrylic gel. After adding the boat booms
to the ship, they were also rigged. The hulls of the boats displayed in the
water were carefully sanded, the boats were glued to the base using acrylic gel.
The steam pinnace´s wake was sculpted using acrylic gel and drybrushed with
white artist´s oils after curing.
| CONCLUSIONS |
This is a
beautiful little resin kit of a handsome vessel – and it looks even more
pleasing in this bright paint scheme.
May 2011
If you would like your product reviewed fairly and quickly, please contact me or see other details in the Note to Contributors.