Revell 1/35 UDT Boat and Team
| KIT #: | 0313 |
| PRICE: | 8.99 GBP (marked down) |
| DECALS: | one option |
| REVIEWER: | Jeffery Simpson |
| NOTES: | Scale is more like 1:40 |
| HISTORY |
If you type in “UDT 21” in Google, among other things, you can find an account of the demolition work on Okinawa in 1945.
Wikipedia says that
“Underwater Demolition Team”, UDT was a term first used by the US Navy in the
Pacific Theatre in WW2. It seems likely to me that much of the work of UDTs –
clearing beach obstacles – would be
 done in shallow water and would not really
require the flippers and aqualungs of the kit figures. It is likely that UDTs
would have used small rubber boats but I have not been unable to find out what
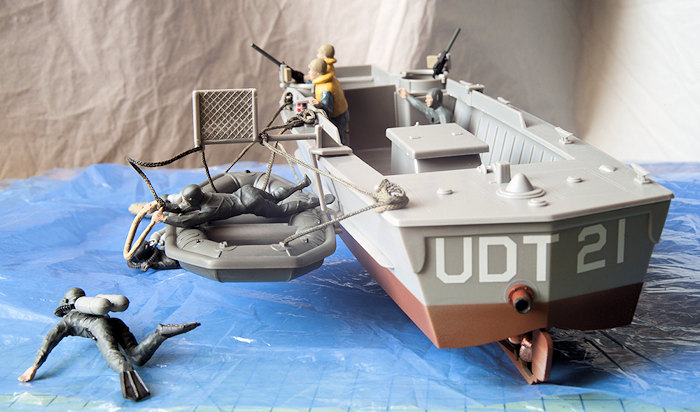
sort of powered craft were normally used by UDTs. The kit includes a rubber boat
rigged alongside the landing craft to allow divers to enter and leave the water
while the boat is in motion. I have been unable to confirm if this was an
experimental technique or if it was ever employed in action.
done in shallow water and would not really
require the flippers and aqualungs of the kit figures. It is likely that UDTs
would have used small rubber boats but I have not been unable to find out what
sort of powered craft were normally used by UDTs. The kit includes a rubber boat
rigged alongside the landing craft to allow divers to enter and leave the water
while the boat is in motion. I have been unable to confirm if this was an
experimental technique or if it was ever employed in action.
The type of landing craft depicted by the kit looks like a LCA, with forward gun positions and a narrow bow ramp. The “normal” landing craft used by the USN in WW2 was a LCP(R), with gun postions at the stern and a wide bow ramp.
My guess is that it would be quite hard to verify the precise equipment used by UDTs on any given date bearing in mind the covert nature of their operations and the rapidly changing technology in the late WW2 period. I have not attempted to do that research. Overall, there is at least a suspicion that Revell used a bit of licence in the combination of equipment depicted in the kit, possibly it depicts a post-war team.
| THE KIT |
The figures are actually 46mm tall, which is more like 1:40 scale (Not surprising as at the time this kit was developed, the standard scale for US kit makers of things like this was 1/40. Ed). At 1:40 scale the boat’s 280mm represents 11 metres long which is plausible for an LCP type craft.
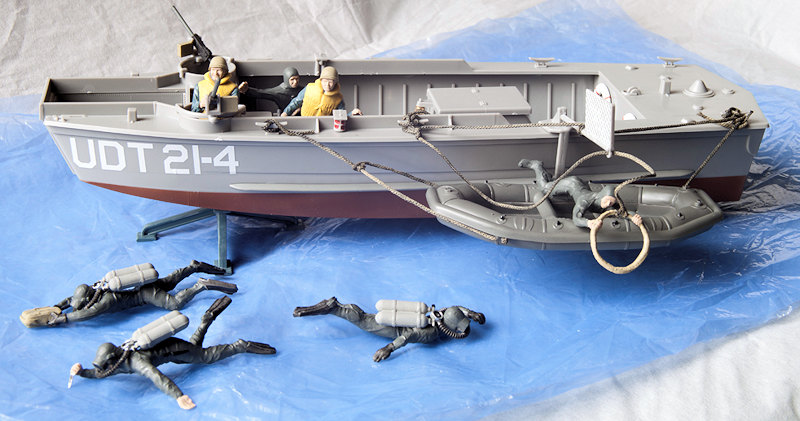
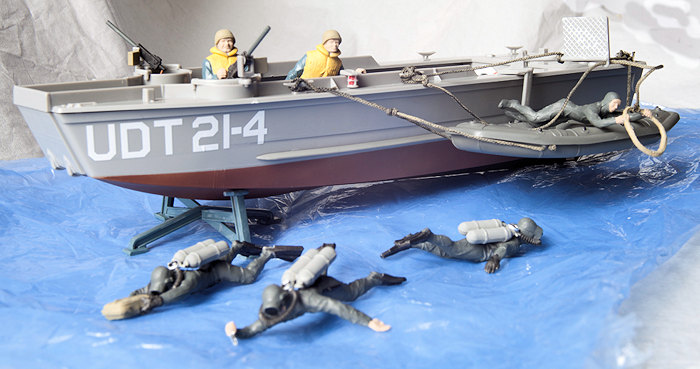
The kit is as much a set of figures with a boat as a boat with crew figures. There are 3 “frogmen” in swimming poses, one crouching, one lying down holding a hoop and 2 standing crew figures: 7 figures in all.
I remember having this kit in the early 60s, so I must have made it! In those days it came in multi-coloured plastic and I doubt I painted it at all, it was a great toy (the hull and frogmen will float). I became a big fan of Monogram kits thereafter, even though they became less toy like.
 This Revell kit has a long
pedigree being first released by Monogram in 1959. The most recent re-release in
2012 did not seem to sell well in the UK and kits can still be found (2016),
often at discount prices.
This Revell kit has a long
pedigree being first released by Monogram in 1959. The most recent re-release in
2012 did not seem to sell well in the UK and kits can still be found (2016),
often at discount prices.
The kit comes in a rather flimsy lidded box. The parts are in grey plastic. No thread is included. There are decals. No flag is included, maybe small craft do not fly a flag. The fit of parts is not good. There are a lot of sink marks. The figures are not poseable. The facemasks of the frogmen are not flat. A lot of the detail is crude and reveals the age of the kit. There was noticeable flash on my kit, most of the parts have a slight ridge where the mould join line would be.
There is a 12 page multi-lingual instruction leaflet. Colours are identified by a code letter, which is listed with a descriptive name, there is no cross-reference to an particular manufacturer’s paint numbers.
| CONSTRUCTION |
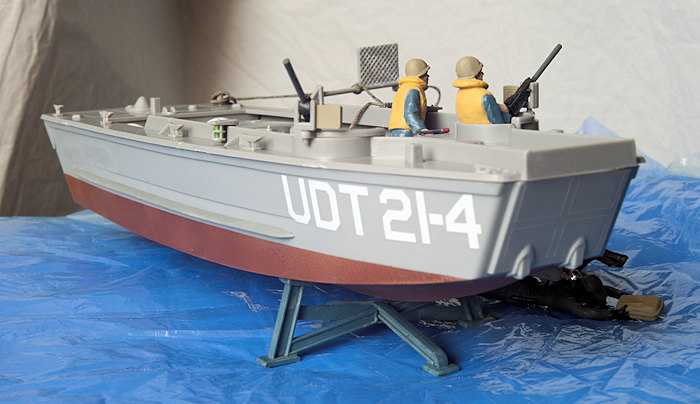
I was looking forward to building this kit as a “trip down memory lane” back to the early 1960s, as a toy, so it was disappointing to find that the re-issued kit is not multi-coloured, but in grey plastic. I didn’t really want to do any extensive painting, but realised that significant parts of the kit would need to be painted for it to even look “toy like”. Perhaps regrettably, I decided that the grey plastic of the boat was “ok” and so only needed to paint the bottom of the hull.
The hull bottom parts were assembled and masked and painted red with acrylic paint. (The paints used were “whatever came to hand” and undoubtedly include the products of several different manufacturers). [If one was going to paint the hull grey it would be best to attach the floor and interior sides, and fill any gaps first.]
 Step 1 as per the instructions: assemble the
motor: immediately I found that something was wrong with my memory from about 50
years ago: the fit was apallingly bad! Most of the locating pins had to be cut
away to get the motor halves to align. This was the story of the build, there
would be an argument for removing all of the alignment pins as a preliminary
“Step 0”. The floor is not correctly aligned on the pins, in spite of me using
considerable force, so the sides are too high and the deck does not fit at the
bow.
Step 1 as per the instructions: assemble the
motor: immediately I found that something was wrong with my memory from about 50
years ago: the fit was apallingly bad! Most of the locating pins had to be cut
away to get the motor halves to align. This was the story of the build, there
would be an argument for removing all of the alignment pins as a preliminary
“Step 0”. The floor is not correctly aligned on the pins, in spite of me using
considerable force, so the sides are too high and the deck does not fit at the
bow.
Maybe in my youth was stronger? Or maybe I didn’t notice things like fit? Anyway, in the present this kit was a bit of a battle. Large number of ejector pin circles are on visible surfaces including the figures, these were filled and smoothed. The motor was not painted since it sits inside a cowl on the floor and it is not very detailed anyway.
Detail parts like the tiller and the throttle lever were painted with a brush as they appeared in the build sequence as per the instructions. The upper hull is attached at step 7, once again the fit was bad and a large gap is visible between this and the bow ramp. By this stage I was getting a bit fed up with the project and just went ahead as rapidly as possible, accepting the bad fit.
In step 8 the cleats are attached. If the boat is
going to be rigged it would be best to adapt the cleats at this
 stage to suit
the thread that one is going to use. I didn’t, and the final rigging was more
difficult and does not look too good either, although that is a moot point on
this kit.
stage to suit
the thread that one is going to use. I didn’t, and the final rigging was more
difficult and does not look too good either, although that is a moot point on
this kit.
At step 11 we get to the frogmen and their rubber boat. Once Again I got caught out: I assembled the boat and then painted it and the frogmen with a semi-gloss dark grey mix of acrylic paints. However for rigging it would have been better to leave the boat unassembled (to be fair to Revell they do show the “optional thread” at this stage).
Step 13 involves glueing the aqualung halves together. The integral air hose is moulded in an unrealistic circular shape which easily fits over the frogmen’s heads, for play purposes. As you can see in the photo’s that is how they look: unrealistic!
Step 14 rigging the rubber boat to fit alongside the motor boat is well illustrated with 7 different types of knots shown. However I had great difficulty finding sutable thread. A black synthetic cord 1.5mm diameter was resorted to. This was a bit too big for the provided cleats (and indeed at a scale 2” it is coarse, even for mooring rope) but it was robust enough to hold the rubber boat in place. There is in fact a bracket provided by Revell to allow the boats to be glued together and this would make things a lot easier. The cord was dipped in thinned acrylic brown paint to make it look somewhat more like rope.
As part of this build I wanted to try covering
metallic parts with foil, so the ships bell (brass), part 29, the propeller
(bronze), part 17 were put to one side. As was the fire extinguisher after
painting red. After the frogmen had been painted grey silver foil was applied to
their regulators and to the unsheaved knife. I tried va rious glues and various
foils. It seems to me that the easiest method is to roughly cut out a piece of
foil of the appropriate colour to an oversize, coat the place where the foil is
wanted with white glue, let it get slightly tacky and then position the foil and
press it lightly in place with a scriber or a wooden toothpick. After a few
moments burnish the part with a toothpick. If the foil starts to move, either
lift it off and start again, or let it settle a bit and burnish later. Ordinary
kitchen foil is quite able to conform to raised detail like the regulators and
fire extinguisher nozzle. I used “art” foil for the brass and copper colours and
found they were harder to use and I could not get the high shine of the silver
foil. To coat things like the propellors it is necessary to apply overlapping
pieces of foil and burnish until the loin is (nearly) invisible. The metallic
details were over the top for an otherwise lacklustre kit, but it was a good
test piece to try out those techniques.
rious glues and various
foils. It seems to me that the easiest method is to roughly cut out a piece of
foil of the appropriate colour to an oversize, coat the place where the foil is
wanted with white glue, let it get slightly tacky and then position the foil and
press it lightly in place with a scriber or a wooden toothpick. After a few
moments burnish the part with a toothpick. If the foil starts to move, either
lift it off and start again, or let it settle a bit and burnish later. Ordinary
kitchen foil is quite able to conform to raised detail like the regulators and
fire extinguisher nozzle. I used “art” foil for the brass and copper colours and
found they were harder to use and I could not get the high shine of the silver
foil. To coat things like the propellors it is necessary to apply overlapping
pieces of foil and burnish until the loin is (nearly) invisible. The metallic
details were over the top for an otherwise lacklustre kit, but it was a good
test piece to try out those techniques.
The provided decals were applied as shown in step 15, not having painted the plastic there was no adhesion problem, so that was nice.
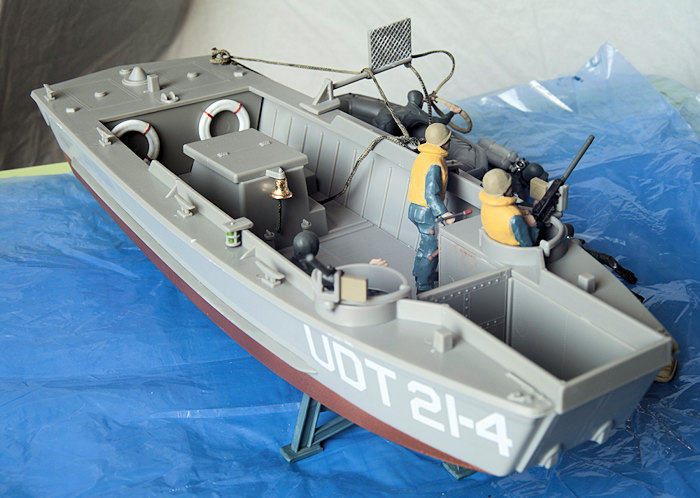
The boat crew were painted with blue uniforms, yellow life preservers, which oddly have no moulded straps, flesh faces and hands. The face masks of the frogmen were gloss black. If one could be bothered a suitable disk of clear acrylic would be even better.
| CONCLUSIONS |
After the initial disappointment that the kit was not moulded in the colourful plastic of the 1959 edition there was a certain pleasure in overcoming the numerous small problems posed. One really has to regard this kit as a toy, for the price paid it was reasonable value for money.
April 2016
Copyright ModelingMadness.com
I paid for this model myself.
If you would like your product reviewed fairly and fairly quickly, please contact the editor or see other details in the Note to Contributors.