
Mirage 1/72 AT-1 Assault Gun
|
KIT # |
72605 |
|
PRICE: |
$11.98 ($9.96 at Squadron) |
|
DECALS: |
N/A |
|
REVIEWER: |
Llarry Amrose |
|
NOTES: |
|
BACKGROUND |
 Go here
for the preview. For all my best efforts, I
wasn’t able to find any references to expand on the history in the kit
instructions.
Go here
for the preview. For all my best efforts, I
wasn’t able to find any references to expand on the history in the kit
instructions.
This kit shares sprues C and D with Mirage’s Vickers 7TP series, and likely more sprues with the T-26 series. There are a fair number of extra parts in this kit that won’t be used, coming from other variants.
|
CONSTRUCTION |
The instructions consist of 19 steps, and the order is quite reasonable, with subassemblies built, then set aside to dry while work continues elsewhere. There is a note in the first step to “cut off the rivets that prevent correct assembly”. This is important here, when attaching the fenders to the hull, but will also be necessary later when building the upper hull. Note carefully that the fenders are both labeled as part A1, even though they are definitely a left and right. A number of other parts are also labeled the same for both sides, but they are far more distinct.
 Step 6 adds the top and back of the engine compartment to
the hull (somehow, I managed to get the back, T5 installed upside down and not
notice until far too late…). I recommend not installing the rear of the
upper hull, AT3 at this time, but rather waiting until the rest of the upper
hull is ready as the angle of the rear wall is important to the final fit.
Step 6 adds the top and back of the engine compartment to
the hull (somehow, I managed to get the back, T5 installed upside down and not
notice until far too late…). I recommend not installing the rear of the
upper hull, AT3 at this time, but rather waiting until the rest of the upper
hull is ready as the angle of the rear wall is important to the final fit.
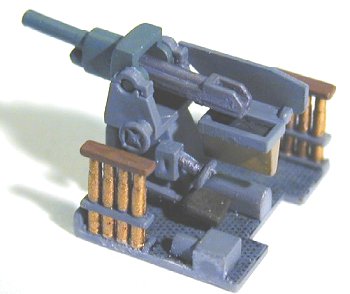
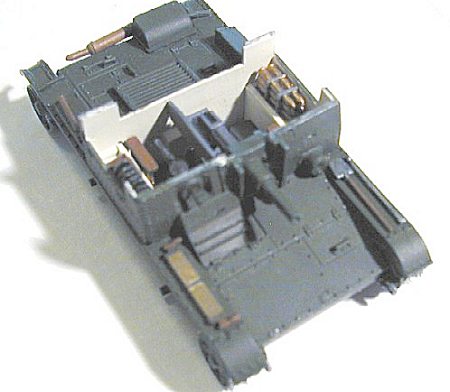
Steps 7 and 8 create the interior. This is probably the most interesting and impressive part of the kit. 17 parts comprise the gun, its mounting, crew seats and shell storage.
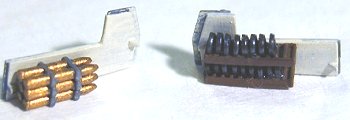 Steps 12 and 13 mount the gun and MG ammo to the hull
sides, and I suggest completing these steps before step 11, so that the upper
hull can be built all at once.
Steps 12 and 13 mount the gun and MG ammo to the hull
sides, and I suggest completing these steps before step 11, so that the upper
hull can be built all at once.
The upper hull is built in 11 and 14. The fit is not
forgiving, the parts must be aligned just right to avoid, or at least minimize
the need for filler. Test-fitting individual parts shows that a perfect fit is
possible, but the parts must be lined up just right for it to happen.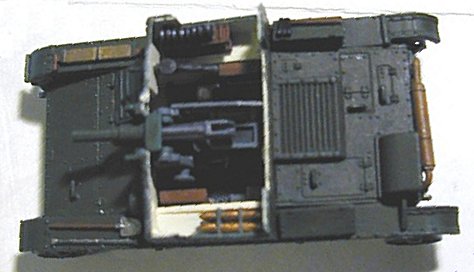
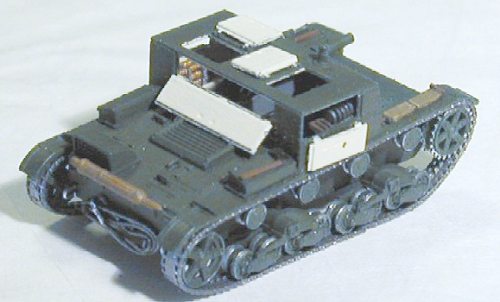
This brings us to the rest of the hull-mounted detail and finally the suspension. The hatches and hull panels can be posed open, so as to leave that wonderful interior visible. Actually, it’s even less of a choice than you would think – dry-fitting shows that none of those parts will fit properly without notable trimming. Mounted open, the size discrepancy is irrelevant and invisible.
The tracks are flexible and one-piece. Attachment is simple, but I just don’t like that way these tracks don’t hold paint well when bent during installation. They turned out to be a touch too long, so I had to trim three links off each side, which unfortunately prevented the nice smooth connection designed into the tracks.
|
CAMOUFLAGE & MARKINGS |
 As Scott surmised in the Preview, the color callouts are
all Humbrol numbers. H27002, 27003 and 27004 are the fine Metal Cote series.
As Scott surmised in the Preview, the color callouts are
all Humbrol numbers. H27002, 27003 and 27004 are the fine Metal Cote series.
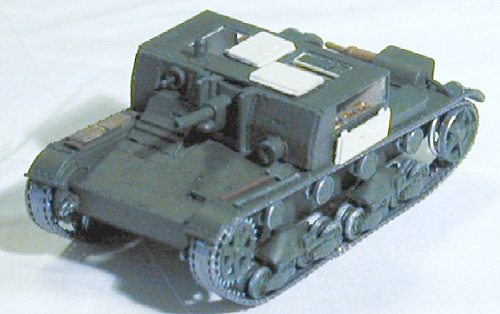
The overall color of H114 – Russian Green poses a bit of trouble. Humbrol has discontinued the color, and it is no longer readily available. A substitute was necessary. Research including wartime and modern pictures of Soviet vehicles showed a variety of shades, so I’m not sure there is one correct answer. I ended up using a coat of Vallejo Russian Green over PollyScale Panzer Green (I found the Vallejo a little to thin to cover well on its own).
At this point it’s ready for weathering, which I would expect to be rather light. The AT-1 was an experimental vehicle made in small numbers during peacetime, so I would expect to be fairly well cared for, at least at first.
|
CONCLUSIONS |
This is not really a kit for beginners. There are a lot of well-molded detailed parts, but alignment in a couple of places can be tricky. As a little-known subject, it won’t get great oohs and aahs sitting on the shelf, but the interior is impressive. The upper hull fit could keep this from being a contest winner, but completing it well is worth a good sense of personal accomplishment. A great deal for the price, in fact it’s better than many kits two and three times the price.
My thanks to Scott for allowing me to build this ki.
Copyright ModelingMadness.com
If you would like your product reviewed fairly and fairly fairly quickly, please contact the editor or see other details in the Note to Contributors.