Tamiya 1/35 scale
Matilda Mk
| KIT #: | 35300 |
| PRICE: | $46.00 SRP |
| DECALS: | Three options |
| REVIEWER: | Bill Michaels |
| NOTES: |
Tamiya’s milestone 300th release in 1/35 |
| HISTORY |
 Paraphrasing
the TamiyaUSA website:
Paraphrasing
the TamiyaUSA website:
Early in the 1930s, the British army made the
decision to produce tanks for different roles.
The “Cruiser” Tanks were envisioned to fill the scout/cavalry role, while
the “Infantry” tanks were designed to fill the close support role.
The Matilda entered production in 1936, and featured unusually thick 60mm
armor, a 2-pounder cannon, and thick side skirts which protected the "Japanese
type" bogies. Powered by two diesel engines, the Matilda had a top speed of
24km/hr, which was deemed appropriate as it matched the walking speed of
infantry.
At the North African front, thanks to its impenetrable armor, the Matilda completely defeated the opposing Italian forces. Because of the strength of their armor, the Germans had to resort to using their 88mm guns which were the only weapons that could penetrate the Matilda. The Matilda was used throughout WWII and was also used by Soviet, Australian forces.
| THE KIT |
Dan Lee built the old 1970s-era kit back in
2007; his build article is
here on MM.
While the old kit was never motorized, it did suffer from a number of
inaccuracies as did most of its stable mates from the era.
One of the more obvious faults was the size of the model- it is too wide
for one thing.
| CONSTRUCTION |
 First
thing you need to do is decide which option you will be building- there are some
differences in the detail parts used.
I like to go through the instructions to “X” out parts that I won’t be
using, to prevent mistakes down the line.
First
thing you need to do is decide which option you will be building- there are some
differences in the detail parts used.
I like to go through the instructions to “X” out parts that I won’t be
using, to prevent mistakes down the line.
Furthermore,
in this case, painting the model takes some planning.
The Caunter scheme requires some extensive masking, and the side skirts
complicate things further. Since I
didn’t want to paint the model with the tracks installed, I decided it would be
easier to paint the skirts first, and install them later.
(In the end, this decision worked out fine for me.)
 completed
hull (less side skirts).
Once the hull was painted, I was ready to install the tracks.
At that point, I realized that installing the link and length track was
going to be difficult, as getting it aligned was going to be difficult with the
upper hull in the way. Rather
than fight that battle, I decided that going with the vinyl tracks would be a
better choice—especially given that most of it is hidden under the side skirts.
completed
hull (less side skirts).
Once the hull was painted, I was ready to install the tracks.
At that point, I realized that installing the link and length track was
going to be difficult, as getting it aligned was going to be difficult with the
upper hull in the way. Rather
than fight that battle, I decided that going with the vinyl tracks would be a
better choice—especially given that most of it is hidden under the side skirts.
| COLORS & MARKINGS |
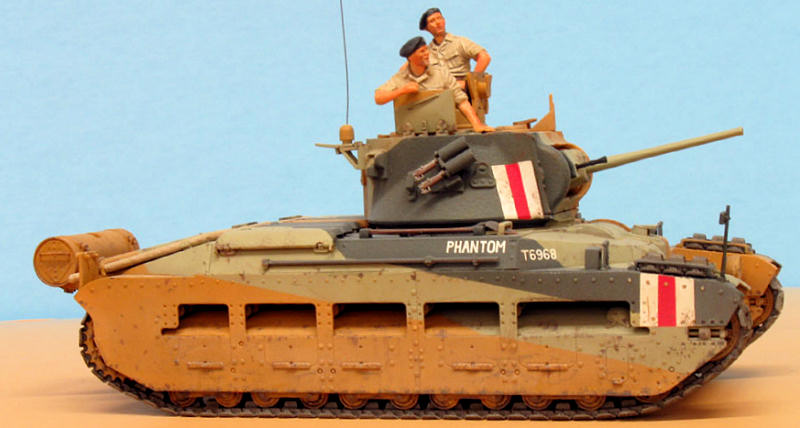
The kit includes markings for three vehicles.
Two are North African tanks in the three-color “Caunter” scheme.
The third scheme is a two-tone brown tank based in England.
 As
I was building the model, I hadn’t yet decided whether or not to use the three
figures included in the kit, and whether or not to build the model with hatches
open or closed. On the one hand, I
liked the look of the model with the figures in place, but on the other hand,
there are no interior parts. My
initial thoughts were to build the model closed, so the lack of interior detail
wouldn’t show. But, as I built the
model, I kept my options open— I installed the loader’s hatch with some sticky
putty to hold it in place for painting, in case I wanted to open it later.
The Commander’s hatch has two sets of parts- one for an open hatch and
one set for closed. I didn’t
install either set, and just painted them both so I could decide at the end of
the build.
As
I was building the model, I hadn’t yet decided whether or not to use the three
figures included in the kit, and whether or not to build the model with hatches
open or closed. On the one hand, I
liked the look of the model with the figures in place, but on the other hand,
there are no interior parts. My
initial thoughts were to build the model closed, so the lack of interior detail
wouldn’t show. But, as I built the
model, I kept my options open— I installed the loader’s hatch with some sticky
putty to hold it in place for painting, in case I wanted to open it later.
The Commander’s hatch has two sets of parts- one for an open hatch and
one set for closed. I didn’t
install either set, and just painted them both so I could decide at the end of
the build.
The drivers’ hatch is designed to be moveable- in theory, if you’re careful with the glue, you can install it and then pick a final position for it later. I closed it after installation, so it would get painted with the rest of the model. That turned out to be a mistake—after the base coat, camo color, clear coat, and flat coat, it was permanently stuck in the closed position!
In addition to the smaller markings, the kit
includes decals for the large red/white recognition flashes. I was a little
concerned about using them—I wasn’t sure that they would fit, and I thought they
might obscure the nice cast texture detail on the turret.
So instead, I decided to paint them- it was easy to mask a rectangle,
paint it white, and then add the red stripe.
A plus to this approach is that I was able to damage and scrape the
markings during the weathering process and reveal the base coat underneath.
(Besides- nothing looks more like painted on markings than painted on
markings!)
Once the basic camouflage was painted, I went
ahead and added the tracks and side skirts.
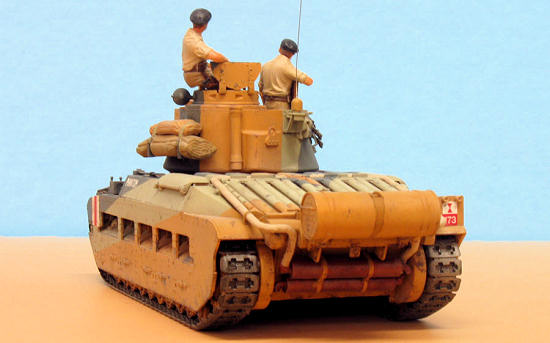
Next to go on the model were the exhaust parts, tools, and other small
details that would have been in the way when painting the camouflage. At this
point, I went ahead and painted the figures, as I needed to make a decision on
whether to install the hatches in the open or closed position.
Because the model has no interior parts in the turret, I didn’t want to
leave the hatches open unless the figures were going to fill the hole.
The figures are OK- with separate heads and
arms. I painted them with a variety of acrylic colors from my paint drawer.
For the skin areas, I started with a base coat of Tamiya flesh color, and
then blended in a redder color for the sunburn.
In the end, I was happy with how they came out, so I decided to use them
on the model—so the hatches were now glued in the open position.
 With
the large markings already painted on, I only had a few smaller decals to go on
the model. I brushed on small patches of future in the locations where they were
going, and let it dry overnight. I
then placed the decals, which settled down nicely with a little help from Mr.
Decal Softener. After another
night to dry, I then airbrushed the model with a coat of Tamiya clear.
This sealed in the in the decals, and provided a nice base for the first
step of weathering.
With
the large markings already painted on, I only had a few smaller decals to go on
the model. I brushed on small patches of future in the locations where they were
going, and let it dry overnight. I
then placed the decals, which settled down nicely with a little help from Mr.
Decal Softener. After another
night to dry, I then airbrushed the model with a coat of Tamiya clear.
This sealed in the in the decals, and provided a nice base for the first
step of weathering.
To weather the model, I first created an oil
wash using a dab of burnt umber paint and a lot of odorless thinner.
I applied the wash to the entire model, with an eye towards getting it
into all the little recesses and corners.
I then let the model sit for a few days, to be sure it was dry.
Once it was dry, I airbrushed a coat of flat clear.
When clear coating a tank like this, I like to mix a tiny amount of tan
paint into the clear coat- to help create an overall dusty look.
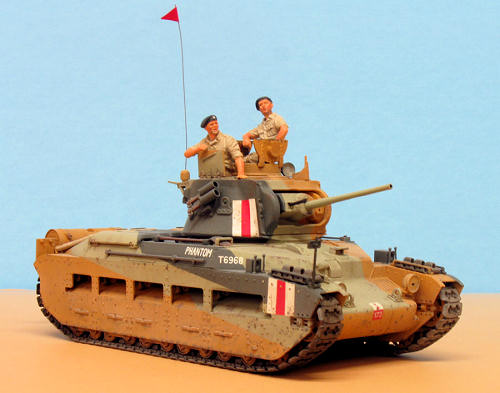
The final step in weathering was to scrub the
model vigorously with a light colored (dust/ash)
powder/pigment. I used a
pigment that will stick in place when applied to a matt paint- from Bragdon
Enterprises. (
| FINAL CONSTRUCTION |
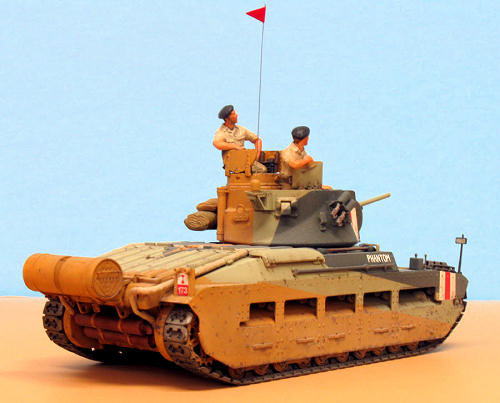
With painting and weathering completed, I glued
the commander and gunner figures in place in the turret.
This is also when I discovered I couldn’t get the driver’s hatch open,
even after 5 minutes of tinkering to try to break the paint bond.
Fortunately, I was wise enough to give up trying before I did something
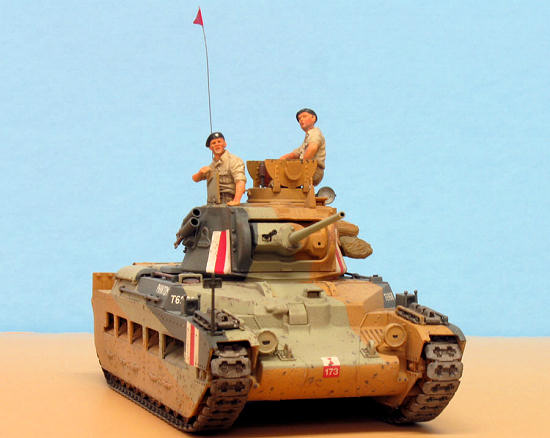
stupid and broke something or damaged the finish. The very last step was to
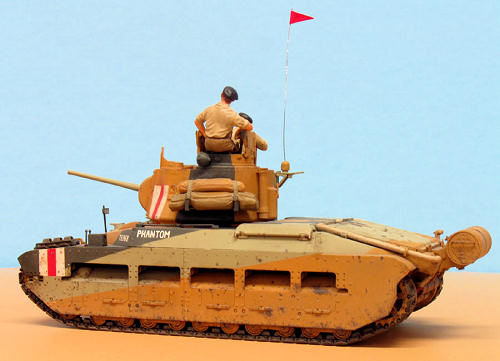
drill a tiny hole in the antenna mount, and install a piece of .008 steel wire
as an antenna, with a red pennant from a leftover model ship flag sheet.
One last comment- apparently, not all Matildas
carried the extra fuel tank.
While poking around on the web after the model was finished, I found several
pictures, some with the tank, and some without.
I even found a picture of the “Phantom”—one that showed it without the
fuel tank.
| CONCLUSIONS |
 I
really enjoyed this build- it was a fun diversion from my recent 1/48 scale
aircraft projects. The kit is
“modern Tamiya” with good engineering, and very good fit.
The only complication is painting the Caunter scheme-
but I think the end result was worth it.
I
really enjoyed this build- it was a fun diversion from my recent 1/48 scale
aircraft projects. The kit is
“modern Tamiya” with good engineering, and very good fit.
The only complication is painting the Caunter scheme-
but I think the end result was worth it.
February, 2011
Review kit courtesy of my wallet. Note that
while the retail price is $46, the kit can be found for less.
I paid $28 for mine, at a special sale from one of MM’s fine advertisers.
If you would like your product reviewed fairly and quickly, please contact me or see other details in the Note to Contributors.